
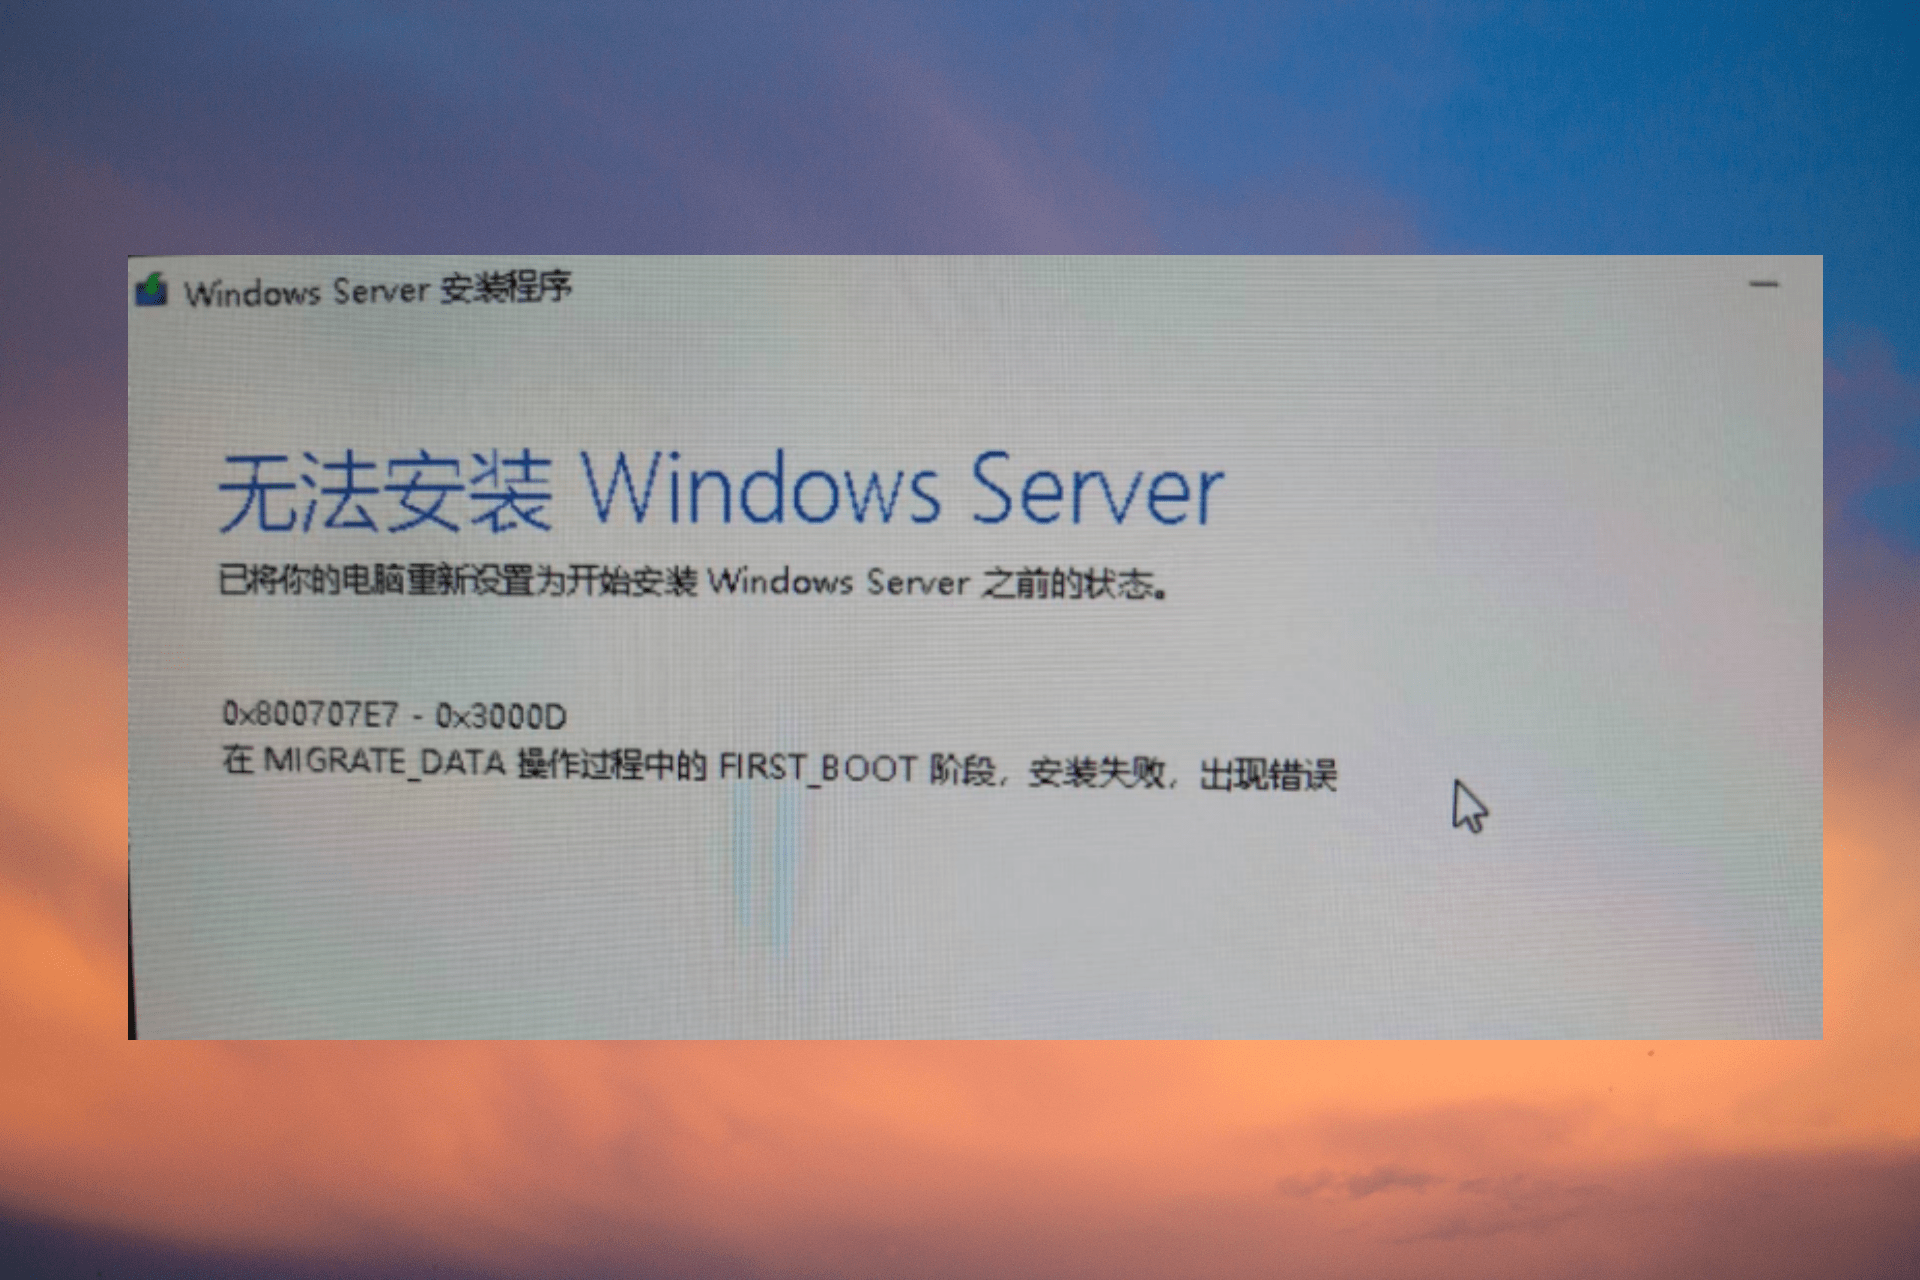
The Windows 10 Update error code «0x800707E7 – 0x3000D: The installation failed in the FIRST_BOOT phase with an error during MIGRATE_DATA operation», usually occurs when Windows cannot migrate a user profile.
The error 0x800707E7 in Windows 10 Update, commonly faced on computers with NVIDIA Graphics cards, which are using the NVIDIA Update Service to update drivers or other NVIDIA software. More specifically, on NVIDIA card systems, when you install the NVIDIA software, a new user is automatically created in Windows, named «UpdatusUser» which is used by the NVIDIA Update service.
In this guide you’ll find step-by-step instructions to resolve the following errors in Windows 10 Update:
-
- 0x800707E7 – 0x3000D: The installation failed in the FIRST_BOOT phase with an error during MIGRATE_DATA operation
- 0x000007E7: ERROR_PROFILE_DOES_NOT_MATCH_DEVICE, The specified profile is intended for a device of a different type than the specified device.
How to Solve Windows 10 Update Errors 0x800707e7, 0x000007E7.
Step 1. Uninstall NVIDIA Software from your Machine.
If you own an an NVIDIA graphics card, navigate to Control Panel -> Programs and features and Uninstall all NVIDIA Software.*
* Note: This step, applies only to systems with NVIDIA Cards. If you don’t own an NVIDIA graphics card skip to step-2.
To Uninstall NVIDIA’s Software.
1. Navigate in Programs and features in Control Panel. To do that:
1. Press simultaneously the Windows
+ R keys to open the run command box.
2. Type: appwiz.cpl and click OK.

2. Select one by one all the NVIDIA software and click Uninstall.

3. Follow the onscreen instructions to remove NVIDIA’s software from your computer.
4. When the uninstall is complete restart your PC and continue to next step.
Step 2. Delete «UpdatusUser» & any Unknown User Profile.
1. Right-click on your computer (This PC) icon on Explorer and choose Properties.
2. Click Advanced System Settings.
3. At User Profiles, click Settings.

3. Select and delete the UpdatusUser profile, or any other profile that is unknown to you (except your profile and the Default Profile).

4. When done, click OK and continue to next step.
Step 3. Remove Unknown User Profiles in Registry.
1. Open Registry Editor: to do that:
1. Press Windows
2. Type regedit and press Enter.

3. In Registry Editor navigate to the following key at the left pane:
- HKEY_LOCAL_MACHINESOFTWAREMicrosoftWindows NTCurrentVersionProfileList
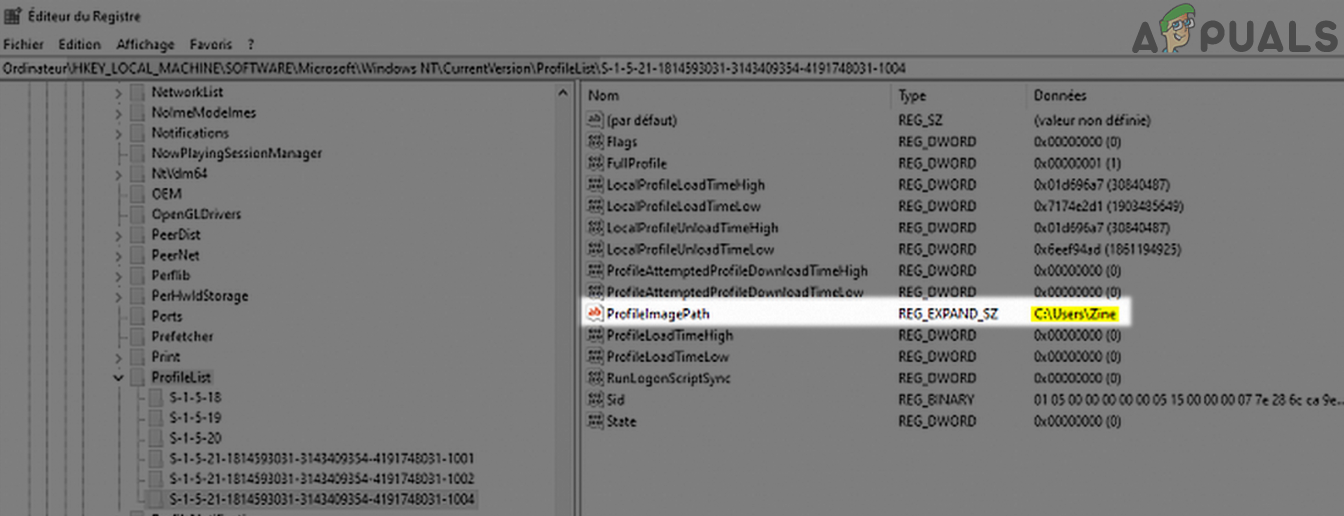
4a. Now expand the ProfileList key and click on each «S-1-5-21-xxxx» profile and see if any of them has the value «C:UsersUpdatusUser» at ProfileImagePath.

4b. If you find the «C:UsersUpdatusUser» value on a profile, then select the profile on the left pane and Delete it.

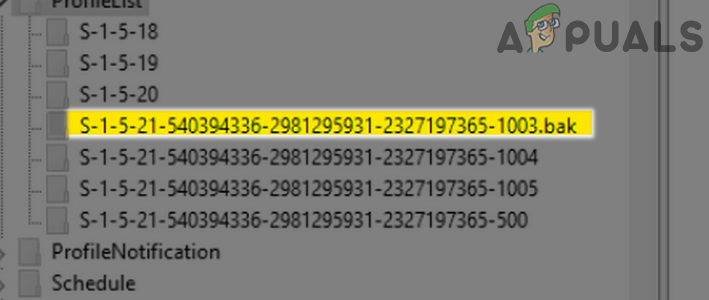
5. Finally see the full name of each «S-1-5-21-xxxx» profile-key (under the «ProfileList key»), and delete any profile-key that has a .bak extension at the end of its name.

6. When done, close Registry Editor and restart your PC.
7. After restart:
a. Navigate to Windows 10 download site and click the Update now button.
b. Save the «Windows10Upgrade9252.exe» file on your desktop.
c. Double click at the downloaded file to open the Windows Upgrade Assistant.
d. Click Update Now to start the update.

8. Windows Update should now be completed smoothly and without error 0x800707e7 (or 0x000007E7).
9. Finally, after updating Windows 10, and if you own an NVIDIA graphics card, proceed and re-install the NVIDIA’s software.
That’s all folks! Did it work for you?
Please leave a comment in the comment section below or even better: like and share this blog post in the social networks to help spread the word about this problem.
If this article was useful for you, please consider supporting us by making a donation. Even $1 can a make a huge difference for us.

Важно устанавливать обновления Windows не только для доступа к недавно выпущенным функциям, но и для защиты вашей системы от кибератак. Однако, если вы столкнетесь с проблемами установки обновлений Windows, такими как код ошибки 0x800707E7 — 0x3000D в Windows 10, захотите ли вы продолжить установку?
Конечно, стоит. В конце концов, обновления Windows уберегут вас. Если вы столкнетесь с проблемами установки обновлений Windows, такими как код ошибки 0x800707E7 — 0x3000D, не беспокойтесь. Есть способы их решения.
В этой статье мы поделимся тем, что мы знаем о коде ошибки, причинах ее возникновения, а также способах ее устранения.
Что такое 0x800707E7 — Код ошибки 0x3000D?
По словам затронутых пользователей, код ошибки 0x800707E7 — 0x3000D возникает при попытке установить последнюю версию Windows 10. Обычно это сообщение об ошибке:
Совет для профессионалов: просканируйте свой компьютер на наличие проблем с производительностью, ненужных файлов, вредоносных приложений и угроз безопасности
которые могут вызвать проблемы в системе или снизить производительность.
Проблемы с бесплатным сканированием для ПК. Об Outbyte, инструкции по удалению, лицензионное соглашение, политика конфиденциальности.
«Нам не удалось установить Windows 10. Мы вернули ваш компьютер в состояние, в котором он был до того, как вы начали установку Windows 10».
Когда вы сталкиваетесь с этой ошибкой, установка обновления Windows 10 останавливается в какой-то момент и снова и снова терпит неудачу при каждой попытке.
Теперь вы можете спросить, что вызывает 0x800707E7 — 0x3000D, установка завершилась ошибкой фазы FIRST_BOOT? Эта проблема может возникнуть из-за проблем с видеокартой стороннего производителя. Чаще всего виноват проблемный драйвер дисплея NVIDIA. Другие возможные триггеры включают нехватку места на диске, стороннее программное обеспечение и вредоносные программы.
Как исправить 0x800707E7 — 0x3000D, сбой установки при ошибке фазы FIRST_BOOT?
Если вы столкнулись с ошибкой 0x800707E7 — 0x3000D, установка завершилась ошибкой фазы FIRST_BOOT, попробуйте наши решения ниже. Надеюсь, что хотя бы один из них поможет решить проблему.
Решение №1: проверьте системные требования
При обновлении предыдущей версии Windows до Windows 10 вы должны выполнить некоторые требования. Если вы не соответствуете хотя бы одному из них, у вас могут возникнуть проблемы с установкой Windows 10. Возможно, вам даже не удастся установить ее.
Чтобы установить Windows 10, необходимо учитывать следующие требования:
- Процессор: 1 ГГц
- ОЗУ: 1 ГБ для 32-разрядной версии или 2 ГБ для 64-разрядной версии
- Жесткий диск: 32 ГБ или более
- Видеокарта: совместимая с драйвером WDDM 1.0 или DirectX 9
- Дисплей / разрешение : 800 x 600
Решение №2. Удалите все мошеннические учетные записи пользователей.
GeForce регулярно выпускает обновления для своей видеокарты. Они выпускают эти обновления, чтобы представить новые функции и исправить ошибки, о которых сообщалось ранее. И поскольку NVIDIA является основным виновником проблемы, неправильный профиль пользователя может помешать обновлению. Такая учетная запись может помешать установке обновления, что приведет к отображению ошибки.
В этом решении вам необходимо удалить мошенническую учетную запись пользователя. Обратите внимание, что это потребует использования редактора реестра. Итак, убедитесь, что у вас есть резервная копия вашего реестра или у вас есть ранее созданная точка восстановления системы. Получив любой из двух вариантов, выполните следующие действия:
Решение №3. Удалите все проблемные сторонние приложения.
Бывают случаи, когда проблемное стороннее приложение может мешать обновлению, что вызывает различные проблемы. Кроме того, несовместимость этих приложений может конфликтовать с существующими системными файлами и reimg. Итак, чтобы решить эту проблему, вы можете попытаться удалить любое проблемное стороннее приложение, которое вы установили.
Вот как это сделать:
Решение №4: Установите антивирусный пакет
Иногда вредоносные объекты вмешиваются в системные процессы, вызывая появление сообщений об ошибках. Если вы хотите предотвратить эти угрозы, установите на свое устройство надежное решение для защиты от вредоносных программ. Эффективный антивирусный пакет может выявлять любые угрозы и в первую очередь предотвращать их возникновение.
Сегодня существует множество антивирусных пакетов, доступных для загрузки. Убедитесь, что вы выбрали тот, который доказал свою эффективность в блокировании угроз. Кроме того, скачивайте только с авторитетных сайтов. После загрузки и установки антивирусного пакета запускайте регулярное сканирование на вирусы, чтобы убедиться, что ваша система не содержит угроз.
Решение № 5. Загрузите ISO-образ Windows 10 с сайта Microsoft
Поскольку у вас возникли проблемы с обновлением Windows 10, попробуйте загрузив Windows 10 ISO прямо с веб-сайта Microsoft. После загрузки дважды щелкните образ ISO, а затем файл setup.exe, чтобы начать процесс обновления.
Решение № 6: Чистая установка Windows 10
Если ни одно из пяти решений не работает, вы можете выполнить чистую установку Windows 10 на своем устройстве. Пошаговое руководство о том, что делать, см. В приведенных ниже инструкциях:
Резюме
Не позволяйте ошибкам мешать вам установить обновление Windows. Если вы столкнулись с такой ошибкой с кодом 0x800707E7 — 0x3000D в Windows 10, сделайте свою домашнюю работу и исследуйте. А еще лучше использовать решения, описанные в этой статье.
Пробовали ли вы какие-либо из рекомендованных нами выше исправлений? Какие из них работали? Дайте нам знать ниже!
YouTube видео: Исправить 0x800707E7 — 0x3000D, сбой установки из-за ошибки фазы FIRST_BOOT
06, 2023
A third-party program is often the cause behind the 0x800707E7 error
by Madhuparna Roy
A diploma holder in computers and with a keen interest in technology, Madhuparna is passionate about writing How-to guides and helping people solve the most intricate Windows issues…. read more
Updated on April 4, 2023
Reviewed by
Alex Serban

After moving away from the corporate work-style, Alex has found rewards in a lifestyle of constant analysis, team coordination and pestering his colleagues. Holding an MCSA Windows Server… read more
- When trying to upgrade to the latest version of Windows, you may often come across the 0x800707e7-0x3000d error with the message, Installation failed.
- It can also lead to a BSOD error in some cases, and in most cases, the issue seems to be related to a third-party program, corrupted files & folders, or faulty Windows update components.
- If you have too many redundant user profiles, that can also be why you see the 0x800707e7 error during the upgrade.
XINSTALL BY CLICKING THE DOWNLOAD FILE
This software will repair common computer errors, protect you from file loss, malware, hardware failure and optimize your PC for maximum performance. Fix PC issues and remove viruses now in 3 easy steps:
- Download Restoro PC Repair Tool that comes with Patented Technologies (patent available here).
- Click Start Scan to find Windows issues that could be causing PC problems.
- Click Repair All to fix issues affecting your computer’s security and performance
- Restoro has been downloaded by 0 readers this month.
You are not alone if you are trying to upgrade to Windows 11 but getting the 0x800707E7 – 0X3000D error.
As the upgrade reaches a certain percentage, the system restarts again, rolls back to the previous Windows version, and shows the following error code, 0x800707E7 – 0X3000D.
What causes Windows 11 update error 0x800707e7?
Some of the reasons that we have identified that may trigger the Windows 11 upgrade error 0x800707E7 are as below:
- Services and startup items – Certain services, and startup items like trace sessions or apps may interfere with the update causing the issue.
- Conflicting external devices – Sometimes, connected peripherals like a USB, pen drive, or keyboard may interrupt the upgrade process, thus, showing the 0x800707E7 error.
- Problematic software/applications – It could be possible that a certain third-party app or software may be the reason behind the error.
- Outdated drivers – If the system drivers are not updated, it can trigger the 0x800707E7 error.
- Corrupted system files – Broken or damaged system files are often the reason behind many errors including the Windows 11 upgrade error.
- Faulty or too many user profiles – Chances are that you have redundant or corrupt user profiles that may create a conflict with the process.
- Incorrect path of the index location – Sometimes, even the index location path may trigger the 0x800707e7-0x3000d error.
How do I fix Windows 11 update error 0x800707e7-0x3000d?
You can try some of the preliminary checks to possibly fix the issue:
- Run Windows troubleshooter to detect and fix the issue automatically.
- Disable and remove conflicting external devices.
- Uninstall problematic software and applications.
- Disconnect the LAN cable to stop downloading updates.
- Disable the services and startup items.
However, if none of the above methods work, we have some effective solutions to help you fix the 0x800707e7-0x3000d error during the Windows 11 upgrade.
1. Disable Trace Session
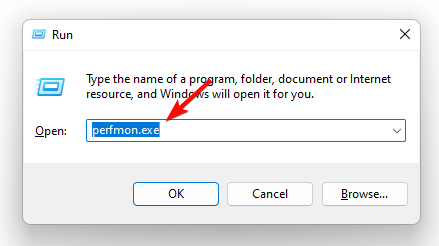
- Press the Win + R keys simultaneously to launch the Run console, type performance.exe, and hit Enter to open the Performance Monitor.

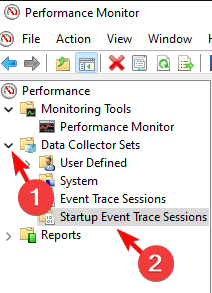
- On the left, expand the Data Collector Sets section, and select Startup Event Trace Sessions.

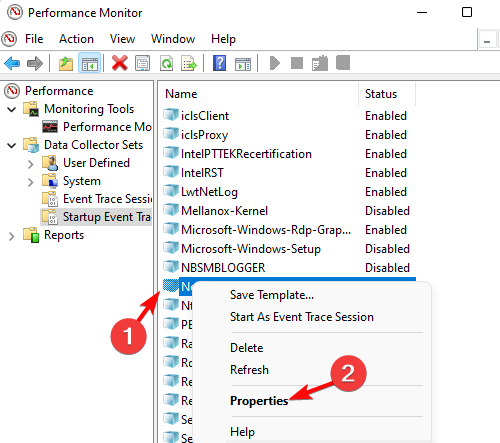
- Now, on the right, look for NPETraceSession, right-click on it, and select Properties.

- In the Properties dialog, go to the Trace Session tab, and uncheck the box next to Enabled. Press Apply and then OK to save changes.

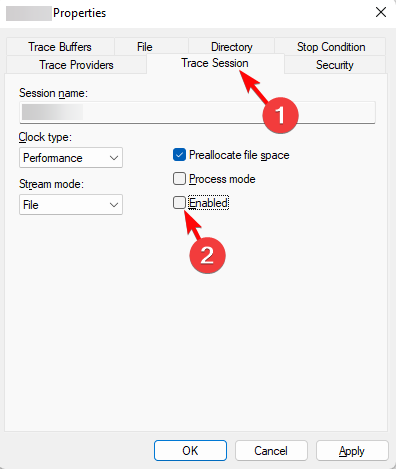
Now, restart your PC and check if you can now upgrade to Windows 11 without the 0x800707e7 error.
2. Delete unrecognized user profiles
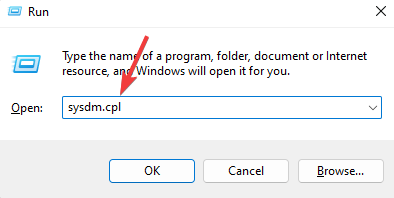
- Open the Run dialog by pressing the Win + R keys together. Type sysdm.cpl and hit Enter to launch the System Properties window.

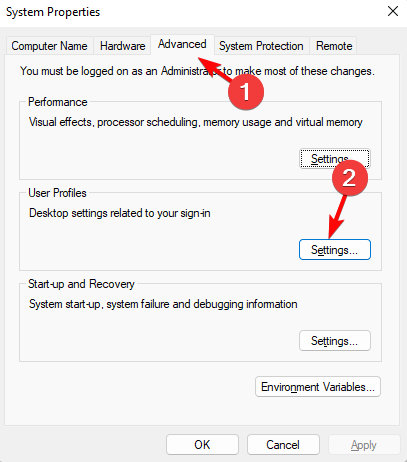
- Next, select the Advanced tab, and under User Profiles, click on Settings.

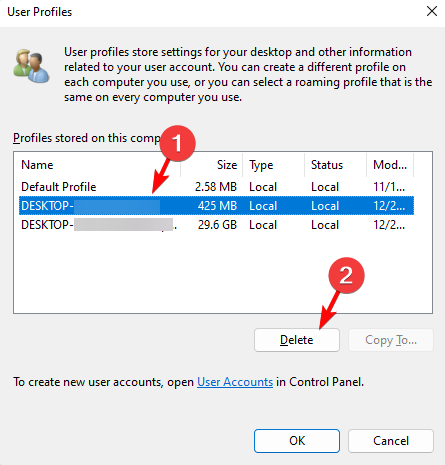
- Now, in the User Profiles dialog, look for any unknown profiles. If you find any, select the profile and press the Delete button.

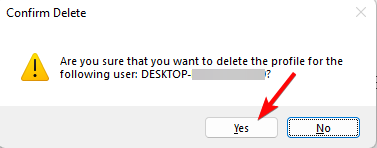
- Press Yes in the prompt to confirm.

- Repeat the process for any other unknown user profile.
Some PC issues are hard to tackle, especially when it comes to corrupted repositories or missing Windows files. If you are having troubles fixing an error, your system may be partially broken.
We recommend installing Restoro, a tool that will scan your machine and identify what the fault is.
Click here to download and start repairing.
Once done, press OK to exit, reboot your PC, and you should not encounter the 0x800707E7 – 0X3000D error anymore.
- How to upgrade to Windows 11
- The Best Uninstaller App to Use
- Fix: User Profile Cannot be Loaded After Reset Error in Windows 11
3. Remove the corrupted user profile from the registry editor

NOTE
Before making any changes to the registry editor, make sure to create a backup of the registry settings. This will help you recover any data that may be lost during the process.
- To open the Run console, press the Win + R shortcut keys, type in regedit in the search bar, and hit Enter to launch Registry Editor.

- In the Registry Editor window, navigate to the below path:
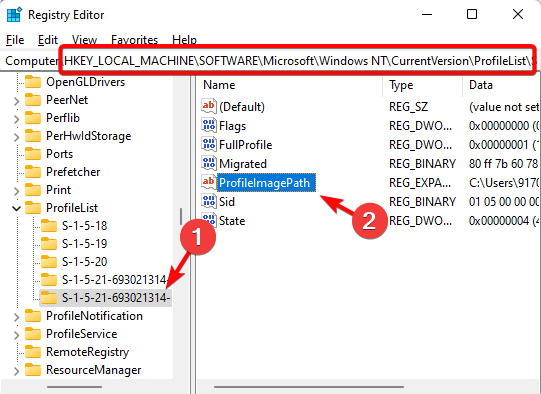
HKEY_LOCAL_MACHINESOFTWAREMicrosoftWindows NTCurrentVersionProfileList - Now, under the ProfileList key on the left, select the user profile, and on the right, look for the ProfileImagePath string value.

- Under Data you should see the profile name that can help you identify if it’s an unknown account. If it is, delete the associated registry key under ProfileList.
- You should also delete any key under ProfileList with a .bak extension.
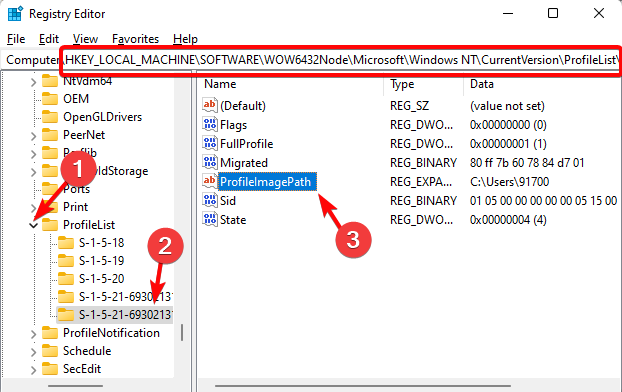
- Now, navigate to the below path and repeat Steps 3 to 5 for this as well:
ComputerHKEY_LOCAL_MACHINESOFTWAREWOW6432NodeMicrosoftWindows NTCurrentVersionProfileList

Once you have successfully deleted the unknown user profiles, restart your PC and check if the issue is resolved or if it still persists.
4. Uninstall conflicting software
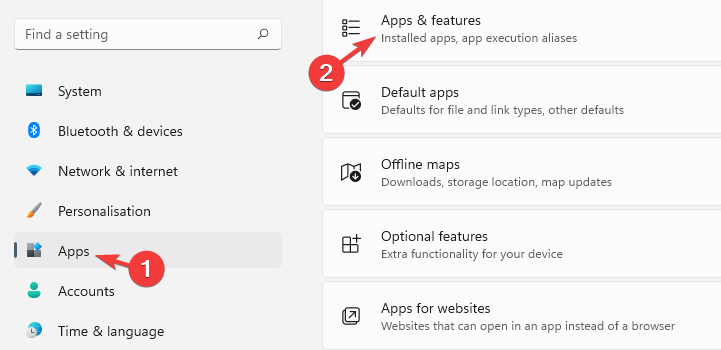
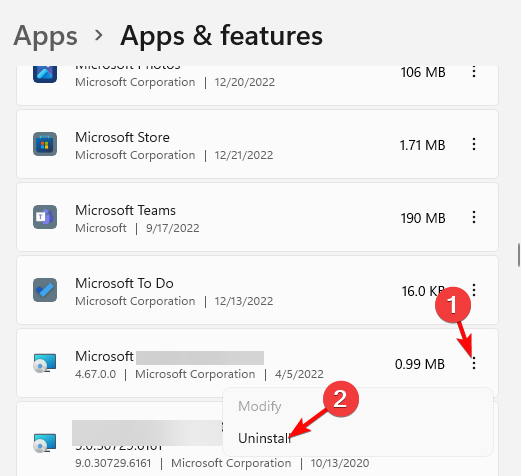
- Press the Win + I keys together to launch Windows Settings. Click on Apps on the left and then click on Apps & features on the right.

- On the next screen, go to the right, and under the App list, look for the problematic app. It’s usually Microsoft’s Zune Software or the Kaspersky Antivirus.

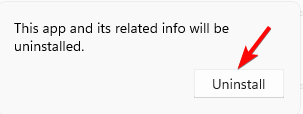
- Go to the app, click on the three dots next to it, and select Uninstall.
- Press Uninstall again to confirm.

Once the software is completely uninstalled, reboot your computer and check if the 0x800707e7 is gone.
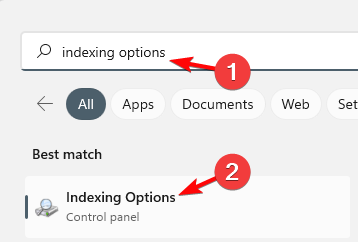
5. Set the Indexing Location to the default path
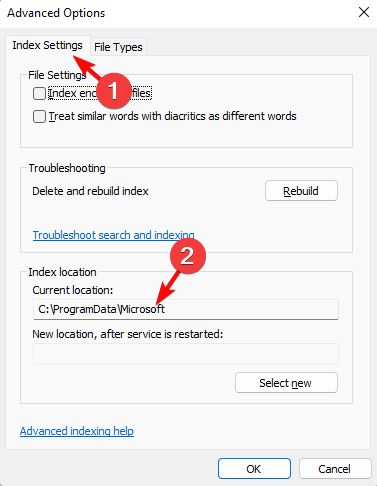
- Go to Windows Search, type Indexing Options in the search bar, and click on the result.

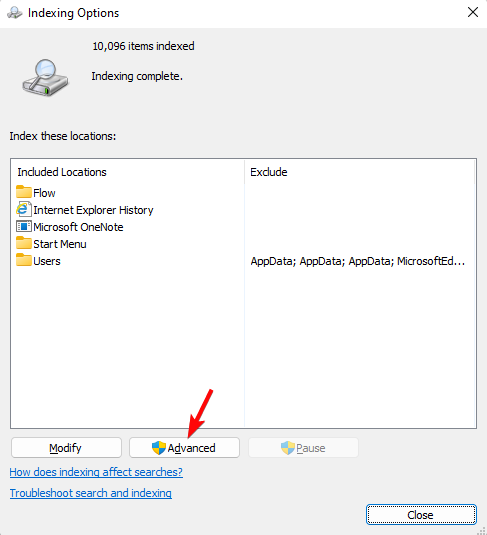
- In the Indexing Options dialog, click on Advanced.

- Next, in the Advanced Options window, under Index Settings, go to Index Location. Here, check if the path is set to
C:ProgramDataMicrosoft
- If not, then click on Select new, and then set the path to C:ProgramDataMicrosoft. Press OK.


Once done, restart your PC, try upgrading to Windows 11 and check if you still encounter the 0x800707e7 error.
Alternatively, you can also reset the Windows update components following the process mentioned in our detailed post, which is also applicable to the 0x800707e7 error.
However, if all of the above methods fail to work, you may refer to our guide on how to perform a repair upgrade (also applicable to Windows 11) to fix the issue.
For any other queries on Windows 11 upgrade issues, do leave a message in the comments box below.
Still having issues? Fix them with this tool:
SPONSORED
If the advices above haven’t solved your issue, your PC may experience deeper Windows problems. We recommend downloading this PC Repair tool (rated Great on TrustPilot.com) to easily address them. After installation, simply click the Start Scan button and then press on Repair All.
![]()
Содержание
- Ошибка first boot при установке windows 10
- Вопрос
- Ответы
- Все ответы
- 0x3000D, установка завершилась неудачно на этапе FIRST_BOOT
- Ошибка установки обновления Windows 10 0x800707E7 — 0x3000D
- 1]Проверьте требования к техническим характеристикам системы.
- 2]Удалить мошеннический профиль пользователя
- 3]Удалите стороннее конфликтующее программное обеспечение.
- 4]Непосредственно загрузите Windows 10 ISO
- 5]Чистая установка Windows 10
- Как исправить код ошибки 0xC190010, 0x30018 в Windows 10
- Решения
- Причины ошибок
- Дополнительная информация и ручной ремонт
- Как исправить ошибку Windows 10 с кодом 0x800705b4
- Исправьте ошибки SearchUI.exe в вашей Windows
- Как исправить ошибку Windows 10 8024402C
- Исправление ошибки синего экрана netio.sys в Windows
- Установка не удалась, преждевременно завершена
- Простое руководство по исправлению ошибки 115
- Исправить ложные уведомления в Центре действий
- Руководство по быстрому исправлению ошибки 0x0000007B, 0xF78524
- LiveInternetLiveInternet
- —Метки
- —Всегда под рукой
- —Рубрики
- —Музыка
- —Приложения
- —Поиск по дневнику
- —Подписка по e-mail
- —Сообщества
- —Статистика
- Что делать с ошибкой 0xC1900101 – 0x40017 при установке Windows 10?
- Что может вызывать 0xC1900101 – 0x40017?
- Решение №1 Повторный запуск установки
- Решение №2 Отключение Брандмауэра Windows
- Решение №3 Отключение внешних устройств
- Решение №4 Отключение антивируса
- Решение №5 Обновление драйверов
- Решение №6 Освобождение дополнительного места на диске
- Решение №7 Чистая загрузка системы
- Решение №8 Обновление BIOS
Ошибка first boot при установке windows 10

Вопрос
Добрый день! Столкнулся с такой ошибкой при попытке обновить 14986:
«Ошибка 0xc1900101-0x30018 на этапе установки FIRST_BOOT во время операции SYSPREP».
Помогите решить проблему, пожалуйста.
Ответы
Сразу после удаления Антивируса Касперского без проблем обновился через ЦО.
Все ответы
Подскажите, пожалуйста, перед обновлением системы у вас возникали какие нибудь ошибки во время работы компьютера?
Каким образом у вас появляется данная ошибка (обычное обновление ОС, Sysprep операция, переустановка ОС?)
На данное время у вас система в рабочем состоянии?
Попробуйте сделать, пожалуйста, DISM online helt check перед обновлением.
Посмотрите, пожалуйста, похожую тему.
Если Вам помог чей-либо ответ, пожалуйста, не забывайте жать на кнопку «Предложить как ответ» или «Проголосовать за полезное сообщение» Мнения, высказанные здесь, являются отражение моих личных взглядов, а не позиции корпорации Microsoft. Вся информация предоставляется «как есть» без каких-либо гарантий.
Источник
0x3000D, установка завершилась неудачно на этапе FIRST_BOOT
Если при попытке обновления до последней версии Windows 10 с Windows 7 / 8.1 / 10 вы столкнетесь с ошибка 0x800707E7 — 0x3000D, то этот пост призван помочь вам.

Когда вы столкнетесь с этой проблемой. вы получите следующее полное сообщение об ошибке —
Не удалось установить Windows 10
Мы вернули ваш компьютер к тому состоянию, в котором он был до того, как вы начали установку Windows 10.
0x800707E7 — 0x3000D
Ошибка установки на этапе FIRST_BOOT с ошибкой во время операции MIGRATE_DATA
Когда вы сталкиваетесь с этой ошибкой установки и обновления Windows 10, установка останавливается на определенном проценте и при каждой попытке повторяется с ошибкой. В основном эта проблема возникает из-за видеокарты стороннего производителя. Основным виновником является вмешательство драйвера дисплея NVIDIA в установку. Кроме того, нехватка места на диске, внешнее программное обеспечение и некоторые другие причины также мешают процессу установки обновления.
Ошибка установки обновления Windows 10 0x800707E7 — 0x3000D
Если вы столкнулись с этой проблемой, вы можете попробовать наши предложения ниже и посмотреть, поможет ли это решить проблему:
Давайте посмотрим на описание процесса, связанного с каждым из перечисленных решений.
1]Проверьте требования к техническим характеристикам системы.
| Процессор: | 1 гигагерц (ГГц) или более быстрый совместимый процессор или система на кристалле (SoC) |
| БАРАН: | 1 гигабайт (ГБ) для 32-разрядной версии или 2 ГБ для 64-разрядной версии |
| Размер жесткого диска: | Жесткий диск 32 ГБ или больше |
| Видеокарта: | Совместимость с DirectX 9 или новее с драйвером WDDM 1.0 |
| Отображать: | 800 × 600 |
| Интернет-соединение: | Подключение к Интернету необходимо для выполнения обновлений, а также для загрузки и использования некоторых функций. Windows 10 Pro в S-режиме, Windows 10 Pro Education в S-режиме, Windows 10 Education в S-режиме и Windows 10 Enterprise в S-режиме требуют подключения к Интернету во время начальной настройки устройства (Out of Box Experience или OOBE), а также учетная запись Microsoft (MSA) или учетная запись Azure Activity Directory (AAD). Для переключения устройства с Windows 10 в S-режиме также требуется подключение к Интернету. |
Если ваша система соответствует минимальным требованиям, но вы все еще сталкиваетесь с ошибкой, вы можете попробовать следующее решение.
2]Удалить мошеннический профиль пользователя
GeForce регулярно выпускает обновления для своей видеокарты, добавляя новые функции и исправляя предыдущие ошибки. Как уже отмечалось, NVIDIA является основной причиной этой проблемы, поскольку создается неправильный профиль пользователя для обработки задач, связанных с обновлением. Эта учетная запись, присутствующая в системе, предотвращает установку Windows 10, тем самым вызывая ошибку.

Это решение требует от вас удаления мошеннического профиля пользователя. Вот как:
Эта процедура также включает в себя операцию с реестром, поэтому убедитесь, что вы приняли меры предосторожности, такие как резервное копирование реестра или создание точки восстановления системы. После этого действуйте следующим образом:

После этого вы можете попробовать установить обновление еще раз. Процесс должен завершиться без ошибок.
3]Удалите стороннее конфликтующее программное обеспечение.
По какой-то причине стороннее программное обеспечение с низкоуровневым кодированием, как известно, вызывает различные проблемы в Windows 10, включая эту ошибку установки обновления. Более того, отсутствие совместимости в приложениях также приводит к конфликту со встроенными файлами и ресурсами. Программное обеспечение может вызывать различные ошибки во время обновления Windows, обновления, установки и запуска определенных программ. В этом случае вы можете удалить любое стороннее программное обеспечение в своей системе, а затем повторить процесс установки обновления.
4]Непосредственно загрузите Windows 10 ISO
Поскольку вы сталкиваетесь с этой ошибкой при установке обновления Windows 10 с помощью инструмента создания мультимедиа, также известного как Windows Update Assistant, это решение влечет за собой прямую загрузку файла образа ISO Windows 10 с веб-сайта Microsoft. После того, как вы загрузили ISO в место (предпочтительно на рабочий стол) на вашем устройстве, дважды щелкните образ ISO, чтобы смонтировать его как виртуальный диск, затем дважды щелкните значок setup.exe файл, чтобы начать процесс обновления на месте.
Примечание: Если вы пытаетесь выполнить обновление с Windows 7, вам понадобится стороннее программное обеспечение виртуального диска для монтирования образа ISO.
5]Чистая установка Windows 10
Если ничего не помогает, вы можете выполнить чистую установку Windows 10 на устройстве.
Источник
Как исправить код ошибки 0xC190010, 0x30018 в Windows 10
Пользователи при обновлении до Windows 10 с Windows 7 или Windows 8 / 8.1 или при обновлении до новой версии, сборки, пакета обновления или крупного обновления Windows 10 могут столкнуться с кодом ошибки 0xC1900101, 0x30018. Установка Windows 10 завершается сбоем, останавливается или зависает. В процессе установки он достигает определенного максимального предела (обычно 6% или 32%), затем возвращается к предыдущей версии операционной системы и отображает следующее сообщение:
Нам не удалось установить Windows 10. Мы вернули ваш компьютер в прежнее состояние, прежде чем вы начали установку Windows 10.
Решения
 Причины ошибок
 Причины ошибок
При попытке исправить код ошибки 0xC1900101-0x30018 очень важно знать, что вызывает эту проблему. Наиболее вероятные причины этой ошибки:
Дополнительная информация и ручной ремонт
При устранении проблем, связанных с кодами ошибок, лучше всего использовать методы ручного ремонта. Использование этих методов помогает пользователям точно определить основные причины проблемы и постоянно применять решения для их устранения.
Хотя большинство методов ручного ремонта может выполнить любой пользователь Windows, даже не обладающий техническими возможностями, в определенных случаях требуется помощь профессионала Windows. Если вы не готовы столкнуться с рисками при реализации ручных методов самостоятельно, подумайте о том, чтобы получить помощь профессионального специалиста по Windows, или вы можете использовать мощный автоматизированный инструмент.
Исправляя код ошибки 0xC1900101-0x30018, вы можете повторить те же шаги, что и для 0xc000021a (метод первый), или вы можете попробовать сделать следующее:
ПРИМЕЧАНИЕ: Не забывайте нажимать Enter после каждой команды.
net stop wuauserv
net stop cryptSvc
чистые стоповые бит
net stop msiserver
ПРИМЕЧАНИЕ: Не забывайте нажимать Enter после каждой команды.
C: WindowsSoftwareDistribution SoftwareDistribution.old
C: WindowsSystem32catroot2 Catroot2.old
ПРИМЕЧАНИЕ: Не забывайте нажимать Enter после каждой команды.
net start wuauserv
net start cryptSvc
чистые стартовые биты
net start msiserver
Не можете смириться с долгим и техническим ручным процессом ремонта? Вы все еще можете исправить эту ошибку, загрузив и установив мощный автоматизированный инструмент это, безусловно, сделает работу в один миг!
Как исправить ошибку Windows 10 с кодом 0x800705b4
Исправьте ошибки SearchUI.exe в вашей Windows
Как исправить ошибку Windows 10 8024402C
Исправление ошибки синего экрана netio.sys в Windows
Установка не удалась, преждевременно завершена
Простое руководство по исправлению ошибки 115
Исправить ложные уведомления в Центре действий
Руководство по быстрому исправлению ошибки 0x0000007B, 0xF78524
Источник
LiveInternetLiveInternet
—Метки
—Всегда под рукой
—Рубрики
—Музыка
—Приложения
—Поиск по дневнику
—Подписка по e-mail
—Сообщества
—Статистика
Установка Windows 10
Нам не удалось установить Windows 10
Мы вернули ваш компьютер в состояние, в котором он был до того, как вы начали установку Windows 10.
Основным виновником является вмешательство драйвера дисплея NVIDIA в установку. Кроме того, нехватка места на диске, внешнее программное обеспечение и некоторые другие причины также мешают процессу установки обновления.
Если вы столкнулись с этой проблемой, вы можете попробовать наши предложения ниже и посмотреть, поможет ли это решить проблему:
1. Проверить требования к системным характеристикам
2. Удалить несанкционированные профили пользователей
3. Удалите любое стороннее конфликтующее программное обеспечение
4. Непосредственно загрузите Windows 10 ISO
Давайте посмотрим на описание процесса, связанного с каждым из перечисленных решений.
1] Проверьте требования к техническим характеристикам системы.
Это основные требования для установки Windows 10 на ПК. Если ваше устройство не соответствует этим требованиям, возможно, у вас нет тех возможностей, которые предполагались при работе с Windows 10, и вы можете подумать о покупке нового ПК. 
Если ваша система соответствует минимальным требованиям, но вы все еще сталкиваетесь с ошибкой, вы можете попробовать следующее решение.
2] Удалить мошеннический профиль пользователя
GeForce регулярно выпускает обновления для своей видеокарты, добавляя новые функции и исправляя предыдущие ошибки. Как уже отмечалось, NVIDIA является основной причиной этой проблемы, поскольку создается неправильный профиль пользователя для обработки задач, связанных с обновлением.
Эта учётная запись, присутствующая в системе, предотвращает установку Windows 10, тем самым вызывая ошибку.
Это решение требует от вас удаления мошеннического профиля пользователя. Вот как:
. Нажмите клавишу Windows + R, чтобы вызвать диалоговое окно «Выполнить».
. Нажмите кнопку « Настройки» в разделе « Профиль пользователя ».
. Найдите и удалите здесь любые другие необычные имена пользователей.
. Затем перейдите в C: Users в проводнике и удалите те же профили пользователей.
. Перейдите по пути к ключу реестра ниже или перейдите к нему :
HKEY_LOCAL_MACHINESOFTWAREMicrosoft
Windows NTCurrentVersionProfileList
. В этом месте на правой панели щёлкните правой кнопкой мыши Updateuser и выберите Удалить.
. Перезагрузить компьютер.
После этого вы можете попробовать установить обновление еще раз. Процесс должен завершиться без ошибок.
3] Удалите стороннее конфликтующее программное обеспечение.
По какой-то причине стороннее программное обеспечение с низкоуровневым кодированием, как известно, вызывает различные проблемы в Windows 10, включая эту ошибку установки обновления.
Более того, отсутствие совместимости в приложениях также приводит к конфликту со встроенными файлами и ресурсами.
Программное обеспечение может вызывать различные ошибки во время обновления Windows, обновления, установки и запуска определенных программ.
В этом случае вы можете удалить любое стороннее программное обеспечение в своей системе, а затем повторить процесс установки обновления.
4] Непосредственно загрузите Windows 10 ISO
Поскольку вы столкнулись с этой ошибкой установки обновления Windows 10 с помощью инструмента создания мультимедиа, также известного как Windows Update Assistant, это решение предполагает, что вы напрямую загружаете файл ISO- образа Windows 10 с веб-сайта Microsoft.
После того, как вы загрузили ISO в место (предпочтительно на рабочий стол) на вашем устройстве, дважды щелкните образ ISO, чтобы смонтировать его как виртуальный диск, а затем дважды щелкните файл setup.exe, чтобы начать процесс обновления на месте.
Источник
Что делать с ошибкой 0xC1900101 – 0x40017 при установке Windows 10?
Ошибка под номером 0xC1900101 – 0x40017 может возникнуть в процессе инсталляции (апдейта до) ОС Windows 10. В ошибке говорится вот что:
Компьютер возвращен к тому состоянию, в котором он находится перед началом установки Windows 10.
0xC1900101 – 0x40017
Ошибка на этапе установки SECOND_BOOT во время операции BOOT
Майкрософт выпустила фиск от подобных ошибок, тем не менее он работает не в каждом случае — иногда приходится задействовать особые методы.
Что может вызывать 0xC1900101 – 0x40017?

Решение №1 Повторный запуск установки
А вы пробовали запустить процесс установки Windows 10 еще раз? В некоторых случаях ошибку 0xC1900101 – 0x40017 удается обойти именно таким способом. Также вы можете попробовать перезагрузить свой ПК и запустить установку еще раз.
Решение №2 Отключение Брандмауэра Windows
Большинство пользователей утверждают, что у них ошибка 0xC1900101 – 0x40017 возникала из-за работающего Брандмауэра Windows. По какой-то причине тот может мешать процессу установки/обновлению до Windows 10, препятствуя загрузке необходимых файлов. Деактивировать Брандмауэр Windows можно вот так:
Запустите установку ОС Windows 10 еще раз и посмотрите, исчезла ли ошибка 0xC1900101 – 0x40017.
Решение №3 Отключение внешних устройств
Подобную проблему могут вызывать некоторые внешние устройства. USB-накопители, внешние HDD/SSD, игровые контроллеры, смартфоны и прочие гаджеты — отключите от своего ПК всё ненужное, а затем повторно запустите установку Windows 10.
Решение №4 Отключение антивируса
Используете на своем компьютере антивирусное ПО от сторонних разработчиков? Знайте, что как раз оно и может вызывать появление ошибки 0xC1900101 – 0x40017. Отключите активную защиту своего антивируса, после чего попытайтесь установить Windows 10 еще раз.
Решение №5 Обновление драйверов
Устаревшие драйвера могут послужить причиной за появлением 0xC1900101 – 0x40017. Вам нужно найти проблематичные драйвера в своей системе и заняться их обновлением. Апдейт драйверов можно произвести следующим образом:
Выполните вышеуказанные действия со всем оборудованием в своей системе, после чего перезагрузите компьютер и запустите установку Windows 10.
Решение №6 Освобождение дополнительного места на диске
Знайте, что установка Windows 10 требует наличия свободного места на диске. Возможно, вы пытаетесь перейти на «десятку» с забитым до самых краев диском. Почистите свой SSD/HDD от ненужных файлов, например, фильмов или видеоигр. Если никакой ошибки при установке Win10 не возникло, значит вам действительно просто не хватало свободного места.
Решение №7 Чистая загрузка системы
Некоторые службы и программы от сторонних разработчиков могут препятствовать установке Windows 10. Чтобы это проверить, вам нужно проделать так называемую «Чистую загрузку». Вот что вам нужно сделать:
Начните установку Windows 10 и проверьте, покажется ли 0xC1900101 – 0x40017. Если все пройдет гладко, то проблема действительно заключалась в одной из отключенных служб или программ. Вернитесь в конфигурацию системы (и диспетчер задач) и включите все ранее деактивированные элементы.
Решение №8 Обновление BIOS
Некоторые владельцы ноутбуков Dell утверждают, что им справиться с 0xC1900101 – 0x40017 помогло обновление BIOS. У вас такой же ноутбук? Воспользуйтесь вот этим материалом от компании Dell, чтобы обновить BIOS на своем ноутбуке.
Источник
The user notices the 0x800707e7 update issue when either the update process does not start or is stuck at some percentage and the system fails to install the update. The 0x800707e7 error code is reported on feature updates, quality updates, or in some cases, upgrading from Windows 7.
After thoroughly going through the error reports, the following are the main causes identified to originate the issue:
- Indexing location: Many Windows updates prefer to see the hosting environment, including the Indexing Location of your PC, in the default settings and if you or any of your applications have moved this setting to another location, it may cause the update to fail.
- Corrupt Software Distribution and Catroot2 folder: Windows Updates temporarily store their data in the Software Distribution and Catroot2 folders. If these folders on your system are corrupt, it may result in the update error at hand.
- Conflicting Applications: Many applications like SQL Server and Antivirus (e.g., Kaspersky) create hidden user profiles on your PC, and the presence of these profiles can break the operation of the problematic update.
- Unknown User Profiles: If there are unknown/ corrupt user profiles present on the system or their traces in the system’s registry, it can cause the user profile suffix mismatch message in the error logs of your system, resulting in the issue at hand.
Before moving on, check if clean booting your PC clears the update error 0x800707e7. If you are one of those Windows 7 users who are encountering the issue while upgrading, make sure to remove home groups from your system before trying the upgrade again.
Moreover, many users have reported that they were able to solve the issue by logging out (not shutting down) of the system when the update in question status changes to install, so, check if that works for you. Also, it will be a good idea to perform a disk clean-up (clears out the old Windows update files and creates space on the system drive) to solve the update issue at hand.
Use the Windows Update Troubleshooter
The Windows Update Troubleshooter is one of Microsoft’s built-in troubleshooters to hunt down the common update issues affecting the system and running the same may solve the update problem.
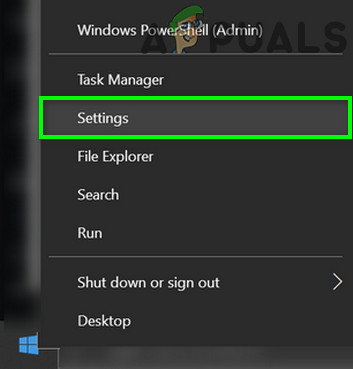
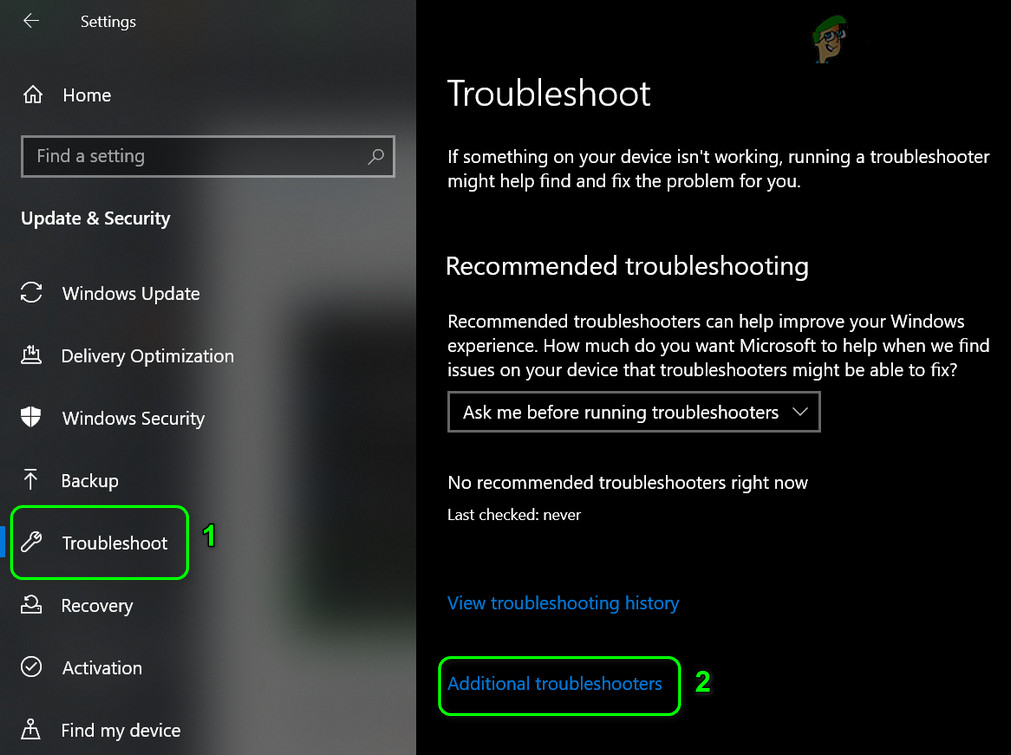
- Right-click Windows and select Settings.

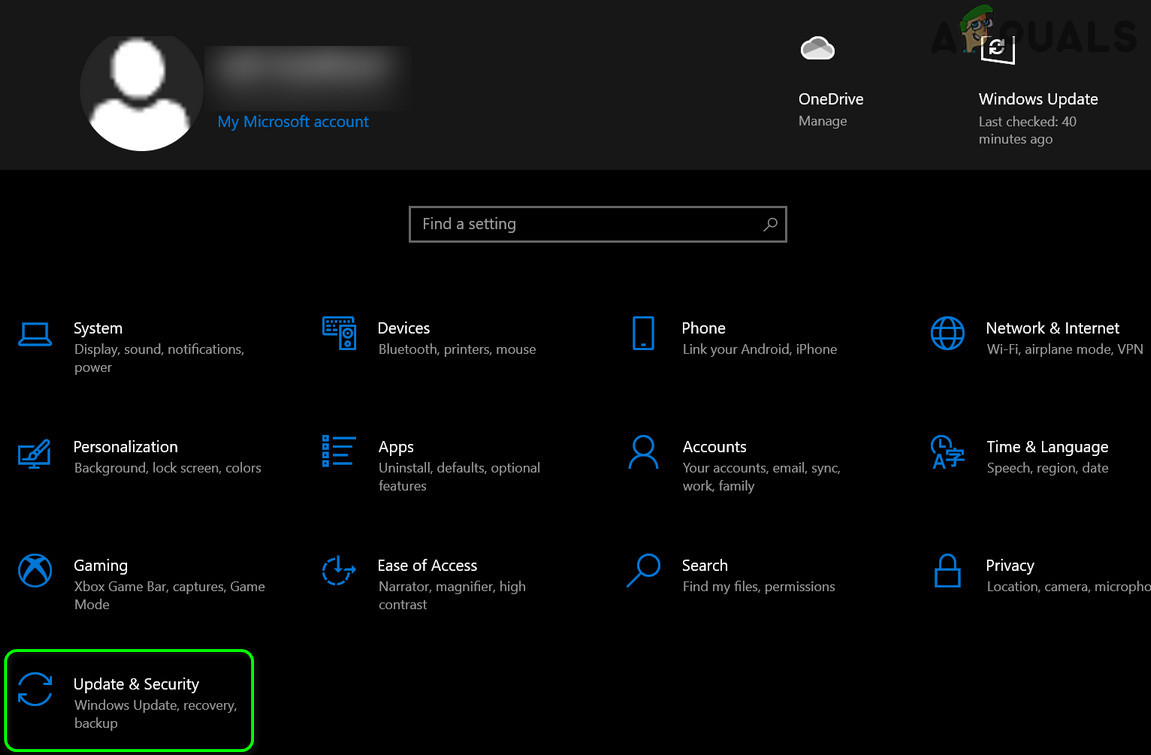
Open Windows Settings - Now open Update & Security and in the resulting window, select Troubleshoot (in the left half of the window).

Open Update & Security - Then, in the right half of the window, click on the link of Additional Troubleshooters.

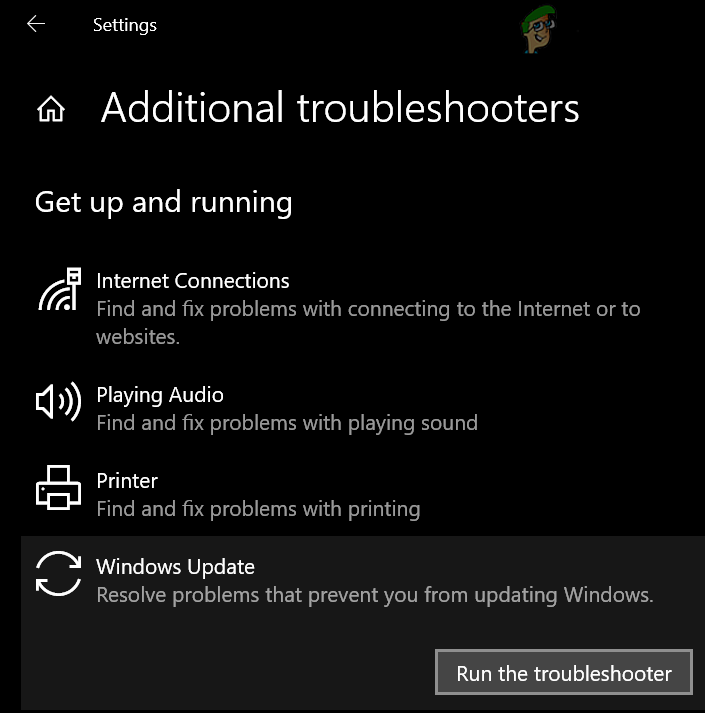
Open Additional Troubleshooters - Now, expand Windows Update (under Get Up and Running) and click on the button of Run the Troubleshooter.

Run the Windows Update Troubleshooter - Then follow the prompts and let the troubleshooter complete its process.
- Once done, apply the changes suggested by the troubleshooter and then check if you can update your system without error 0x800707e7.
Manually Update the PC’s Windows
Installing Windows updates is usually a smooth and automatic process through the Windows Update channel. As these updates are failing to install automatically, manually installing the same, which will use different OS directories and resources, may solve the problem
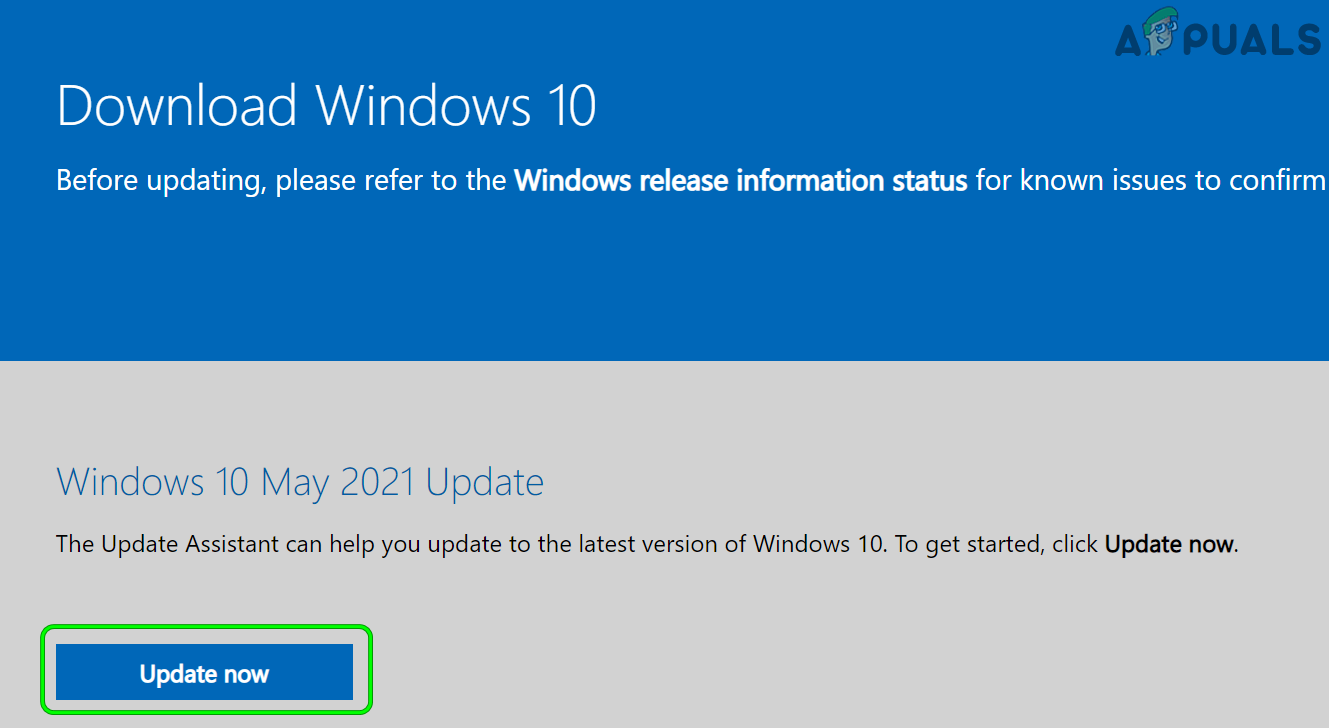
- Launch a web browser and head to the Windows 10 portion of the Microsoft website.
- Now, under the latest Windows Update assistant, click on Update Now and let the update assistant download.

Download Latest Windows Update Assistant by Clicking on Update Now - Afterward, open the setup file of the assistant as administrator and follow the prompts to check if the system can be updated without error 0x800707e7.
Setting the Indexing Location of Your PC to the Default Path
Many users or applications love to customize their PCs as per their requirements. In this process, sometimes they change the Indexing Location path of their system, whereas, some of the Windows Updates require this path to be on the OS drive or on the default setting.
If this path is not set to its default setting on your system, then the updates may fail to install with the update error 0x800707e7 and the same can be fixed by setting the path of the Indexing Location of Your PC to the default.
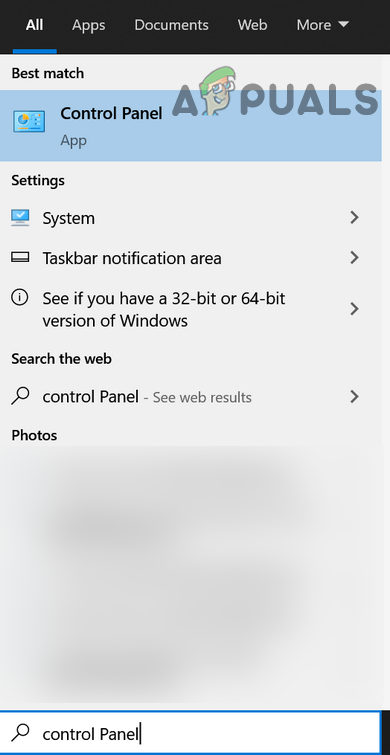
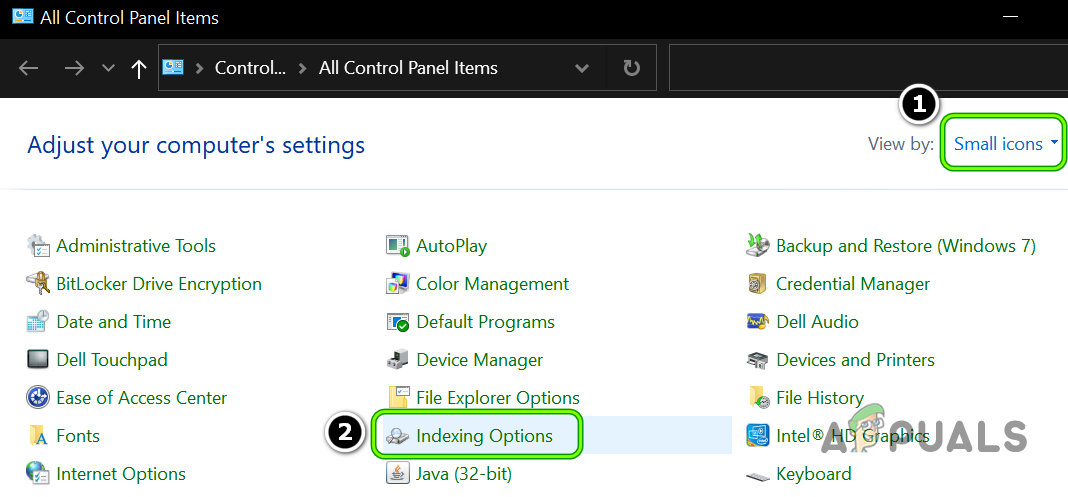
- Click Windows and search for Control Panel. Then open Control Panel.

Open Control Panel - Now click on View by and select Small Icons.

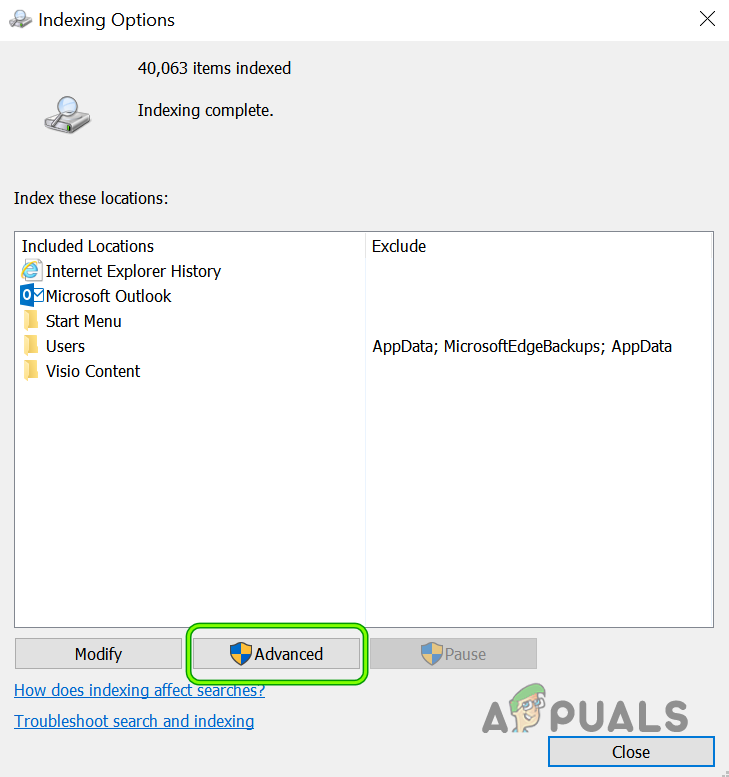
Open Indexing Options in the Control Panel - Then select Indexing Options and in the resulting window, click on the Advanced button (near the bottom of the window).

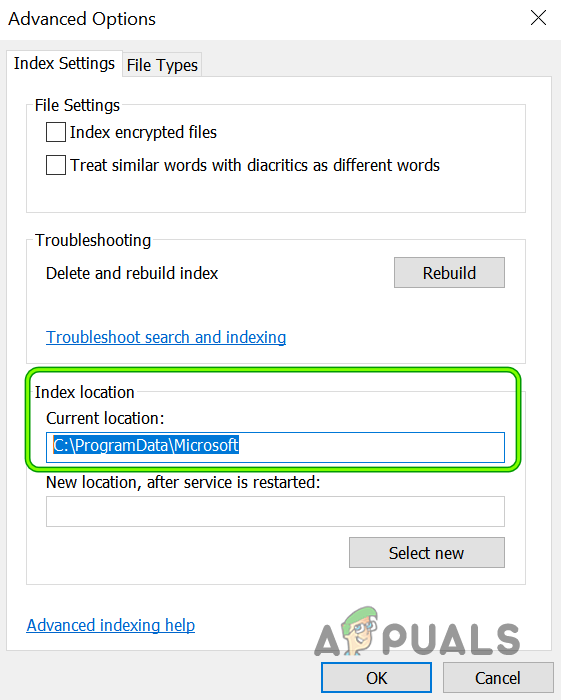
Open Advanced Indexing Options - Now make sure the Current Location under Index Location is set to the following path (you may use the Select New button to set it if the path is a different one):
C:ProgramDataMicrosoft

Set Indexing Location to Defaults - Then apply your changes and reboot your PC (if required). Afterward, check if your PC is clear of the update error 0x800707e7.
Run the SFC & DISM Scans on Your System
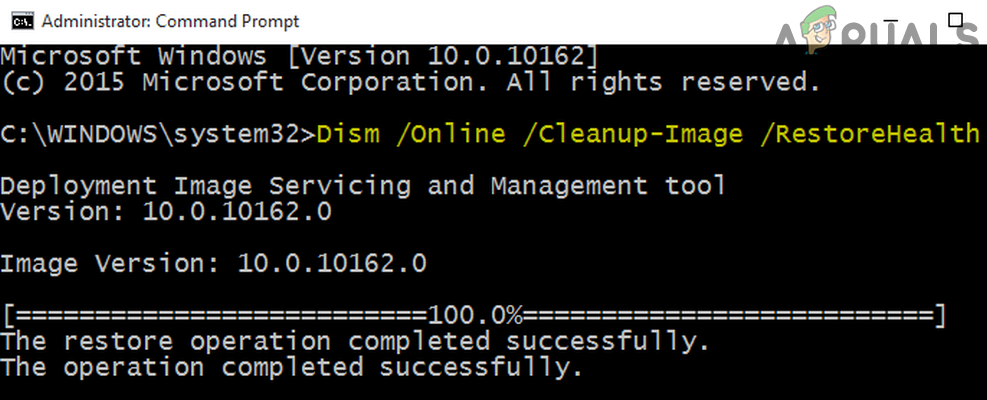
The system files can become corrupt due to many factors like a power failure or if an essential system file is deleted by the antivirus of your system after marking it as a threat (as a result of false-positive). If the essential system files are corrupt, the update under question might fail to install. In this context, using the DISM and SFC scans to clear the files’ corruption may solve the problem.
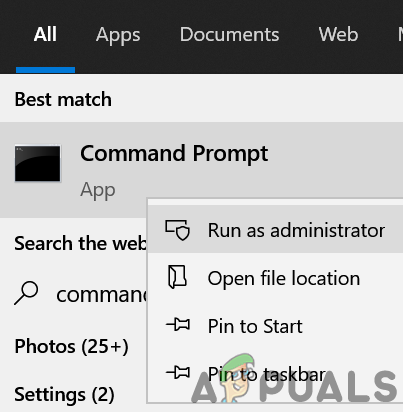
- Click Windows and search for Command Prompt.
- Now, right-click on Command Prompt and select Run as Administrator.

Open Command Prompt as Administrator - Then execute the following (it may take around 20-30 minutes):
Dism /Online /Cleanup-Image /RestoreHealth

Use the DISM Command to RestoreHealth - Once completed, execute the following command (preferably overnight, as this can take some extended time to complete):
SFC /scannow

Perform an SFC Scan - Once executed, check if your system can install the problematic update without encountering the error code 0x800707e7.

Reset the Windows Update Components to the Defaults
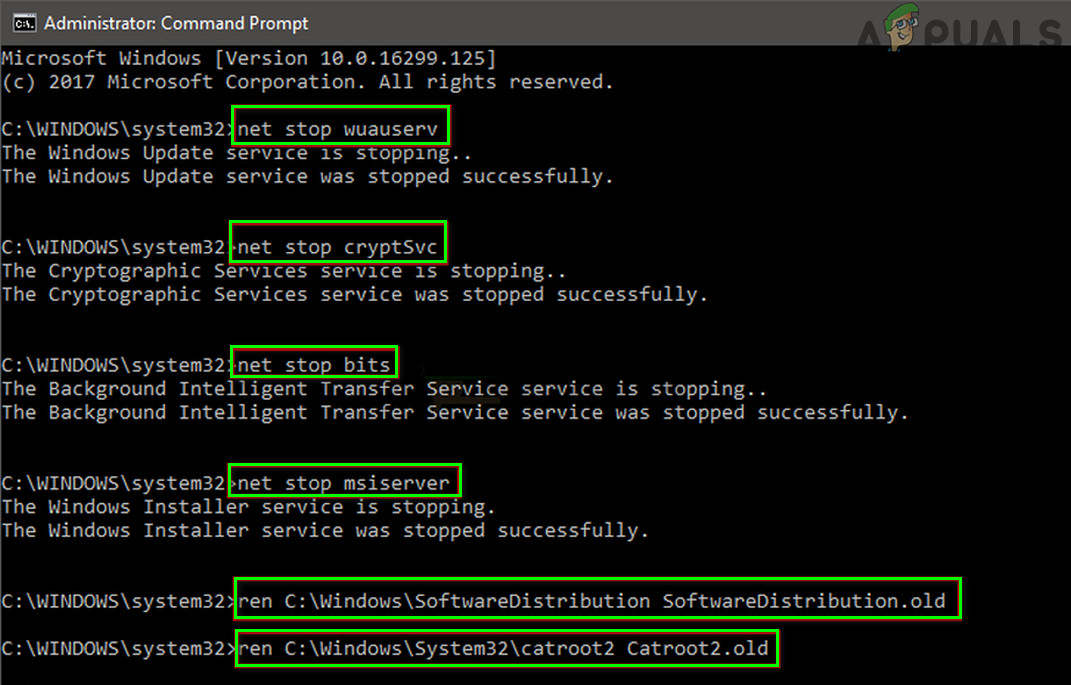
Windows Update temporarily downloads its files to many system folders like the Software Distribution and Catroot2 folders before propagating to the relevant system directories and if the contents of any of these folders are corrupt, the future updates might fail to install with error 0x800707e7. In this scenario, resetting the Windows Update Components i.e., either rename these folders or delete their contents may solve the problem.
- Click Windows and search Command Prompt. Now right-click on the result of Command Prompt and in the sub-menu, select Run as Administrator.
- Then execute the following by copy-pasting the commands one by one (do not forget to press the Enter key after each cmdlet):
net stop wuauserv

net stop cryptSvc

net stop bits

net stop msiserver

ren C:WindowsSoftwareDistribution SoftwareDistribution.old

ren C:WindowsSystem32catroot2 Catroot2.old

net start wuauserv

net start cryptSvc

net start bits

net start msiserver

Stop the Services Related To Update & Rename the Software Distribution and Catroot2 Folders - Now close the Command Prompt window and check if the update error 0x800707e7 is cleared.
Uninstall the Conflicting Applications
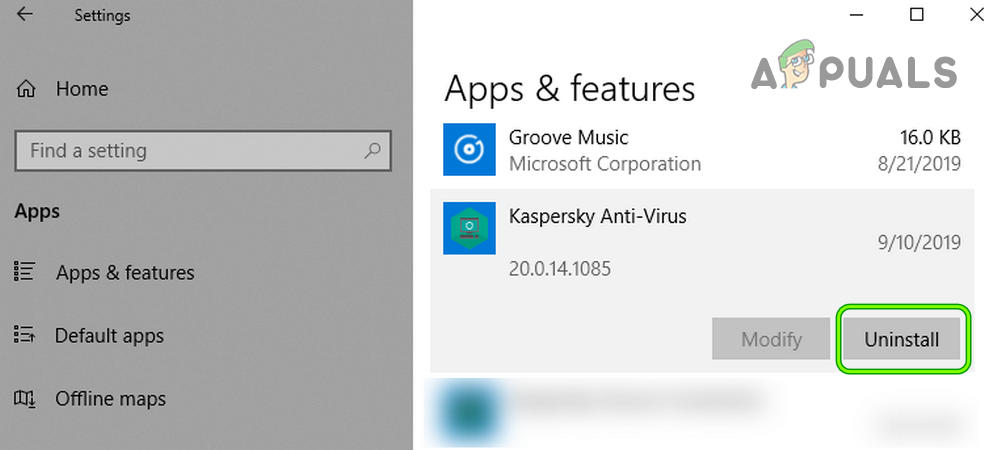
There are many applications (like SQL Server) that create hidden users’ profiles on your system to complete their operation but these profiles may hinder the update process and thus cause the update error 0x800707e7. In this scenario, uninstalling the conflicting applications (like antivirus, etc.) may solve the problem. Following are the applications reported by users to trigger the issue:
- SQL Server
- Kaspersky Antivirus (it will be better to remove any third-party security product but at your own risk as uninstalling the security product may expose your data/system to threats)
- Microsoft’s Zune Software
- Nvidia Drivers
If you have any of these or a similar application, then you may uninstall it. For illustration, we will discuss the uninstallation process of the Kaspersky Antivirus.
- Right-click Windows and open Apps & Features.
- Now expand Kaspersky and click on the Uninstall button.

Uninstall the Kaspersky Anti-Virus - Then confirm to initiate the uninstall process of Kaspersky and follow the prompts to complete the uninstallation process.
- Once completed, reboot your PC, and upon reboot, check if your system is clear of the error 0x800707e7.
Delete the Unknown User Profiles from the System Properties
Your system might fail to install the update in question with error 0x800707e7 if there are corrupt or unwanted user profiles (usually from an uninstalled application) on your system. In this context, deleting the corrupt or unwanted user profile may solve the problem. Before proceeding, it will be better to create a system restore point (to be on the safer side).
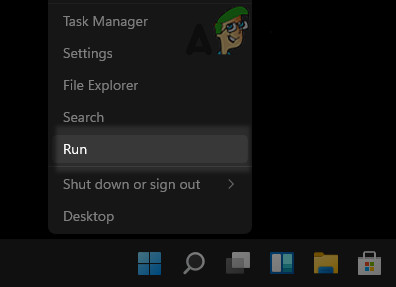
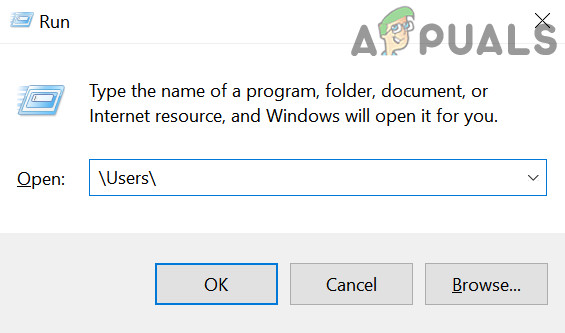
- Right-click Windows and select Run.

Open the Run Command Box from the Quick Access Menu - Now, navigate to the following:
users

Open Users Folder Through the Run Box - Then check if there are user profiles folders that are not required or identified by you (you may have to enable viewing of hidden files/ folders and protected system files). If so, then you may back up the contents of the user folders that you do not need.
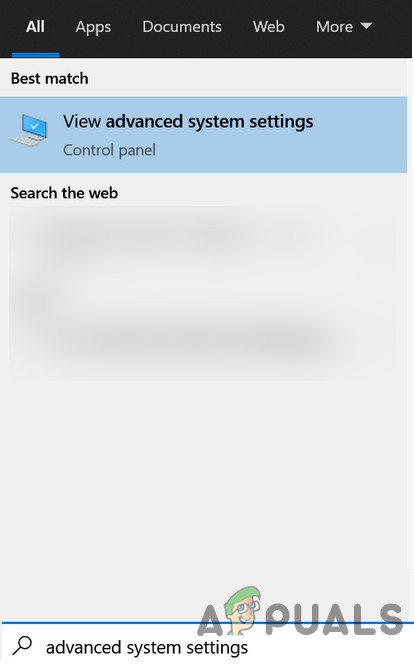
- Now, click Windows and search for Advanced System Settings.

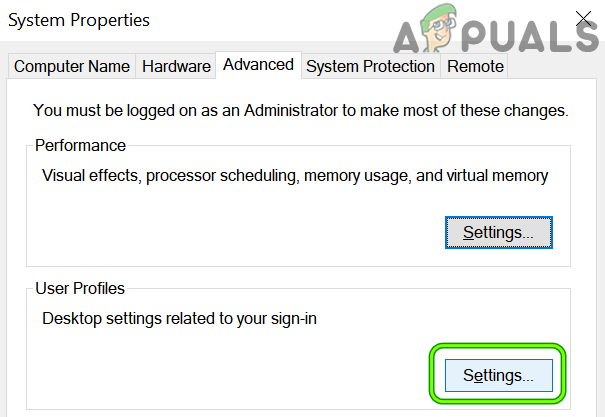
Open Advanced System Settings - Then open View Advanced System Settings and under User Profiles, click on Settings.

Open User Profiles Settings in the Advanced System Settings - Now check if the unknown user profiles are shown here, if so, then select the unknown profile, and click on Delete. Make sure you are not deleting an essential user profile.
- Then confirm to delete the profile and repeat the same for all other unknown profiles.
- Afterward, reboot your PC and upon reboot, check if the problematic Windows update can be applied to your system without triggering the error 0x800707e7.
Edit the System’s Registry to Delete the Corrupt User Profile Entries
If deleting the user profile did not work for you then most probably a corrupt user profile entry, even though it does not exist on the system might be triggering the issue at hand. Before moving on, it is essential to create a backup of your system’s registry (just to be safe). Also, if you are one of those advanced users who have shifted their user profiles to a non-OS drive by editing the registry, then you may revert the same to complete the update process.
Warning:
Advance at your own risk as editing the PC’s registry can be a risky task (if not done properly) and you may cause everlasting damage to your PC/data.
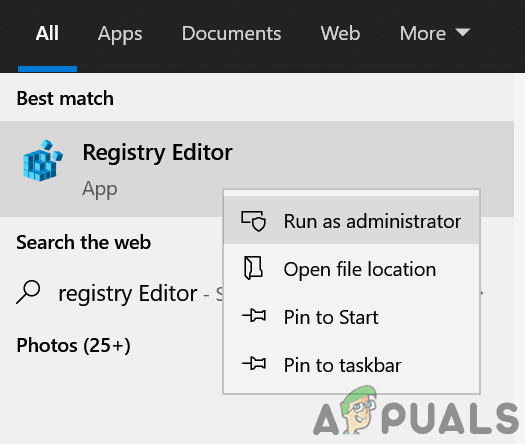
- Click Windows and search for Registry Editor.
- Now right-click on Registry Editor and in the sub-menu, click on Run as Administrator.

Open Registry Editor as Administrator - Then navigate to the following (copy-paste the address):
ComputerHKEY_LOCAL_MACHINESOFTWAREMicrosoftWindows NTCurrentVersionProfileList

Open the ProfileList Key in the Registry Editor - Now check if there is an unknown user account present there that you do not use. If so, delete that registry key and the relevant folder. Be extremely careful, do not delete a key referring to a valid user account.
You can check the folders under the ProfileList key in the left pane and explore the ProfileImagePath key to find out the problematic user profile. If any of the values of the ProfileList key has a .bak extension, you may delete that key as well.
Delete the Registry Key and Folder Referring to the Problematic User Profile - Then repeat the same to the following key:
ComputerHKEY_LOCAL_MACHINESOFTWAREWOW6432NodeMicrosoftWindows NTCurrentVersionProfileList

Delete the Sub-Key of the ProfileList With the .Bak Extension - Once done, reboot your PC after closing the editor’s window and upon reboot, check if the update issue 0x800707e7 is solved.

Run an In-Place Upgrade of Your PC’s Windows
If the issue is still there after trying the above solutions, then running an In-Place Upgrade of your PC’s Windows that will reinstall the OS while keeping your data/apps may clear the error 0x800707e7. Before moving on, make sure to back up essential files/data and create a system restore point.
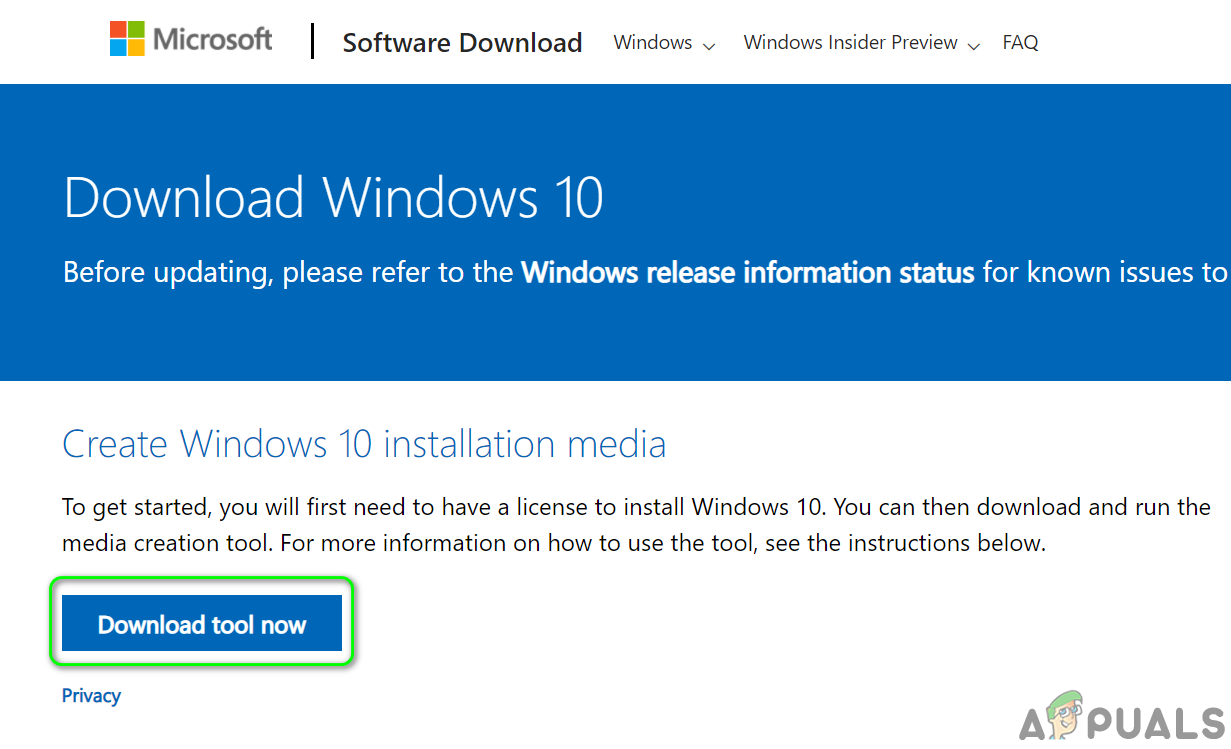
- Launch a web browser and steer to the Windows 10 portion of Microsoft’s website.
- Now click on the Download Tool Now button (in the section of Create Windows 10 Installation Media) and let it download.

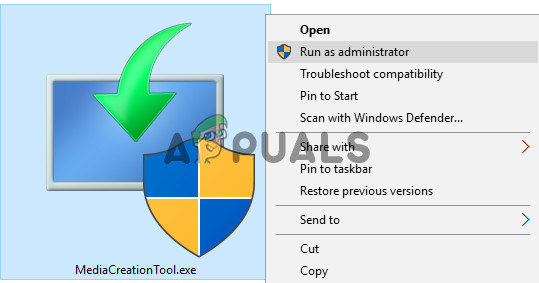
Download Media Creation Tool Now - Then, launch the Media Creation Tool as administrator and on the license terms page, click on the Accept button.

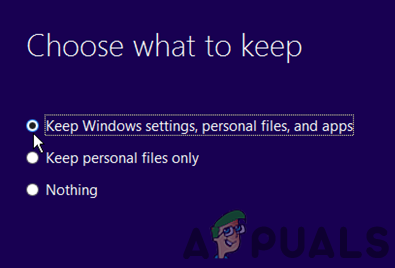
Launch the Media Creation Tool as Administrator - Now select the button of Upgrade This PC Now and follow the wizard’s prompts to complete the upgrade process but during the process, when asked to, select Keep Window Settings, Personal Files, and Apps.
- Once the upgrade process is complete, hopefully, your PC would be clear of the update error 0x800707e7.

Keep Windows Settings, Personal Files, and Apps
If everything else fails, then you may have to either reset your PC to the defaults or perform a clean installation of your PC to solve the update issue.

Kevin Arrows
Kevin Arrows is a highly experienced and knowledgeable technology specialist with over a decade of industry experience. He holds a Microsoft Certified Technology Specialist (MCTS) certification and has a deep passion for staying up-to-date on the latest tech developments. Kevin has written extensively on a wide range of tech-related topics, showcasing his expertise and knowledge in areas such as software development, cybersecurity, and cloud computing. His contributions to the tech field have been widely recognized and respected by his peers, and he is highly regarded for his ability to explain complex technical concepts in a clear and concise manner.