
In this guide, we will show you the steps to fix the ADB Sideload Status 1: Update package is older error. There exists quite a few methods through which you could flash a firmware or OTA update onto your device. The easiest and most straightforward approach is to directly download and install it from the device’s Settings menu. However, you might have to wait for quite some time before your device could actually get blessed with an update. This is because these updates are rolled out in batches.
As a result, only a handful of users receive it in the first go. Depending on which batch you belong to, it might end up taking days before it lands on your device. However, the users who have got the update usually capture the OTA file and upload it so that the ones who haven’t yet got the OTA could manually install this update onto their device right away, thereby skipping the long wait. As far as the installation process is concerned, well it’s the ADB sideload method that is the go-to choice for various users.
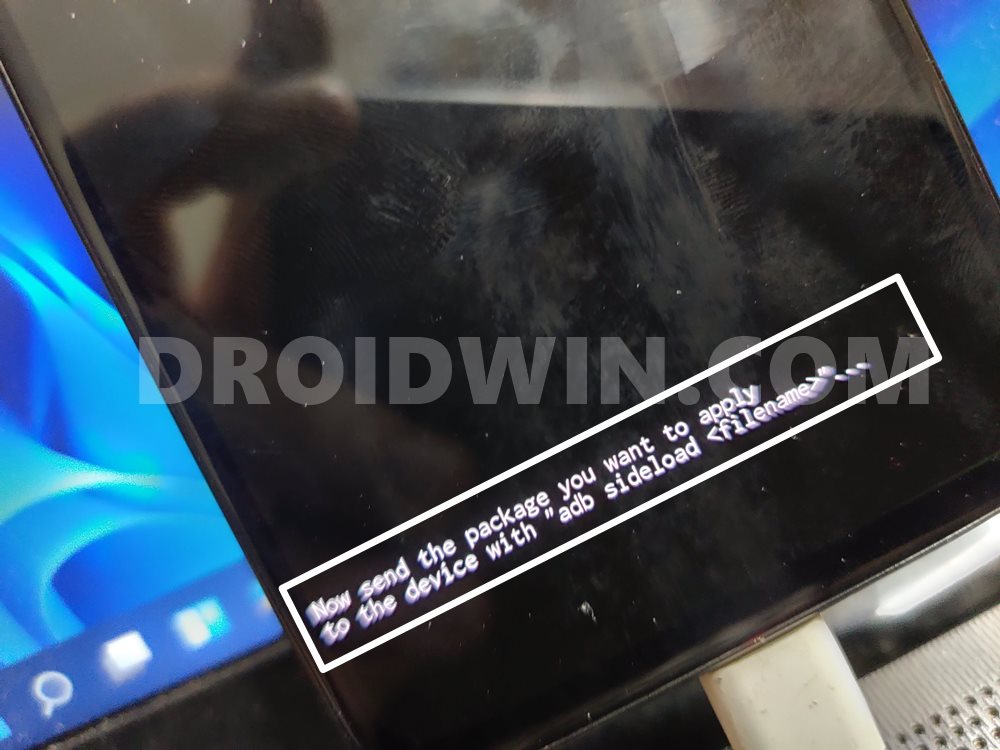
You just need to boot your device to recovery mode, select the sideload method and subsequently flash the update ZIP via the adb sideload filename.zip command. However, it’s proving to be easier said than done for some users. They have voiced their concern that they are getting the ADB Sideload Status 1: Update package is older error message. If you are also in the same boat, then fret not. In this guide, we will show you the steps to fix this issue once and for all. Follow along.
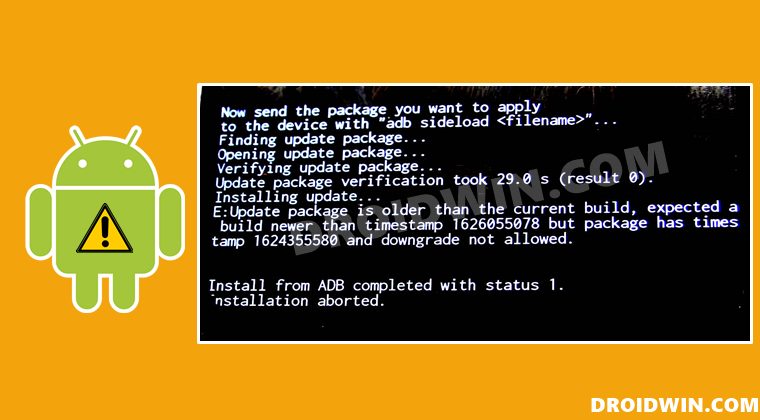
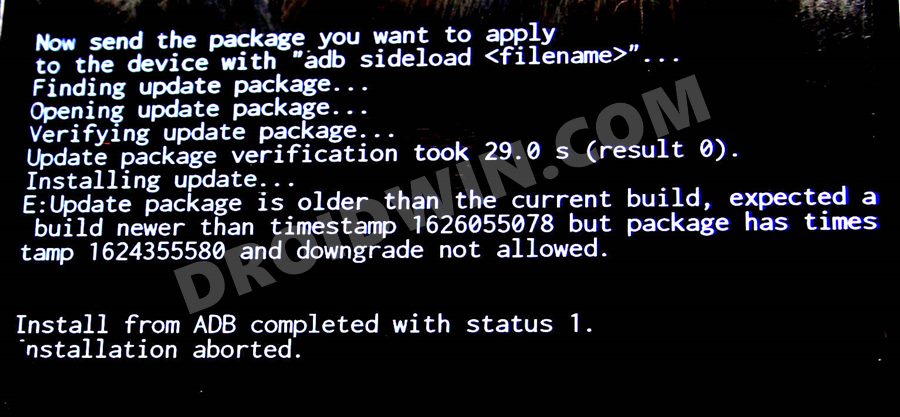
Let’s first have a look at the complete error message (here xxxxx is the newer firmware version and yyyyyy is the older one).
Update package is older than the current build, expected a build newer than timestamp xxxxxxx but package has timestamp yyyyyy and downgrade is not allowed
So what is actually happening is that the user is trying to perform a downgrade, i.e flashing an old firmware over the new one. For example, installing the November 2021 update over the January 2022 update [Pixel 6/Pro users might very well be aware of this!] or in drastic cases, installing Android 11 over Android 12. So isn’t that allowed? Well, downgrading and rollbacking to an earlier security patch or even to an earlier OS is completely allowed, but not via this method.
You see, when you are flashing an older update file over the current one, then all the partitions would be flashed via their respective IMG (and BIN) files. But a flashing process is only possible in an unlocked bootloader, whereas the users who are currently getting this error are trying to downgrade on a locked bootloader, and hence are greeted with this error message. Apart from that, even if you have an unlocked bootloader, you might still get this error message.
This is because the stock sideloading process has never been designed to perform a downgrade. So if you try downgrading via sideloading, you are bound to get the ADB Sideload Status 1: Update package is older error message. So how to rectify this issue? Well, if you wish to downgrade or roll back to an earlier build, then you will have to bid adieu to the ADB Sideload and rather try out alternate ways of firmware flashing.
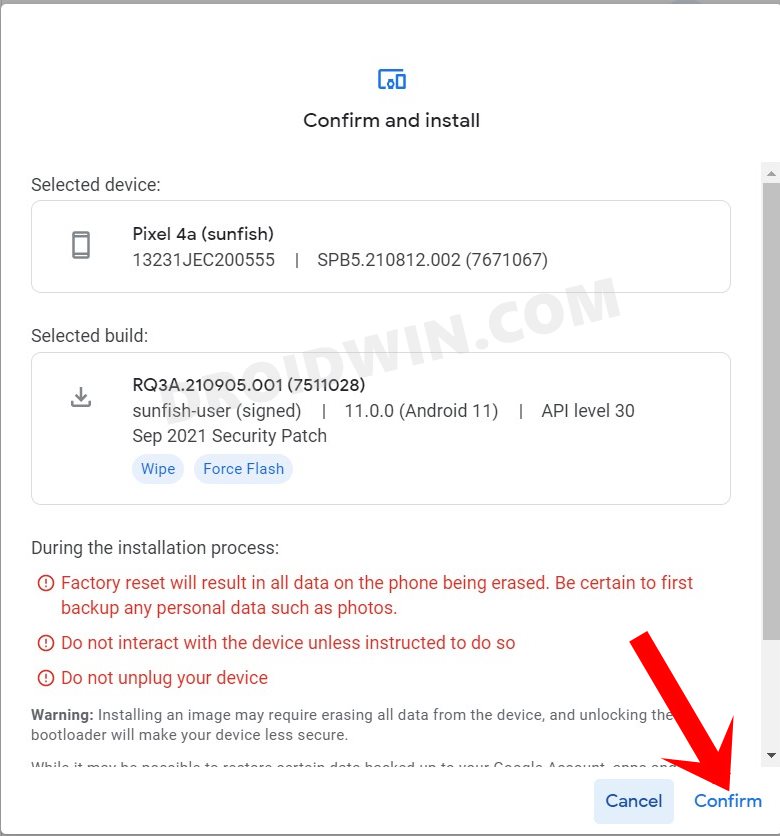
To be more specific, you could either use the Fastboot Commands or your OEM-specific tools. such as Android Flash Tool for Pixel/Mi Flash Tool for Xiaomi, etc. Both these methods support the downgrading process, but the Flash Tool method is usually preferred as it is much easier to execute. However, if you want more granular controls over this process, then you should opt for the Fastboot Command.
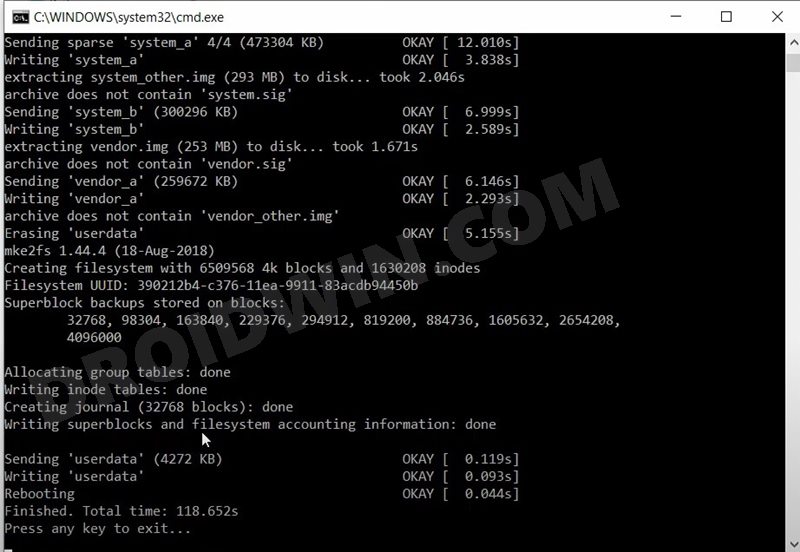
But do keep in mind that no matter which method you go for, you will first have to unlock the bootloader on your device. Apart from that, the downgrading process will wipe off all the data from your device. So if that’s well and good, then you may refer to the below resource guides to perform a downgrade:
- How to Unlock the Bootloader of Any Android Device
- Guide to Flash Stock Firmware via Fastboot Commands
- How to Downgrade Pixel Devices via Android Flash Tool
- How to Downgrade Pixel Devices via Fastboot Commands
- Install MIUI Fastboot ROM in Xiaomi, Mi, Redmi, Poco Devices
So with this, we conclude the guide on how you could fix the ADB Sideload Status 1: Update package is older error message. In a nutshell, the reason for this error is that you aren’t allowed to perform a downgrade via ADB Sideload. So opt for the Fastboot Command or Flash Tool method and have your device’s bootloader unlocked, you will then be able to easily carry out the downgrade. On that note, we round off this tutorial. If you have any queries, then do let us know via the comments section below.
- How to Install Custom ROM on Android via ADB Sideload
- ADB Sideload not working: Cannot Read File [Fixed]
- How to Use ADB Sideload in Android [Stock and TWRP Recovery]
- ADB Unable to Allocate Bytes Error: How to Fix
About Chief Editor

Sadique Hassan
administrator
A technical geek by birth, he always has a keen interest in the Android platform right since the birth of the HTC Dream. The open-source environment always seems to intrigue him with the plethora of options available at his fingertips. “MBA by profession, blogger by choice!”
EDIT: Had to send the phone back as the bootloader was locked and nothing was flashing. I believe they EDL flashed it and all is good now. Unlocked the bootloader on the new one just in case this happens again, I will be able to fix 
BACKSTORY:
Okay, so I recently updated to MiUI 12 and it wasn’t great. My apps were crashing all the time and the general stability was not good. (this was around a week ago)
Then earlier today, my device just went into the boot screen (the colourful MiUI one) and stayed there for over 30 mins.
I forcefully restarted my phone using the volume buttons and it would go into the first «Mi powered by android» screen and then back into the colourful MiUI screen.
Then it would stay in the MiUI screen for a minute or so, and then restart itself, continually repeating the process.
At this stage, I had no custom recovery, had not tried to tinker with the phone (other than disabling some default apps through FastbootTools), and everything was fine until MiUI 12 came.
WHAT I DID:
I was able to access the default XiaoMi recovery (3.0?) and tried to wipe the data and restart, but nothing would change.
I tried to use the MiPC Suite after selecting in recovery, but it would recognise my device, even after updating to latest version.
I tried to use FastBootTools, but that would also not recognise my device.
I tried to use XiaoMiTool V2 (by Francesco Tescari), and that did recognise my device. I selected «my device is bricked» option and it did its thing, downloading and trying to sideload something. And then on the device, it got stuck at 4.99% with a message «You won’t be able to turn on your device if you try to reboot it», and on the XiaoMiTool, the progress was at around 400% and said -70 seconds remaining, and around 40000MB / 3000 MB or something along those lines. Basically, shit was fucked.
So I just let it sit there for a bit and then the XiaoMiTool V2 gave and error, «miui sideload failed adb execution exception adb sideload exited with status 1»
I had 3 options,
-
«Retry step»
-
«Go back to previous step»
-
«Cancel and abort»
I tried to search what the error was, but all of the results came from years ago, for different devices. So I clicked «Cancel and abort», only for the device to remain unchanged (4.99%, You won’t be able to turn on your device if you try to reboot it), while the XiaoMiTool V2 went back to the start screen.
So I tried it again, the «my device is bricked option», and went through the same steps, and now it is stuck at «Pushing file to the device via ADB, …, Starting MIUI sideload procedure».
Now I am stuck. My phone screen just says
«4.99%, You won’t be able to turn on your device if you try to reboot it»
and my XiaoMiTool is stuck on the beginning sideload procedure.
Closing
If you managed to read this far, thanks, even if you don’t have a solution. I appreciate anything that could help with this situation.
В этом руководстве мы покажем вам шаги по исправлению ошибки ADB Sideload Status 1: Update package is old. Существует довольно много способов, с помощью которых вы можете установить прошивку или обновление OTA на свое устройство. Самый простой и простой способ — загрузить и установить его напрямую из меню «Настройки» устройства. Однако вам, возможно, придется подождать некоторое время, прежде чем ваше устройство действительно получит обновление. Это связано с тем, что эти обновления выпускаются партиями.
В результате только несколько пользователей получают его с первого раза. В зависимости от того, к какой партии вы принадлежите, может пройти несколько дней, прежде чем она попадет на ваше устройство. Однако пользователи, получившие обновление, обычно захватывают файл OTA и загружают его, чтобы те, кто еще не получил OTA, могли сразу же вручную установить это обновление на свое устройство, тем самым минуя долгое ожидание. Что касается процесса установки, то метод боковой загрузки ADB является предпочтительным выбором для различных пользователей.
 Неопубликованная загрузка ADB в процессе
Вам просто нужно загрузить устройство в режим восстановления, выбрать метод боковой загрузки, а затем прошить ZIP-файл обновления через имя файла боковой загрузки adb.zip команда. Однако для некоторых пользователей это оказывается легче сказать, чем сделать. Они выразили обеспокоенность тем, что получают сообщение об ошибке ADB Sideload Status 1: Update package is old. Если вы тоже в одной лодке, то не волнуйтесь. В этом руководстве мы покажем вам, как решить эту проблему раз и навсегда. Следуйте вместе.
Давайте сначала посмотрим на полное сообщение об ошибке (здесь xxxxx — более новая версия прошивки, а yyyyyy — старая).
Пакет обновления старше текущей сборки, ожидается сборка новее, чем временная метка xxxxxxx, но пакет имеет временную метку yyyyyy, и переход на более раннюю версию не разрешен.
Так что на самом деле происходит то, что пользователь пытается выполнить даунгрейд, т.е. прошить старую прошивку поверх новой. Например, установка обновления за ноябрь 2021 г. вместо обновления за январь 2022 г. [Pixel 6/Pro users might very well be aware of this!] или, в крайних случаях, установка Android 11 поверх Android 12. Разве это не разрешено? Даунгрейд и откат на более ранний патч безопасности или даже на более раннюю ОС вполне разрешены, но не этим методом.
Видите ли, когда вы прошиваете старый файл обновления поверх текущего, тогда все разделы будут прошиты через соответствующие файлы IMG (и BIN). Но процесс перепрошивки возможен только при разблокированном загрузчике, тогда как пользователи, которые в настоящее время получают эту ошибку, пытаются перейти на заблокированный загрузчик и, следовательно, получают это сообщение об ошибке. Кроме того, даже если у вас разблокирован загрузчик, вы все равно можете получить это сообщение об ошибке.
Это связано с тем, что процесс загрузки неопубликованной версии никогда не был рассчитан на понижение версии. Поэтому, если вы попытаетесь выполнить понижение версии с помощью боковой загрузки, вы обязательно получите сообщение об ошибке ADB Sideload Status 1: Update package is old. Итак, как исправить эту проблему? Что ж, если вы хотите понизить версию или вернуться к более ранней сборке, вам придется попрощаться с боковой загрузкой ADB и попробовать альтернативные способы прошивки.
Чтобы быть более конкретным, вы можете использовать команды Fastboot или свои инструменты OEM. например, Android Flash Tool для Pixel/Mi Flash Tool для Xiaomi и т. д. Оба эти метода поддерживают процесс понижения версии, но метод Flash Tool обычно предпочтительнее, поскольку его гораздо проще выполнить. Однако, если вам нужен более детальный контроль над этим процессом, вам следует выбрать команду Fastboot.
Но имейте в виду, что независимо от того, какой метод вы выберете, вам сначала придется разблокировать загрузчик на вашем устройстве. Кроме того, процесс понижения версии сотрет все данные с вашего устройства. Так что, если это хорошо, вы можете обратиться к приведенным ниже руководствам по ресурсам, чтобы выполнить понижение версии:
Итак, на этом мы завершаем руководство о том, как можно исправить сообщение об ошибке ADB Sideload Status 1: Update package is old. В двух словах, причина этой ошибки в том, что вам не разрешено выполнять понижение версии через ADB Sideload. Поэтому выберите метод Fastboot Command или Flash Tool и разблокируйте загрузчик вашего устройства, после чего вы сможете легко выполнить понижение версии. На этой ноте мы завершаем этот урок. Если у вас есть какие-либо вопросы, сообщите нам об этом через раздел комментариев ниже.
Forewords
This question gets the first result from Google, so my answer covers a bit different error.
The error in question has [INSTALL_FAILED_INSUFFICIENT_STORAGE] code. My answer is for any Performing Streamed Install error that does not specifically define [INSTALL_FAILED_INSUFFICIENT_STORAGE] code.
My Environment
- KDE Neon 5.24 (a.k.a. Ubuntu 20.04 but latest KDE stuff)
- Visual Studio Code from Snap (I use this mainly)
- Android Studio from Snap (I use this to install SDK, Platform Tools and Build Tools)
Troubleshooting
The problem is this globally installed /usr/bin/adb overrides the adb that Flutter uses. As you know, Ubuntu has many outdated packages (to protect their system’s stability). ADB is one of them. So, if you try to do:
adb kill-server
adb start-server
You will highly likely get an output similar to below:
* daemon not running; starting now at tcp:5037
ADB server didn't ACK
Full server startup log: /tmp/adb.1000.log
Server had pid: 12668
--- adb starting (pid 12668) ---
adb I 03-26 03:19:35 12668 12668 main.cpp:57] Android Debug Bridge version 1.0.39
adb I 03-26 03:19:35 12668 12668 main.cpp:57] Version 1:8.1.0+r23-5ubuntu2
adb I 03-26 03:19:35 12668 12668 main.cpp:57] Installed as /usr/lib/android-sdk/platform-tools/adb
adb I 03-26 03:19:35 12668 12668 main.cpp:57]
adb I 03-26 03:19:35 12668 12668 adb_auth_host.cpp:416] adb_auth_init...
adb I 03-26 03:19:35 12668 12668 adb_auth_host.cpp:174] read_key_file '/home/erayerdin/.android/adbkey'...
adb I 03-26 03:19:35 12668 12668 adb_auth_host.cpp:391] adb_auth_inotify_init...
adb I 03-26 03:19:35 12668 12668 adb_auth_host.cpp:467] Calling send_auth_response
adb server killed by remote request

* failed to start daemon
error: cannot connect to daemon
In some flutter run sessions, I’ve got an output similar to «adb server version (whatever) does not match the client (whatever); killing». That’s when I had the doubt maybe I have installed adb globally. Check this:
which adb
# /usr/bin/adb
# This is a sign that this adb might be globally installed.
# This must be a symlink. Just to make sure, I do the following...

realpath /usr/bin/adb
# /usr/lib/android-sdk/platform-tools
# This is the evidence that it has been installed globally.
So, we use an outdated version of adb, which does not match the target device’s adb server.
Solution
So, we need to get rid of this global adb first.
⚠ Warning
If you use
adbfrom terminal, what we are going to do will remove it. You can add your{SDK PATH}/platform-toolswhereSDK PATHis where you have installed SDK to get it back.
Simply do:
sudo apt remove android-sdk android-sdk-common android-sdk-build-tools android-sdk-build-tools-common android-sdk-platform-tools android-sdk-platform-tools-common
However, doing these actually does not remove adb from the system. It still lays there for some reason, so, for the last step, we do:
# simply backup our symlink
sudo mv /usr/bin/adb /usr/bin/adb.bak

# and backup global android-sdk tools
sudo mv /usr/lib/android-sdk /usr/lib/android-sdk.bak
After these steps, you can restart your editor and try again. If you want to make double sure, you can optionally do (while your editor’s closed):
# clean the build artifacts
flutter clean

# reinstall the packages because we have cleared them
flutter pub get
flutter pub get packages
#34001 (comment)
@VladyslavBondarenko hie thanks for the response.Well it did kind of help i wiped out the data from the virtual device and it started working but when i hit flutter run, the virtual device would freeze or just stop itself and then the logs would end like this
C:AndroidStudioProjectsflutterapptest_project>flutter run
Using hardware rendering with device AOSP on IA Emulator. If you get graphics artifacts, consider enabling software
rendering with «—enable-software-rendering».
Launching libmain.dart on AOSP on IA Emulator in debug mode…
Running Gradle task ‘assembleDebug’…
Running Gradle task ‘assembleDebug’… Done 1260,5s (!)
√ Built buildappoutputsapkdebugapp-debug.apk.
Installing buildappoutputsapkapp.apk…
167,2s (!)
D/FlutterActivity( 5482): Using the launch theme as normal theme.
D/FlutterActivityAndFragmentDelegate( 5482): Setting up FlutterEngine.
D/FlutterActivityAndFragmentDelegate( 5482): No preferred FlutterEngine was provided. Creating a new FlutterEngine for this FlutterFragment.
Flutter is taking longer than expected to report its views. Still trying…
Syncing files to device AOSP on IA Emulator…
D/FlutterActivityAndFragmentDelegate( 5482): Attaching FlutterEngine to the Activity that owns this Fragment.
D/OpenGLRenderer( 5482): Skia GL Pipeline
D/FlutterView( 5482): Attaching to a FlutterEngine: io.flutter.embedding.engine.FlutterEngine@244933f
W/le.test_projec( 5482): Accessing hidden method Landroid/view/accessibility/AccessibilityNodeInfo;->getSourceNodeId()J (light greylist, reflection)
W/le.test_projec( 5482): Accessing hidden method Landroid/view/accessibility/AccessibilityRecord;->getSourceNodeId()J (light greylist, reflection)
W/le.test_projec( 5482): Accessing hidden field Landroid/view/accessibility/AccessibilityNodeInfo;->mChildNodeIds:Landroid/util/LongArray; (light greylist, reflection)
W/le.test_projec( 5482): Accessing hidden method Landroid/util/LongArray;->get(I)J (light greylist, reflection)
D/FlutterActivityAndFragmentDelegate( 5482): Executing Dart entrypoint: main, and sending initial route: /
I/Choreographer( 5482): Skipped 302 frames! The application may be doing too much work on its main thread.
I/OpenGLRenderer( 5482): Initialized EGL, version 1.4
D/OpenGLRenderer( 5482): Swap behavior 1
D/HostConnection( 5482): HostConnection::get() New Host Connection established 0xe2b70150, tid 5863
D/HostConnection( 5482): HostConnection::get() New Host Connection established 0xe57a1140, tid 5503
D/HostConnection( 5482): HostComposition ext ANDROID_EMU_CHECKSUM_HELPER_v1 ANDROID_EMU_native_sync_v2 ANDROID_EMU_native_sync_v3 ANDROID_EMU_native_sync_v4 ANDROID_EMU_dma_v1 ANDROID_EMU_YUV420_888_to_NV21 ANDROID_EMU_YUV_Cache ANDROID_EMU_async_unmap_buffer GL_OES_EGL_image_external_essl3 GL_OES_vertex_array_object GL_KHR_texture_compression_astc_ldr ANDROID_EMU_gles_max_version_3_1
D/HostConnection( 5482): HostComposition ext ANDROID_EMU_CHECKSUM_HELPER_v1 ANDROID_EMU_native_sync_v2 ANDROID_EMU_native_sync_v3 ANDROID_EMU_native_sync_v4 ANDROID_EMU_dma_v1 ANDROID_EMU_YUV420_888_to_NV21 ANDROID_EMU_YUV_Cache ANDROID_EMU_async_unmap_buffer GL_OES_EGL_image_external_essl3 GL_OES_vertex_array_object GL_KHR_texture_compression_astc_ldr ANDROID_EMU_gles_max_version_3_1
W/OpenGLRenderer( 5482): Failed to choose config with EGL_SWAP_BEHAVIOR_PRESERVED, retrying without…
D/OpenGLRenderer( 5482): Swap behavior 0
D/eglCodecCommon( 5482): setVertexArrayObject: set vao to 0 (0) 0 0
D/EGL_emulation( 5482): eglCreateContext: 0xe57851e0: maj 3 min 1 rcv 4
D/eglCodecCommon( 5482): setVertexArrayObject: set vao to 0 (0) 0 0
D/EGL_emulation( 5482): eglCreateContext: 0xe3d32a00: maj 3 min 1 rcv 4
D/EGL_emulation( 5482): eglMakeCurrent: 0xe3d32a00: ver 3 1 (tinfo 0xe3d7c670)
E/eglCodecCommon( 5482): glUtilsParamSize: unknow param 0x000082da
E/eglCodecCommon( 5482): glUtilsParamSize: unknow param 0x000082da
D/HostConnection( 5482): createUnique: call
D/HostConnection( 5482): HostConnection::get() New Host Connection established 0xe57a1190, tid 5503
E/eglCodecCommon( 5482): GoldfishAddressSpaceHostMemoryAllocator: ioctl_ping failed for device_type=5, ret=-1
D/HostConnection( 5482): HostComposition ext ANDROID_EMU_CHECKSUM_HELPER_v1 ANDROID_EMU_native_sync_v2 ANDROID_EMU_native_sync_v3 ANDROID_EMU_native_sync_v4 ANDROID_EMU_dma_v1 ANDROID_EMU_YUV420_888_to_NV21 ANDROID_EMU_YUV_Cache ANDROID_EMU_async_unmap_buffer GL_OES_EGL_image_external_essl3 GL_OES_vertex_array_object GL_KHR_texture_compression_astc_ldr ANDROID_EMU_gles_max_version_3_1
D/EGL_emulation( 5482): eglMakeCurrent: 0xe57851e0: ver 3 1 (tinfo 0xe57836f0)
E/eglCodecCommon( 5482): glUtilsParamSize: unknow param 0x000082da
E/eglCodecCommon( 5482): glUtilsParamSize: unknow param 0x000082da
I/Choreographer( 5482): Skipped 1683 frames! The application may be doing too much work on its main thread.
D/EGL_emulation( 5482): eglMakeCurrent: 0xe3d32a00: ver 3 1 (tinfo 0xe3d7c670)
D/eglCodecCommon( 5482): setVertexArrayObject: set vao to 0 (0) 1 2
I/OpenGLRenderer( 5482): Davey! duration=134875ms; Flags=1, IntendedVsync=2243599484209, Vsync=2271649483087, OldestInputEvent=9223372036854775807, NewestInputEvent=0, HandleInputStart=2271653219400, AnimationStart=2271653292800, PerformTraversalsStart=2271653312800, DrawStart=2271659659500, SyncQueued=2293522279700, SyncStart=2294562086000, IssueDrawCommandsStart=2294562257900, SwapBuffers=2365554445600, FrameCompleted=2379515031400, DequeueBufferDuration=4473659000, QueueBufferDuration=1135000,
I/Choreographer( 5482): Skipped 2571 frames! The application may be doing too much work on its main thread.
I/OpenGLRenderer( 5482): Davey! duration=66801ms; Flags=0, IntendedVsync=2409835137997, Vsync=2452685136283, OldestInputEvent=9223372036854775807, NewestInputEvent=0, HandleInputStart=2452697355600, AnimationStart=2452697499900, PerformTraversalsStart=2452701819700, DrawStart=2452709301600, SyncQueued=2452709346300, SyncStart=2452709472100, IssueDrawCommandsStart=2452709657600, SwapBuffers=2452710154400, FrameCompleted=2476637233900, DequeueBufferDuration=23705921000, QueueBufferDuration=7549000,
D/EGL_emulation( 5482): eglMakeCurrent: 0xe57851e0: ver 3 1 (tinfo 0xe57836f0)
D/eglCodecCommon( 5482): setVertexArrayObject: set vao to 0 (0) 1 0
I/Choreographer( 5482): Skipped 116 frames! The application may be doing too much work on its main thread.
Lost connection to device.
Syncing files to device AOSP on IA Emulator…
C:AndroidStudioProjectsflutterapptest_project>
@Vuyisile619 let’s keep conversation in your issue.
Could you provide your flutter doctor -v and flutter run --verbose?