
Ошибки Kyocera ECOSYS M2030dn
Ошибки Kyocera ECOSYS M2030pn
Ошибки Kyocera ECOSYS M2035dn
Ошибки Kyocera ECOSYS M2040dn
Ошибки Kyocera ECOSYS M2135dn
Ошибки Kyocera ECOSYS M2530dn
Ошибки Kyocera ECOSYS M2535dn
Ошибки Kyocera ECOSYS M2540dn
Ошибки Kyocera ECOSYS M2540dw
Ошибки Kyocera ECOSYS M2635dn
Ошибки Kyocera ECOSYS M2635dw
Ошибки Kyocera ECOSYS M2640idw
Ошибки Kyocera ECOSYS M3040dn
Ошибки Kyocera ECOSYS M3040idn
Ошибки Kyocera ECOSYS M3145dn
Ошибки Kyocera ECOSYS M3145idn
Ошибки Kyocera ECOSYS M2735dw
Ошибки Kyocera ECOSYS M3540dn
Ошибки Kyocera ECOSYS M3540idn
Ошибки Kyocera ECOSYS M3550idn
Ошибки Kyocera ECOSYS M3560idn
Ошибки Kyocera ECOSYS M3645dn
Ошибки Kyocera ECOSYS M3645idn
Ошибки Kyocera ECOSYS M3655idn
Ошибки Kyocera ECOSYS M3660idn
Ошибки Kyocera ECOSYS M3860idn
Ошибки Kyocera ECOSYS M3860idn
Ошибки Kyocera ECOSYS M4125idn
Ошибки Kyocera ECOSYS M4132idn
Ошибки Kyocera ECOSYS M5521cdn
Ошибки Kyocera ECOSYS M5521cdw
Ошибки Kyocera ECOSYS M5526cdn
Ошибки Kyocera ECOSYS M5526cdw
Ошибки Kyocera ECOSYS M6026cdn
Ошибки Kyocera ECOSYS M6026cidn
Ошибки Kyocera ECOSYS M6030cdn
Ошибки Kyocera ECOSYS M6035cidn
Ошибки Kyocera ECOSYS M6230cidn
Ошибки Kyocera ECOSYS M6235cidn
Ошибки Kyocera ECOSYS M6526cdn
Ошибки Kyocera ECOSYS M6526cidn
Ошибки Kyocera ECOSYS M6530cdn
Ошибки Kyocera ECOSYS M6535cidn
Ошибки Kyocera ECOSYS M6630cidn
Ошибки Kyocera ECOSYS M6635cidn
Ошибки Kyocera ECOSYS M8124cidn
Ошибки Kyocera ECOSYS M8130cidn
Ошибки Kyocera ECOSYS P2035d
Ошибки Kyocera ECOSYS P2040dn
Ошибки Kyocera ECOSYS P2040dw
Ошибки Kyocera ECOSYS P2135d
Ошибки Kyocera ECOSYS P2135dn
Ошибки Kyocera ECOSYS P2235dn
Ошибки Kyocera ECOSYS P2235dw
Ошибки Kyocera ECOSYS P3045dn
Ошибки Kyocera ECOSYS P3050dn
Ошибки Kyocera ECOSYS P3055dn
Ошибки Kyocera ECOSYS P3060dn
Ошибки Kyocera ECOSYS P3145dn
Ошибки Kyocera ECOSYS P3150dn
Ошибки Kyocera ECOSYS P3155dn
Ошибки Kyocera ECOSYS P3160dn
Ошибки Kyocera ECOSYS P3260dn
Ошибки Kyocera ECOSYS P4035dn
Ошибки Kyocera ECOSYS P4040dn
Ошибки Kyocera ECOSYS P5021cdn
Ошибки Kyocera ECOSYS P5021cdw
Ошибки Kyocera ECOSYS P5026cdn
Ошибки Kyocera ECOSYS P5026cdw
Ошибки Kyocera ECOSYS P6021cdn
Ошибки Kyocera ECOSYS P6026cdn
Ошибки Kyocera ECOSYS P6030cdn
Ошибки Kyocera ECOSYS P6035cdn
Ошибки Kyocera ECOSYS P6130cdn
Ошибки Kyocera ECOSYS P6230cdn
Ошибки Kyocera ECOSYS P6235cdn
Ошибки Kyocera ECOSYS P7035cdn
Ошибки Kyocera ECOSYS P7040cdn
Ошибки Kyocera ECOSYS P7240cdn
Ошибки Kyocera ECOSYS P8060cdn
Ошибки Kyocera FS-C8600DN
Ошибки Kyocera FS-C8650DN
Ошибки Kyocera FS1016MFP
Ошибки Kyocera FS1018MFP
Ошибки Kyocera FS1020MFP
Ошибки Kyocera FS1024MFP
Ошибки Kyocera FS1025MFP
Ошибки Kyocera FS1028MFP
Ошибки Kyocera FS1030MFP
Ошибки Kyocera FS1035MFP
Ошибки Kyocera FS1040
Ошибки Kyocera FS1050
Ошибки Kyocera FS1060DN
Ошибки Kyocera FS1100
Ошибки Kyocera FS1110
Ошибки Kyocera FS1116MFP
Ошибки Kyocera FS1118MFP
Ошибки Kyocera FS1120
Ошибки Kyocera FS1120MFP
Ошибки Kyocera FS1124MFP
Ошибки Kyocera FS1125MFP
Ошибки Kyocera FS1128MFP
Ошибки Kyocera FS1130MFP
Ошибки Kyocera FS1135MFP
Ошибки Kyocera FS1200
Ошибки Kyocera FS1220MFP
Ошибки Kyocera FS1300D
Ошибки Kyocera FS1320D
Ошибки Kyocera FS1320MFP
Ошибки Kyocera FS1325MFP
Ошибки Kyocera FS1350DN
Ошибки Kyocera FS1370DN
Ошибки Kyocera FS1500
Ошибки Kyocera FS6020
Ошибки Kyocera FS6025MFP
Ошибки Kyocera FS6025MFPB
Ошибки Kyocera FS6030MFP
Ошибки Kyocera FS6500
Ошибки Kyocera FS6525MFP
Ошибки Kyocera FS6530MFP
Ошибки Kyocera FS6700
Ошибки Kyocera FS6900
Ошибки Kyocera FS6950DN
Ошибки Kyocera FS8000CD
Ошибки Kyocera FS8000CN
Ошибки Kyocera FS8100DN
Ошибки Kyocera TASKalfa 180
Ошибки Kyocera TASKalfa 1800
Ошибки Kyocera TASKalfa 1801
Ошибки Kyocera TASKalfa 181
Ошибки Kyocera TASKalfa 205c
Ошибки Kyocera TASKalfa 220
Ошибки Kyocera TASKalfa 2200
Ошибки Kyocera TASKalfa 2201
Ошибки Kyocera TASKalfa 221
Ошибки Kyocera TASKalfa 2420w
Ошибки Kyocera TASKalfa 2460ci
Ошибки Kyocera TASKalfa 2470ci
Ошибки Kyocera TASKalfa 250ci
Ошибки Kyocera TASKalfa 2510i
Ошибки Kyocera TASKalfa 2520i
Ошибки Kyocera TASKalfa 255
Ошибки Kyocera TASKalfa 2550ci
Ошибки Kyocera TASKalfa 2551ci
Ошибки Kyocera TASKalfa 2552ci
Ошибки Kyocera TASKalfa 2553ci
Ошибки Kyocera TASKalfa 255b
Ошибки Kyocera TASKalfa 255c
Ошибки Kyocera TASKalfa 265ci
Ошибки Kyocera TASKalfa 300ci
Ошибки Kyocera TASKalfa 300i
Ошибки Kyocera TASKalfa 3010i
Ошибки Kyocera TASKalfa 3011i
Ошибки Kyocera TASKalfa 305
Ошибки Kyocera TASKalfa 3050ci
Ошибки Kyocera TASKalfa 3051ci
Ошибки Kyocera TASKalfa 306ci
Ошибки Kyocera TASKalfa 307ci
Ошибки Kyocera TASKalfa 308ci
Ошибки Kyocera TASKalfa 3212i
Ошибки Kyocera TASKalfa 3252ci
Ошибки Kyocera TASKalfa 3253ci
Ошибки Kyocera TASKalfa 3500i
Ошибки Kyocera TASKalfa 3501i
Ошибки Kyocera TASKalfa 350ci
Ошибки Kyocera TASKalfa 3510i
Ошибки Kyocera TASKalfa 3511i
Ошибки Kyocera TASKalfa 3550ci
Ошибки Kyocera TASKalfa 3551ci
Ошибки Kyocera TASKalfa 3552ci
Ошибки Kyocera TASKalfa 3553ci
Ошибки Kyocera TASKalfa 356ci
Ошибки Kyocera TASKalfa 358ci
Ошибки Kyocera TASKalfa 4002i
Ошибки Kyocera TASKalfa 4003i
Ошибки Kyocera TASKalfa 400ci
Ошибки Kyocera TASKalfa 4012i
Ошибки Kyocera TASKalfa 4052ci
Ошибки Kyocera TASKalfa 4053ci
Ошибки Kyocera TASKalfa 406ci
Ошибки Kyocera TASKalfa 408ci
Ошибки Kyocera TASKalfa 420i
Ошибки Kyocera TASKalfa 4500i
Ошибки Kyocera TASKalfa 4501i
Ошибки Kyocera TASKalfa 4550ci
Ошибки Kyocera TASKalfa 4551ci
Ошибки Kyocera TASKalfa 4820w
Ошибки Kyocera TASKalfa 5002i
Ошибки Kyocera TASKalfa 5003i
Ошибки Kyocera TASKalfa 500ci
Ошибки Kyocera TASKalfa 5052ci
Ошибки Kyocera TASKalfa 5053ci
Ошибки Kyocera TASKalfa 508ci
Ошибки Kyocera TASKalfa 520i
Ошибки Kyocera TASKalfa 5500i
Ошибки Kyocera TASKalfa 5501i
Ошибки Kyocera TASKalfa 550c
Ошибки Kyocera TASKalfa 552ci
Ошибки Kyocera TASKalfa 5550ci
Ошибки Kyocera TASKalfa 5551ci
Ошибки Kyocera TASKalfa 6002i
Ошибки Kyocera TASKalfa 6003i
Ошибки Kyocera TASKalfa 6052ci
Ошибки Kyocera TASKalfa 6053ci
Ошибки Kyocera TASKalfa 620
Ошибки Kyocera TASKalfa 6500i
Ошибки Kyocera TASKalfa 6501i
Ошибки Kyocera TASKalfa 650c
Ошибки Kyocera TASKalfa 6550ci
Ошибки Kyocera TASKalfa 6551ci
Ошибки Kyocera TASKalfa 7002i
Ошибки Kyocera TASKalfa 7003i
Ошибки Kyocera TASKalfa 7052ci
Ошибки Kyocera TASKalfa 7353ci
Ошибки Kyocera TASKalfa 750c
Ошибки Kyocera TASKalfa 7550ci
Ошибки Kyocera TASKalfa 7551ci
Ошибки Kyocera TASKalfa 8000i
Ошибки Kyocera TASKalfa 8001i
Ошибки Kyocera TASKalfa 8002i
Ошибки Kyocera TASKalfa 8003i
Ошибки Kyocera TASKalfa 8052ci
Ошибки Kyocera TASKalfa 820
Ошибки Kyocera TASKalfa 8353ci
Ошибки Kyocera TASKalfa 9002i
Ошибки Kyocera TASKalfa 9003i
Модератор: vetal

 kaoc » Чт ноя 11, 2021 11:14 am
-

kaoc
- Заправил чернильницу
-

- Сайт



-
-
Kyocera 1035 «бледная» печать
srMax в форуме Принтеры, МФУ, факсы, копиры формата A4
- 2
- 13946
srMax

Пт янв 23, 2015 2:49 pm
-
Kyocera 1035 «бледная» печать
-
-
Kyocera FS-1120d индикатор «Нет бумаги»
vs-dos в форуме Принтеры, МФУ, факсы, копиры формата A4
- 11
- 15137
СТРОНЦИЙ
Вт ноя 02, 2021 2:24 pm
-
Kyocera FS-1120d индикатор «Нет бумаги»
-
-
[SCANNER ERROR] Lamp Error Kyocera FS-1016
мастерчип в форуме Принтеры, МФУ, факсы, копиры формата A4
- 3
- 6641
Усатый Полосатый
Вс окт 28, 2018 11:08 pm
-
[SCANNER ERROR] Lamp Error Kyocera FS-1016
-
-
Taskalfa 180 ошибка «Е» и «Встряхните картр. с тонером»
manik.76 в форуме Принтеры, МФУ, копиры формата A3
- 3
- 9645
dviz
Пн фев 20, 2017 1:35 pm
-
Taskalfa 180 ошибка «Е» и «Встряхните картр. с тонером»
-
-
Kyocera taskalfa 3501 «открыта крышка основного блока»
Юрий Яраскин в форуме Принтеры, МФУ, копиры формата A3
- 3
- 2889
Goldwater
Пт сен 10, 2021 1:31 pm
-
Kyocera taskalfa 3501 «открыта крышка основного блока»

Вернуться в Принтеры, МФУ, факсы, копиры формата A4
Кто сейчас на форуме
Сейчас этот форум просматривают: нет зарегистрированных пользователей и гости: 86
Kyocera Ecosys M2035dn Ошибка C0150
Добрый день.
Аппарат пришел с такой ошибкой. В форумах подобная ошибка появлялась по данному аппарату, но решений не было. По мануалу — ошибка EEPROM. Снял дамп с рабочего аппарата, подправил серийный номер (прописывается в трех местах) — проблема не уходит.
Захожу в режим U004 серийных номеров нет, все поле пустое. Перекинул главную плату с другого аппарата (поменяв eeprom) — запустился, но с ошибкой 0180. Зато в режиме U004 появились серийные номера: main и engin.
Обновил FW машины до последней версии, но ошибка осталась.
Теперь вот думаю, а где вообще храниться серийный номер машины: получается во флэши главной платы?
Теперь возникает вопрос, как восстановить (прописать) серийный номер?
- mevorg
- новичок
- Сообщения: 15
- Зарегистрирован: 22:54 — 06.04.17
- Баллы репутации: 0


Re: Kyocera Ecosys M2035dn Ошибка C0150
 mevorg » 17:53 — 10.04.17
То что не решится — это я и так понял. Но вот средствами Prescribe тут вы правы. Но только я ни разу их не применял на практике (.
- mevorg
- новичок
- Сообщения: 15
- Зарегистрирован: 22:54 — 06.04.17
- Баллы репутации: 0
Re: Kyocera Ecosys M2035dn Ошибка C0150
mevorg » 11:26 — 11.04.17
Пока нет. С программированием средствами Prescribe незнаком, это конечно бы решило проблему. Похоже никто не поделиться данным секретом. Пока ищу другие варианты. (
- mevorg
- новичок
- Сообщения: 15
- Зарегистрирован: 22:54 — 06.04.17
- Баллы репутации: 0
Re: Kyocera Ecosys M2035dn Ошибка C0150
Mishel01 » 11:55 — 11.04.17
Надо решить — так и решайте, а не проводите время в поисках других вариантов.
Каких секретов вы ждете? Лень скачать с оф. сайта документацию по Прескрайбу?
С каких пор ошибки 01хх стали сбрасываемыми?
- Mishel01
- эксперт
- Сообщения: 8413
- Зарегистрирован: 01:10 — 10.01.11
- Баллы репутации: 1

Re: Kyocera Ecosys M2035dn Ошибка C0150
mevorg » 12:42 — 11.04.17
Я пытаюсь решить проблему так как я могу, если я не знаю язык — значит не знаю. Чтобы его изучить надо время, которого на данный момент не хватает. От вас лично я ничего не жду и лень мне не присуща. А кто вам сказал что ошибка что ошибка 01xx сбрасывается?
- mevorg
- новичок
- Сообщения: 15
- Зарегистрирован: 22:54 — 06.04.17
- Баллы репутации: 0
Re: Kyocera Ecosys M2035dn Ошибка C0150
Mishel01 » 13:03 — 11.04.17
«Я лично» — тут совершенно ни при чем вообще.
От софтового (прескрайбового) варианта отказались — не вопрос, дело хозяйское.
Мне производитель сказал, что они НЕсбрасываемые. Но дело было давно, хз — может чего нового изобрели))
- Mishel01
- эксперт
- Сообщения: 8413
- Зарегистрирован: 01:10 — 10.01.11
- Баллы репутации: 1
Re: Kyocera Ecosys M2035dn Ошибка C0150
mevorg » 15:07 — 11.04.17
Немного освобожусь, сниму NAND флэш, только мой программатор плохо работает с ними (у товарища позаимствую). Может у кого есть содержимое флэшки, так на всякий случай?
TC58NVG0S3ETA0B
- mevorg
- новичок
- Сообщения: 15
- Зарегистрирован: 22:54 — 06.04.17
- Баллы репутации: 0
Re: Kyocera Ecosys M2035dn Ошибка C0150
mevorg » 15:31 — 11.04.17
Да чтобы другие знали, что там копаться незачем. Пока никто, никому так и не помог с данной ошибкой. Пусть через задний проход ). Вы наверняка знаете и прикалываетесь )
- mevorg
- новичок
- Сообщения: 15
- Зарегистрирован: 22:54 — 06.04.17
- Баллы репутации: 0
Re: Kyocera Ecosys M2035dn Ошибка C0150
nRust » 15:32 — 11.04.17
mevorg писал(а):Захожу в режим U004 серийных номеров нет, все поле пустое. Перекинул главную плату с другого аппарата (поменяв eeprom) — запустился, но с ошибкой 0180. Зато в режиме U004 появились серийные номера: main и engin.
Здесь же (U004) выбираете Execute и прописывается серийник с EEPROM. Так сбрасывается ошибка 0180.
- nRust
- новичок
- Сообщения: 18
- Зарегистрирован: 15:23 — 04.07.13
- Откуда: Санкт-Петербург
- Баллы репутации: 0
Re: Kyocera Ecosys M2035dn Ошибка C0150
mevorg » 16:00 — 11.04.17
если подкинуть другую плату, то появится серийный номер, но другой машины. В итоге в режиме U004 будет два разных серийных номера (получаете фатальную ошибку U0180). Команда Execute это команда копирования, она не дает редактировать серийный номер. А экспериментировать с рабочей платой что то затратно.
- mevorg
- новичок
- Сообщения: 15
- Зарегистрирован: 22:54 — 06.04.17
- Баллы репутации: 0
Re: Kyocera Ecosys M2035dn Ошибка C0150
Mishel01 » 16:30 — 11.04.17
Вобщем, разговор локального ленивого глухого с ретивым удаленным слепым.
Надоест толочь воду — сделаете клон епромки с рабочего аппарата на НОВУЮ микросхему.
- Mishel01
- эксперт
- Сообщения: 8413
- Зарегистрирован: 01:10 — 10.01.11
- Баллы репутации: 1
- mevorg
- новичок
- Сообщения: 15
- Зарегистрирован: 22:54 — 06.04.17
- Баллы репутации: 0
Re: Kyocera Ecosys M2035dn Ошибка C0150
Mishel01 » 10:35 — 12.04.17
То есть ставите ПЛАТУ-донора — всё нормально (условно), а ставите «больную» плату с клоном ЕПРОМКИ с донора — проблема остается, я верно понял?
- Mishel01
- эксперт
- Сообщения: 8413
- Зарегистрирован: 01:10 — 10.01.11
- Баллы репутации: 1
- mevorg
- новичок
- Сообщения: 15
- Зарегистрирован: 22:54 — 06.04.17
- Баллы репутации: 0
Re: Kyocera Ecosys M2035dn Ошибка C0150
Mishel01 » 18:41 — 12.04.17
Ну вот вам, собственно, и ответ. Чувствуете в себе силы достаточные — ковыряйте собственно плату (помимо флешки и епромки). Если нет — меняйте.
- Mishel01
- эксперт
- Сообщения: 8413
- Зарегистрирован: 01:10 — 10.01.11
- Баллы репутации: 1
Re: Kyocera Ecosys M2035dn Ошибка C0150
pokyocere » 13:45 — 14.04.17
Не надо трогать EEPROM, нужно отвезти в авторизованный сервисный центр. В сервисе есть новая прошивка , она лечит эту ошибку.
Если не поможет, то тогда берем чистую EEPROM, заливаем родной дамп. Очень редко MAIN PWB под замену.
- pokyocere
- новичок
- Сообщения: 43
- Зарегистрирован: 00:45 — 30.08.15
- Баллы репутации: 0
Re: Kyocera Ecosys M2035dn Ошибка C0150
Mishel01 » 13:52 — 14.04.17
pokyocere писал(а):Не надо трогать EEPROM, нужно отвезти в авторизованный сервисный центр. В сервисе есть новая прошивка , она лечит эту ошибку.
Если не поможет, то тогда берем чистую EEPROM, заливаем родной дамп. Очень редко MAIN PWB под замену.
Рекомендуется, прежде чем что-то излагать, внимательно прочитать всё предшествующее.
- Mishel01
- эксперт
- Сообщения: 8413
- Зарегистрирован: 01:10 — 10.01.11
- Баллы репутации: 1
Вернуться в KYOCERA
Кто сейчас на конференции
Сейчас этот форум просматривают: нет зарегистрированных пользователей и гости: 1

798 Views
0
Kyocera FS3040MFP and FS3140MFP C0150 Error Code
Below you will find the service manual information for the Kyocera FS3040MFP and FS3140MFP C0150 Error Code along with additional details to explain what can cause the problem and followed by solutions that might help you fix it.
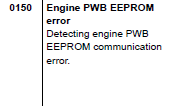
Service Manual Advice for the Kyocera FS3040MFP and FS3140MFP C0150 Error Code
0150 Engine PWB EEPROM error
Description :
Detecting engine PWB EEPROM communication error.
Causes :
Improper installation engine PWB EEPROM.
Defective engine PWB.
Device damage of EEPROM.
Solutions :
Check the installation of the EEPROM and remedy if necessary.
Replace the engine PWB and check for correct operation
Contact the Service Administrative Division.
Remember, not every error is exactly the same. What fixes the issue one time might not fix it the next. While the information above comes from the service manual and generally should get your machine up and running, sometimes other factors might be in play.
- Code: 0030
- Description: FAX control PWB system error
Processing with the fax software was disabled due to a software problem. - Causes: FAX control PWB.
- Remedy: 1. Turn the main power swtch off and after 5 seconds, re-mount the FAX controller PWB, then turn power on. 2. Reinstall the fax software. 3. Replace the FAX control PWB.
- Code: 0060
- Description: Control PWB mismatch
Unmatching engine and engine sub boards. Defective engine subboard - Causes: Control PWB
- Remedy: 1. Turn the main power swtch off and after 5 seconds, then turn power on. 2. Replace the control PWB and check for correct operation.
- Code: 0070
- Description: FAX control PWB incompatible detection error
Abnormal detection of FAX control PWB incompatibility In the initial communication with the FAX control PWB, any normal communication command is not transmitted. - Causes: FAX control PWB (The FAX PWB installed will not be the one designed for the machine.
- Remedy: 1. Install the FAX system designed for the model. 2. Reinstall the fax software.
- Code: 0100
- Description: Backup memory device error
- Causes: EEPROM (Control PWB)
- Remedy: 1. Turn the main power swtch off and after 5 seconds, then turn power on. 2. Check that the EEPROM on the main circuit PWB is peroperly installed on the main circuit PWB and, if not, re-install it. 3. Replace the control PWB and check for correct operation.
- Code: 0110
- Description: Backup memory data error
- Causes: EEPROM (Control PWB)
- Remedy: 1. Turn the main power swtch off and after 5 seconds, then turn power on. 2. Check that the EEPROM on the main circuit PWB is peroperly installed on the main circuit PWB and, if not, re-install it. 3. Replace the control PWB and check for correct operation.
- Code: 0120
- Description: MAC address data error
For data in which the MAC address is invalid. - Causes: EEPROM (Control PWB)
- Remedy: 1. Turn the main power swtch off and after 5 seconds, then turn power on. 2. Check the MAC address on the network status page. 3. If it is blank, obtain an EEPROM with its MAC address written from the service support and install. 4. Replace the control PWB and check for correct operation.
- Code: 0130
- Description: Backup memory read/write error (main NAMD)
- Causes: Flash memory (Control PWB)
- Remedy: 1. Turn the main power swtch off and after 5 seconds, then turn power on. 2. Replace the control PWB and check for correct operation
- Code: 0140
- Description: Backup memory data error (main NAND)
- Causes: Flash memory (Control PWB)
- Remedy: 1. Turn the main power swtch off and after 5 seconds, then turn power on. 2. Replace the control PWB and check for correct operation.
- Code: 0150
- Description: Backup memory read/write error (control PWB)
No response is issued from the device in reading/writing for 5 ms or more and this problem is repeated 5 times successively. Mismatch of reading data from 2 locations occurs 8 times successively. Mismatch between writing data and reading data occurs 8 times successively. - Causes: EEPROM (Control PWB)
- Remedy: 1. Turn the main power swtch off and after 5 seconds, then turn power on. 2. Check that the EEPROM is peroperly installed on the control PWB and reinstall it. 3. Replace the control PWB and check for correct operation. 4. Check the EEPROM and if the data are currupted, contact the service support.
- Code: 0160
- Description: Backup memory data error (control PWB)
Reading data from EEPROM is abnormal. - Causes: EEPROM
- Remedy: 1. Turn the main power swtch off and after 5 seconds, then turn power on. 2. Execute U021 — memory initializing. 3. If the EEPROM data are currupted, contact the service support.
- Code: 0170
- Description: Billing counting error
The values on the main circuit PWB and on the engine do not match for any of charging counter, life counter, and scanner counter. - Causes: EEPROM. Control PWB
- Remedy: EEPROM 1. Check that the EEPROMs installed in the control PWB are correct and, if not, use the correct EEPROM for the model. 2. If the EEPROM data are currupted, contact the service support.
Control PWB Replace the control PWB and check for correct operation.
- Code: 0180
- Description: Machine number mismatch
Machine number of control does not match. - Causes: Data damage of EEPROM.
- Remedy: 1. Confirm the machine data for the control units by using U004. 2. If the serial number data of different models is alternately displayed, install the correct EEPROM in the PWB of the wrong serial number data. 3. Contact the Service Support.
- Code: 0190
- Description: Backup memory device error (control PWB)
- Causes: Control PWB
- Remedy: Control PWB Replace the control PWB and check for correct operation.
- Code: 0800
- Description: Image processing error
JAM010X is detected twice. - Causes: Control PWB.
- Remedy: Control PWB Replace the control PWB and check for correct operation.
- Code: 0830
- Description: FAX control PWB flash program area checksum error
A checksum error occurred with the program of the FAX control PWB. - Causes: FAX software. FAX control PWB.
- Remedy: FAX software 1. Reinstall the fax software.
FAX control PWB 1. Execute initializing by U600.(Refer to the FAX service manual) 2. Replace the FAX control PWB.
- Code: 0840
- Description: Faults of RTC (“Time for maintenance T” is displayed) [Check at power up]
The RTC setting has reverted to a previous state. The machine has not been powered for 5 years (compared to the settings stored periodically in the EEPROM). The RTC setting is older than 00:01 on January 1, 2000. [Checked periodically (in 5- minute interval) after powered up] The RTC setting has reverted to a state older than the last time it was checked. 10 minutes have been passed since the previous check. - Causes: Battery (Control PWB). Control PWB.
- Remedy: Battery (Control PWB) 1. Make sure that the back-up batteries on the control PWB are not short-circuited. 2. If the same C call is displayed when power is switched on and off, replace the back up battery. 3. If communication error (due to a noise, etc.) is present with the RTC on the control PWB, check the PWB is properly grounded.
Control PWB Replace the control PWB and check for correct operation.
- Code: 0870
- Description: PCFAX control PWB to main PWB high capacity data transfer error
High-capacity data transfer between the FAX control PWB and the main PWB of the machine was not normally performed even if the data transfer was retried the specified times. - Causes: FAX control PWB. Control PWB.
- Remedy: FAX control PWB 1. Turn the main power swtch off and after 5 seconds, re-mount the FAX controller PWB, then turn power on. 2. Replace the FAX control PWB.
Control PWB Replace the control PWB and check for correct operation.
- Code: 0920
- Description: Fax file system error
The backup data is not retained for file system abnormality of flash memory of the FAX control PWB. - Causes: FAX control PWB.
- Remedy: FAX control PWB 1. Execute initializing by U600 (Refer to the FAX service manual). 2. Replace the FAX control PWB.
- Code: 0970
- Description: 24 V power down detect
If a 24V power disconnection signal is observed and a 12V power disconnection signal is observed simultaneously for one second. - Causes: Connect right PWB. Control PWB
- Remedy: Connect right PWB 1. Check the +24V output is given at YC4- 10 to 13 of the connect right PWB. 2. Replace the connect right PWB
Control PWB Replace the control PWB
- Code: 1010
- Description: Lift motor error (50/60 ppm model only)
After cassette 1 is inserted, lift sensor does not turn on within 10 s. This error is detected four times successively. - Causes: Bottom plate elevation mechanism in the cassette. Connector cable or poor contact in the connector. Drive transmission system of the lift motor. Lift motor. Connect right PWB. Control PWB.
- Remedy: Bottom plate elevation mechanism in the cassette Check to see if the bottom plate can move smoothly and repair it if any problem is found.
Connector cable or poor contact in the connector Reinsert the connector. Also check for continuity within the connector cable. If none, replace the cable. Lift motor and connect right PWB (YC9) Connect right PWB and control PWB (YC29)
Drive transmission system of the lift motor Check if the gears rotate smoothly. If not, grease the bushes and gears. Check for broken gears and replace if any.
Lift motor Replace the lift motor.
Connect right PWB Replace the connect right PWB.
Control PWB Replace the control PWB and check for correct operation.
- Code: 1020
- Description: PF lift motor 1 error (paper feeder)
After cassette 2 is inserted, PF lift sensor 1 does not turn on. This error is detected four times successively. - Causes: Bottom plate elevation mechanism in the cassette. Connector cable or poor contact in the connector. Drive transmission system of the PF lift motor. PF lift motor. PF main PWB.
- Remedy: Bottom plate elevation mechanism in the cassette Check to see if the bottom plate can move smoothly and repair it if any problem is found.
Connector cable or poor contact in the connector Reinsert the connector. Also check for continuity within the connector cable. If none, replace the cable. PF lift motor 1 and PF main PWB (YC7)
Drive transmission system of the PF lift motor Check if the gears rotate smoothly. If not, grease the bushes and gears. Check for broken gears and replace if any.
PF lift motor Replace the PF lift motor 1.
PF main PWB Replace the PF main PWB (Refer to the service manual for the paper feeder).
- Code: 1030
- Description: PF lift motor 2 error (paper feeder)
After cassette 3 is inserted, PF lift sensor 2 does not turn on. This error is detected four times successively. - Causes: Dottom plate elevation mechanism in the cassette. Connector cable or poor contact in the connector. Drive transmission system of the PF lift motor. PF lift motor. PF main PWB.
- Remedy: Dottom plate elevation mechanism in the cassette Check to see if the bottom plate can move smoothly and repair it if any problem is found.
Connector cable or poor contact in the connector Reinsert the connector. Also check for continuity within the connector cable. If none, replace the cable. PF lift motor 2 and PF main PWB (YC7)
Drive transmission system of the PF lift motor Check if the gears rotate smoothly. If not, grease the bushes and gears. Check for broken gears and replace if any.
PF lift motor Replace the PF lift motor 2.
PF main PWB Replace the PF main PWB (Refer to the service manual for the paper feeder).
- Code: 1040
- Description: PF lift motor 3 error (paper feeder)
After cassette 4 is inserted, PF lift sensor 3 does not turn on. This error is detected four times successively. - Causes: Bottom plate elevation mechanism in the cassette. Connector cable or poor contact in the connector. Drive transmission system of the PF lift motor. PF lift motor. PF main PWB.
- Remedy: Bottom plate elevation mechanism in the cassette Check to see if the bottom plate can move smoothly and repair it if any problem is found.
Connector cable or poor contact in the connector Reinsert the connector. Also check for continuity within the connector cable. If none, replace the cable. PF lift motor 3 and PF main PWB (YC7)
Drive transmission system of the PF lift motor Check if the gears rotate smoothly. If not, grease the bushes and gears. Check for broken gears and replace if any.
PF lift motor Replace the PF lift motor 3.
PF main PWB Replace the PF main PWB (Refer to the service manual for the paper feeder).
- Code: 1050
- Description: PF lift motor 4 error (paper feeder)
After cassette 5 is inserted, PF lift sensor 4 does not turn on. This error is detected four times successively. - Causes: Bottom plate elevation mechanism in the cassette. Connector cable or poor contact in the connector. Drive transmission system of the PF lift motor. PF lift motor. PF main PWB.
- Remedy: Bottom plate elevation mechanism in the cassette Check to see if the bottom plate can move smoothly and repair it if any problem is found.
Connector cable or poor contact in the connector Reinsert the connector. Also check for continuity within the connector cable. If none, replace the cable. PF lift motor 4 and PF main PWB (YC7)
Drive transmission system of the PF lift motor Check if the gears rotate smoothly. If not, grease the bushes and gears. Check for broken gears and replace if any.
PF lift motor Replace the PF lift motor 4.
PF main PWB Replace the PF main PWB (Refer to the service manual for the paper feeder).
- Code: 1800
- Description: Paper feeder 1 communication error
A communication error is detected 10 times in succession. - Causes: Paper feeder. Connector cable or poor contact in the connector. PF main PWB. Control PWB.
- Remedy: Paper feeder Follow installation instruction carefully again.
Connector cable or poor contact in the connector Reinsert the connector. Also check for continuity within the connector cable. If none, replace the cable. PF main PWB (YC3) and control PWB (YC22)
PF main PWB Replace the PF main PWB (Refer to the service manual for the paper feeder).
Control PWB Replace the control PWB and check for correct operation.
- Code: 1810
- Description: Paper feeder 2 communication error
A communication error from paper feeder is detected 10 times in succession. - Causes: Paper feeder. PF main PWB. Control PWB.
- Remedy: Paper feeder Check the wiring connection status with the main unit and, if necessary, try connecting it again.
PF main PWB 1. Confirm that the wiring connector is firmly connected and, if necessary, connect the connector all the way in. PF main PWB (YC1) and control PWB (YC22) 2. If the wiring is disconnected, shorted or grounded, replace the wiring. 3. Replace the PF main PWB.
Control PWB 1. Check the control software and upgrade to the latest, if necessary. 2. Replace the control PWB and check for correct operation.
- Code: 1820
- Description: Paper feeder 3 communication error
A communication error from paper feeder is detected 10 times in succession. - Causes: Paper feeder. PF main PWB. Control PWB
- Remedy: Paper feeder Check the wiring connection status with paper feeder unit 2 and, if necessary, try connecting it again.
PF main PWB 1. Confirm that the wiring connector is firmly connected and, if necessary, connect the connector all the way in. PF main PWB (YC1) and PF main PWB (YC22). 2. If the wiring is disconnected, shorted or grounded, replace the wiring. 3. Replace the PF main PWB.
Control PWB 1. Check the control software and upgrade to the latest, if necessary. 2. Replace the control PWB and check for correct operation.
- Code: 1830
- Description: Paper feeder 4 communication error
A communication error from paper feeder is detected 10 times in succession. - Causes: Paper feeder. PF main PWB. Control PWB
- Remedy: Paper feeder Check the wiring connection status with paper feeder unit 3 and, if necessary, try connecting it again.
PF main PWB 1. Confirm that the wiring connector is firmly connected and, if necessary, connect the connector all the way in. PF main PWB (YC1) and PF main PWB (YC22). 2. If the wiring is disconnected, shorted or grounded, replace the wiring. 3. Replace the PF main PWB.
Control PWB 1. Check the control software and upgrade to the latest, if necessary. 2. Replace the control PWB and check for correct operation.
- Code: 1900
- Description: Paper feeder 1 EEPROM error
When writing the data, read and write data does not match 4 times in succession. - Causes: PF main PWB (EEPROM)
- Remedy: PF main PWB (EEPROM) 1. Confirm that the wiring connector is firmly connected and, if necessary, connect the connector all the way in. 2. Replace the PF main PWB.
- Code: 1910
- Description: Paper feeder 2 EEPROM error
When writing the data, read and write data does not match 4 times in succession. - Causes: PF main PWB (EEPROM)
- Remedy: PF main PWB (EEPROM) 1. Confirm that the wiring connector is firmly connected and, if necessary, connect the connector all the way in.Replace the PF main PWB.
- Code: 1920
- Description: Paper feeder 3 EEPROM error
When writing the data, read and write data does not match 4 times in succession. - Causes: PF main PWB (EEPROM)
- Remedy: PF main PWB (EEPROM) 1. Confirm that the wiring connector is firmly connected and, if necessary, connect the connector all the way in. 2. Replace the PF main PWB.
- Code: 1930
- Description: Paper feeder 4 EEPROM error
When writing the data, read and write data does not match 4 times in succession. - Causes: PF main PWB (EEPROM)
- Remedy: PF main PWB (EEPROM) 1. Confirm that the wiring connector is firmly connected and, if necessary, connect the connector all the way in. 2. Replace the PF main PWB.
- Code: 2000
- Description: Main motor startup error
Main motor is not stabilized within 2 s since the motor is activated. - Causes: Main motor. Connect right PWB. Control PWB
- Remedy: Main motor 1. Confirm that the wiring connector is firmly connected and, if necessary, connect the connector all the way in. Main motor and connect right PWB (YC10) Connect right PWB and control PWB (YC29) 2. If the wiring is disconnected, shorted or grounded, replace the wiring. 3. Replace the main motor.
Connect right PWB Replace the cconnect right PWB.
Control PWB 1. Check the control software and upgrade to the latest, if necessary. 2. Replace the control PWB and check for correct operation.
- Code: 2010
- Description: Main motor steady-state error
After main motor is stabilized, the ready signal is not ready for 2 s continuously. - Causes: Main motor. Connect right PWB. Control PWB.
- Remedy: Main motor 1. Check the drive gear can rotate or they are not unusually loaded and, if necessary, replace. 2. Confirm that the wiring connector is firmly connected and, if necessary, connect the connector all the way in. Main motor and connect rightl PWB (YC10) Connect right PWB and control PWB (YC29) 3. If the wiring is disconnected, shorted or grounded, replace the wiring. 4. Replace the main motor.
Connect right PWB Replace the connect right PWB.
Control PWB 1. Check the control software and upgrade to the latest, if necessary. 2. Replace the control PWB and check for correct operation.
- Code: 2200
- Description: Drum motor drive error (50/60 ppm model only)
The drum motor is not stabilized within 2 s after driving starts. - Causes: Connector cable or poor contact in the connector. Drive transmission system of the drum motor. Drum motor. Connect right PWB. Control PWB.
- Remedy: Connector cable or poor contact in the connector Reinsert the connector. Also check for continuity within the connector cable. If none, replace the cable. Drum motor and connect right PWB (YC10) Connect right PWB and control PWB (YC29)
Drive transmission system of the drum motor Check if the rollers and gears rotate smoothly. If not, grease the bushes and gears. Check for broken gears and replace if any.
Drum motor Replace the drum motor.
Connect right PWB Replace the connect right PWB.
Control PWB Replace the control PWB and check for correct operation.
- Code: 2210
- Description: Drum motor steady-state error (50/60 ppm model only)
Stable OFF is detected for 2 s continuously after drum motor stabilized. - Causes: Connector cable or poor contact in the connector. Drive transmission system of the drum motor. Drum motor. Connect right PWB. Control PWB.
- Remedy: Connector cable or poor contact in the connector Reinsert the connector. Also check for continuity within the connector cable. If none, replace the cable. Drum motor and connect right PWB (YC10) Connect right PWB and control PWB (YC29)
Drive transmission system of the drum motor Check if the rollers and gears rotate smoothly. If not, grease the bushes and gears. Check for broken gears and replace if any.
Drum motor Replace the drum motor.
Connect right PWB Replace the connect right PWB.
Control PWB Replace the control PWB and check for correct operation.
- Code: 2330
- Description: Envelope motor error (Over-current) (50/60 ppm model only)
The over-current detection signal of the motor is detected continuously twenty times. - Causes: Connector cable or poor contact in the connector. Drive transmission system of the envelope motor. Envelope motor. Connect left PWB. Control PWB.
- Remedy: Connector cable or poor contact in the connector Reinsert the connector. Also check for continuity within the connector cable. If none, replace the cable. Envelope motor and connect left PWB (YC11) Connect left PWB and control PWB (YC2)
Drive transmission system of the envelope motor Check if the gears rotate smoothly. If not, grease the bushes and gears. Check for broken gears and replace if any.
Envelope motor Replace the envelope motor.
Connect left PWB. Replace the connect left PWB.
Control PWB Replace the control PWB and check for correct operation.
- Code: 2340
- Description: Envelope motor error (Timeout) (50/60 ppm model only)
The position detection sensor is not detected continuously for 30 s. - Causes: Connector cable or poor contact in the connector. Drive transmission system of the envelope motor. Envelope motor. Connect left PWB. Control PWB.
- Remedy: Connector cable or poor contact in the connector Reinsert the connector. Also check for continuity within the connector cable. If none, replace the cable. Envelope motor and connect left PWB (YC11) Connect left PWB and control PWB (YC2)
Drive transmission system of the envelope motor Check if the gears rotate smoothly. If not, grease the bushes and gears. Check for broken gears and replace if any.
Envelope motor Replace the envelope motor.
Connect left PWB Replace the connect left PWB.
Control PWB Replace the control PWB and check for correct operation.
- Code: 2600
- Description: PF drive motor 1 error (paper feeder 1)
When the PF drive motor is driven, error signal is detected continuously for 2 s. - Causes: Connector cable or poor contact in the connector. Drive transmission system of the PF drive motor. DPF drive motor. DPF main PWB.
- Remedy: Connector cable or poor contact in the connector Reinsert the connector. Also check for continuity within the connector cable. If none, replace the cable. PF drive motor 1 and PF main PWB (YC6)
Drive transmission system of the PF drive motor Check if the rollers and gears rotate smoothly. If not, grease the bushes and gears. Check for broken gears and replace if any.
DPF drive motor Replace the PF drive motor 1.
DPF main PWB Replace the PF main PWB (Refer to the service manual for the paper feeder).
- Code: 2610
- Description: PF drive motor 2 error (paper feeder 2)
When the PF drive motor is driven, error signal is detected continuously for 2 s. - Causes: Connector cable or poor contact in the connector. Drive transmission system of the PF drive motor. PF drive motor. PF main PWB.
- Remedy: Connector cable or poor contact in the connector Reinsert the connector. Also check for continuity within the connector cable. If none, replace the cable. PF drive motor 2 and PF main PWB (YC6)
Drive transmission system of the PF drive motor Check if the rollers and gears rotate smoothly. If not, grease the bushes and gears. Check for broken gears and replace if any.
PF drive motor Replace the PF drive motor 2.
PF main PWB Replace the PF main PWB (Refer to the service manual for the paper feeder).
- Code: 2620
- Description: PF drive motor 3 error (paper feeder 3)
When the PF drive motor is driven, error signal is detected continuously for 2 s. - Causes: Connector cable or poor contact in the connector. Drive transmission system of the PF drive motor. PF drive motor. PF main PWB.
- Remedy: Connector cable or poor contact in the connector Reinsert the connector. Also check for continuity within the connector cable. If none, replace the cable. PF drive motor 3 and PF main PWB (YC6)
Drive transmission system of the PF drive motor Check if the rollers and gears rotate smoothly. If not, grease the bushes and gears. Check for broken gears and replace if any.
PF drive motor Replace the PF drive motor 3.
PF main PWB Replace the PF main PWB (Refer to the service manual for the paper feeder).
- Code: 2630
- Description: PF drive motor 4 error (paper feeder 4)
When the PF drive motor is driven, error signal is detected continuously for 2 s. - Causes: Connector cable or poor contact in the connector. Drive transmission system of the PF drive motor. PF drive motor. PF main PWB.
- Remedy: Connector cable or poor contact in the connector Reinsert the connector. Also check for continuity within the connector cable. If none, replace the cable. PF drive motor 4 and PF main PWB (YC6)
Drive transmission system of the PF drive motor Check if the rollers and gears rotate smoothly. If not, grease the bushes and gears. Check for broken gears and replace if any.
PF drive motor Replace the PF drive motor 4.
PF main PWB Replace the PF main PWB (Refer to the service manual for the paper feeder).
- Code: 3100
- Description: Scanner carriage error
The home position is not correct when the power is turned on, at the end of a reading process of the table and document processor. - Causes: Image scanner motor. Home position sensor. CCD PWB. Control PWB.
- Remedy: Image scanner motor 1. Move the scanner by the hand to check whether it is unusually difficult to move. 2. Check that the scanner driving belt is not disengaged. 3. Confirm that the wiring connector is firmly connected and, if necessary, connect the connector all the way in. Image scanner motor and control PWB (YC1002) 4. If the wiring is disconnected, shorted or grounded, replace the wiring. 5. Replace the image scanner motor.
Home position sensor 1. Check that the sensor is correctly positioned. 2. Confirm that the wiring connector is firmly connected and, if necessary, connect the connector all the way in. Home position sensor and CCD PWB (YC3) CCD PWB and control PWB (YC1000) 3. Replace the home position sensor.
CCD PWB Replace the image scanner unit and execute U411.
Control PWB Replace the control PWB and check for correct operation.
- Code: 3200
- Description: Exposure lamp error
When a lamp is made to turn on one side at a time, the white standard data at the time of an initial is lower than a rated value. - Causes: LED PWB. CCD PWB. Control PWB.
- Remedy: LED PWB 1. Reinsert the connector. Also check for continuity within the connector cable. If none, replace the cable. LED PWB and CCD PWB (YC2) CCD PWB and control PWB (YC1000) 2. Replace the image scanner unit.
CCD PWB Replace the image scanner unit and execute U411.
Control PWB Replace the control PWB and check for correct operation.
- Code: 3500
- Description: Communication error between scanner and ASIC
An error code is detected. - Causes: CCD PWB. Control PWB.
- Remedy: CCD PWB 1. Confirm that the wiring connector is firmly connected and, if necessary, connect the connector all the way in. CCD PWB and control PWB (YC1000) 2. If the wiring is disconnected, shorted or grounded, replace the wiring. 3. Replace the image scanner unit and execute U411.
Control PWB Replace the control PWB and check for correct operation.
- Code: 4000
- Description: Polygon motor steady-state error
After Polygon motor is stabilized, the ready signal is at the H level for 20 s continuously. - Causes: Polygon motor (LSU). Control PWB.
- Remedy: Polygon motor (LSU) 1. Confirm that the wiring connector is firmly connected and, if necessary, connect the connector all the way in. Laser scanner unit and control PWB (YC15) 2. If the wiring is disconnected, shorted or grounded, replace the wiring. 3. Replace the laser scanner unit.
Control PWB 1. Check the control software and upgrade to the latest, if necessary. 2. Replace the control PWB and check for correct operation.
- Code: 4200
- Description: BD steady-state error
The BD signal is not detected. - Causes: PD PWB (LSU). Control PWB.
- Remedy: PD PWB (LSU) 1. Confirm that the FCC wiring connector is not distorted and connect the FCC wiring all the way in. Laser scanner unit and control PWB (YC16) 2. If the FCC wiring is disconnected, shorted or grounded, replace the FCC wiring. 3. Replace the laser scanner unit.
Control PWB 1. Check the control software and upgrade to the latest, if necessary. 2. Replace the control PWB and check for correct operation.
- Code: 5100
- Description: Chager current error When the current value measured at the time of potential adjustment is less than 20 mcA. The error of the charge current before toner installation. The error of the charge current before printing.
- Causes: Connector cable or poor contact in the connector. High voltage PWB. Control PWB.
- Remedy: Connector cable or poor contact in the connector Reinsert the connector. Also check for continuity within the connector cable. If none, replace the cable. Chager unit and high voltage PWB High voltage PWB and control PWB (YC19)
High voltage PWB Replace the high voltage PWB and check for correct operation.
Control PWB Replace the control PWB and check for correct operation.
- Code: 6000
- Description: Broken fuser heater wire (Center)
(50/60 ppm model) Fuser thermistor 2 detects a temperature less than 100°C/ 212°F continuously for 30 s after a warm-up start. (40 ppm model) Fuser thermistor 1 detects a temperature less than 100°C/ 212°F continuously for 30 s after a warm-up start. - Causes: Fuser unit. Fuser thermistor connect PWB. Control PWB. Power source PWB. Fuser heater.
- Remedy: Fuser unit 1. Check that no paper jam is present. 2. Confirm that the wiring connector is firmly connected and, if necessary, connect the connector all the way in. Fuser unit and fuser thermistor connect PWB (YC2) Fuser thermistor connect PWB and control PWB (YC21) 3. If the wiring is disconnected, shorted or grounded, replace the wiring. 4. Replace the Fuser unit. (Deteriorated sensitivity due to the toner adhered to the center thermistor.)
Fuser thermistor connect PWB Replace the fuser thermistor connect PWB.
Control PWB 1. Check the control software and upgrade to the latest, if necessary. 2. Replace the control PWB and check for correct operation.
Power source PWB 1. Confirm that the wiring connector is firmly connected and, if necessary, connect the connector all the way in. Power source PWB and connect right PWB (YC4) Connect right PWB and control PWB (YC1) 2. Replace the power source PWB.
Fuser heater 1. Replace the Fuser unit.
- Code: 6020
- Description: Abnormally high fuser thermistor 2 temperature (Center)
(50/60 ppm model only) Fuser thermistor 2 detects a temperature higher than 235°C/455°F. In a heater-off state, the detection temperature of fuser thermistor 2 is higher than 195°C/383°F after the detection temperature of fuser thermistor 2 was 155°C/311°F or less. - Causes: Fuser unit. Fuser thermistor connect PWB. Control PWB.
- Remedy: Fuser unit 1. Confirm that the wiring connector is firmly connected and, if necessary, connect the connector all the way in. Fuser unit and fuser thermistor connect PWB (YC2) Fuser thermistor connect PWB and control PWB (YC21) 2. If the wiring is disconnected, shorted or grounded, replace the wiring. 3. Replace the Fuser unit.
Fuser thermistor connect PWB Replace the fuser thermistor connect PWB.
Control PWB 1. Check the control software and upgrade to the latest, if necessary. 2. Replace the control PWB and check for correct operation.
- Code: 6030
- Description: Broken fuser thermistor 2 wire (Center)
(50/60 ppm model only) Input from fuser thermistor 2 is 1019 or more (A/D value) continuously for 4 s. - Causes: Fuser unit. Fuser thermistor connect PWB. Control PWB. Fuser thermistor 2. Fuser thermostat (triggered). Power source PWB
- Remedy: Fuser unit 1. Check that no paper jam is present. 2. Confirm that the wiring connector is firmly connected and, if necessary, connect the connector all the way in. Fuser unit and fuser thermistor connect PWB (YC2) Fuser thermistor connect PWB and control PWB (YC21) 3. If the wiring is disconnected, shorted or grounded, replace the wiring. 4. Replace the Fuser unit. (Deteriorated sensitivity due to the toner adhered to the center thermistor.)
Fuser thermistor connect PWB Replace the fuser thermistor connect PWB.
Control PWB 1. Check the control software and upgrade to the latest, if necessary. 2. Replace the control PWB.
Fuser thermistor 2 1. Replace the Fuser unit.
Fuser thermostat (triggered) 1. Confirm that the wiring connector is firmly connected and, if necessary, connect the connector all the way in. Fuser unit and power source PWB (YC2) 2. If the wiring is disconnected, shorted or grounded, replace the wiring. 3. Replace the Fuser unit.
Power source PWB Replace the power source PWB.
- Code: 6120
- Description: Abnormally high fuser thermistor 1 temperature
(50/60 ppm model) The detection temperature of fuser thermistor 1 is higher than 245°C/473°F. In a heater-off state, the detection temperature of fuser thermistor 1 is higher than 195°C/383°F after the detection temperature of fuser thermistor 1 was 155°C/311°F or less. (40 ppm model) The detection temperature of fuser thermistor 1 is higher than 250°C/482°F. In a heater-off state, the detection temperature of fuser thermistor 1 is higher than 170°C/338°F after the detection temperature of fuser thermistor 1 was 155°C/311°F or less. - Causes: Connector pin. Triac. Fuser thermistor. Contrl PWB.
- Remedy: Fuser thermistor Replace the fuser unit.
Contrl PWB Replace the control PWB and check for correct operation.
- Code: 6130
- Description: Broken fuser thermistor 1 wire (50/60 ppm model only)
A/D value of the fuser thermistor 1 exceeds 1019 bit continuously for 4 s during warming up. - Causes: Connector cable or poor contact in the connector. Connector pin. Triac. Fuser thermistor. Fuser thermistor connect PWB. Control PWB.
- Remedy: Connector cable or poor contact in the connector Reinsert the connector. Also check for continuity within the connector cable. If none, replace the cable. Fuser thermistor and fuser thermistor connect PWB (YC1) Fuser thermistor connect PWB and control PWB (YC21)
Fuser thermistor Replace the fuser unit.
Fuser thermistor connect PWB Replace the fuser thermistor connect PWB.
Control PWB Replace the control PWB and check for correct operation.
- Code: 6400
- Description: Zero-cross signal error
While fuser heater ON/OFF control is performed, the zerocross signal is not input within 2 s. - Causes: Fuser unit. Power source PWB. Connect right PWB. Control PWB.
- Remedy: Fuser unit 1. Confirm that the wiring connector is firmly connected and, if necessary, connect the connector all the way in. Power source PWB and connect right PWB (YC4) Connect right PWB and control PWB (YC29) 2. If the wiring is disconnected, shorted or grounded, replace the wiring.
Power source PWB Replace the power source PWB.
Connect right PWB Replace the connect right PWB.
Control PWB Replace the control PWB.
- Code: 7000
- Description: Toner motor error
During driving the toner motor, an over-current detection signal is detected at intervals of 10 ms as for 300 accumulation. - Causes: Connector cable or poor contact in the connector. Drum unit. Connect left PWB. Control PWB.
- Remedy: Connector cable or poor contact in the connector Reinsert the connector. Also check for continuity within the connector cable. If none, replace the cable. Toner motor and drum PWB (YC4) Drum PWB and drum connect PWB (YC1) Drum connect PWB and connect left PWB (YC3) Connect left PWB and control PWB (YC3)
Drum unit Replace the drum unit.
Connect left PWB Replace the connect left PWB.
Control PWB Replace the control PWB and check for correct operation.
- Code: 7100
- Description: Toner sensor error
Sensor output value of 930 or more continuously for 5 s. - Causes: Toner sensor. Toner motor. Connect left PWB. Control PWB.
- Remedy: Toner sensor 1. Check the toner sensor output. 2. Confirm that the wiring connector is firmly connected and, if necessary, connect the connector all the way in. Toner sensor and drum PWB (YC3) Drum PWB and drum connect PWB (YC1) Drum connect PWB and connect left PWB (YC3) Connect left PWB and control PWB (YC3) 3. If the wiring is disconnected, shorted or grounded, replace the wiring. 4. Check that the gears of the Developer unit are not damaged and the spiral can rotate. 5. Replace the Developer unit.
Toner motor 1. Draw out the toner container. 2. Check the drive gear can rotate or they are not unusually loaded and, if necessary, replace. 3. Confirm that the wiring connector is firmly connected and, if necessary, connect the connector all the way in. Toner motor and drum PWB (YC4) Drum PWB and drum connect PWB (YC1) Drum connect PWB and connect left PWB (YC3) Connect left PWB and control PWB (YC3) 4. If the wiring is disconnected, shorted or grounded, replace the wiring. 5. Replace the Toner motor.
Connect left PWB Replace the connect left PWB.
Control PWB 1. Check the control software and upgrade to the latest, if necessary. 2. Replace the control PWB and check for correct operation.
- Code: 7400
- Description: Developer unit non-installing error
Sensor output value of 31 or less continuously for 5 s. - Causes: Connector cable or poor contact in the connector. Toner sensor. Connect left PWB. Control PWB.
- Remedy: Connector cable or poor contact in the connector Reinsert the connector. Also check for continuity within the connector cable. If none, replace the cable. Developer unit and drum PWB (YC3) Drum PWB and drum connect PWB (YC1) Drum connect PWB and connect left PWB (YC3) Connect left PWB and control PWB (YC2)
Toner sensor Replace the developer unit.
Connect left PWB Replace the connect left PWB.
Control PWB Replace the control PWB and check for correct operation.
- Code: 7410
- Description: Drum unit type mismatch error
The drum PWB EEPROM does not communicate normally. Absence of the drum unit is detected. - Causes: Connector cable or poor contact in the connector. Toner sensor. Connect left PWB. Control PWB.
- Remedy: Connector cable or poor contact in the connector Reinsert the connector. Also check for continuity within the connector cable. If none, replace the cable. Drum unit and drum connect PWB (YC1) Drum connect PWB and connect left PWB (YC3) Connect left PWB and control PWB (YC2)
Toner sensor Replace the drum unit.
Connect left PWB Replace the connect left PWB.
Control PWB Replace the control PWB and check for correct operation.
- Code: 7800
- Description: Broken temperature sensor wire
Input from temperature sensor is 1019 or more continuously for 160 ms. Input from temperature sensor is 930 or more continuously for 5 s. - Causes: Temperature sensor. Control PWB.
- Remedy: Temperature sensor 1. Confirm that the wiring connector is firmly connected and, if necessary, connect the connector all the way in. Temperature sensor and control PWB (YC30) 2. If the wiring is disconnected, shorted or grounded, replace the wiring. 3. Replace the key right PWB.
Control PWB 1. Check the control software and upgrade to the latest, if necessary. 2. Replace the control PWB and check for correct operation.
- Code: 7810
- Description: Short-circuited temperature sensor wire
Input from temperature sensor is 31 or less continuously for 5 s. - Causes: Temperature sensor. Control PWB.
- Remedy: Temperature sensor 1. Confirm that the wiring connector is firmly connected and, if necessary, connect the connector all the way in. Temperature sensor and control PWB (YC30) 2. If the wiring is disconnected, shorted or grounded, replace the wiring. 3. Replace the key right PWB.
Control PWB 1. Check the control software and upgrade to the latest, if necessary. 2. Replace the control PWB and check for correct operation.
- Code: 7900
- Description: Drum EEPROM error
No response is issued from the device in reading/writing for 5 ms or more and this problem is repeated 5 times successively. Mismatch of reading data from 2 locations occurs 8 times successively. Mismatch between writing data and reading data occurs 8 times successively. - Causes: DR PWB. Connect left PWB. Control PWB.
- Remedy: DR PWB 1. Confirm that the wiring connector is firmly connected and, if necessary, connect the connector all the way in. DR PWB and drum connect PWB (YC1) Drum connect PWB and connect left PWB (YC3) Connect left PWB and control PWB (YC2) 2. If the wiring is disconnected, shorted or grounded, replace the wiring. 3. Replace the Drum unit.
Connect left PWB Replace the connect left PWB.
Control PWB 1. Check the control software and upgrade to the latest, if necessary. 2. Replace the control PWB and check for correct operation.
- Code: F000
- Description: Communication error between Control PWB and Operation PWB
- Causes: Control PWB. Operation PWB.
- Remedy: Control PWB 1. Turn the main power swtch off and after 5 seconds, then turn power on. 2. Check that the wirings and connetors between the control PWB and the operation panel PWB are normal. Operation PWB and control PWB (YC2002) 3. Check that the DIMM memories in the control PWB are well conducted and, if not, replace. 4. Execute U021initialize memory. 5. Replace the control PWB.
Operation PWB Replace the operation PWB.
- Code: F010
- Description: Control PWB checksum error
- Causes: Control PWB.
- Remedy: Control PWB Turn the main power switch off/on to restart the machine. If the error is not resolved, replace control PWB and check for correct operation.
- Code: F020
- Description: Control PWB RAM check sum error
- Causes: Main memory (RAM).
- Remedy: Main memory (RAM) Turn the main power switch off/on to restart the machine. If the error is not resolved, replace control PWB and check for correct operation.
- Code: F040
- Description: Communication error between Controller and Print engine
- Causes: Control PWB.
- Remedy: 1. Turn the main power swtch off and after 5 seconds, then turn power on. 2. Repair or replace the wire from the control PWB, that may be grounded. (Check short-circuit between 5V and 3.3V.) 3. Check the control software and upgrade to the latest, if necessary. 4. If not corrected, replace the control PWB and check for correct operation.
- Code: F041
- Description: Communication error between Controller and Scan engine
- Causes: Control PWB.
- Remedy: 1. Turn the main power swtch off and after 5 seconds, then turn power on. 2. Repair or replace the wire from the control PWB, that may be grounded. (Check short-circuit between 5V and 3.3V.) 3. Check the control software and upgrade to the latest, if necessary. 4. If not corrected, replace the control PWB and check for correct operation.
- Code: F050
- Description: Print engine ROM checksum error
- Causes: Control PWB.
- Remedy: 1. Turn the main power swtch off and after 5 seconds, then turn power on. 2. Confirm that the EEPROM has been properly installed. 3. Check the control software and upgrade to the latest, if necessary. 4. If not corrected, Replace the control PWB and check for correct operation.
- Code: F051
- Description: Scan engine ROM checksum error
- Causes: Control PWB
- Remedy: 1. Turn the main power swtch off and after 5 seconds, then turn power on. 2. Confirm that the EEPROM has been properly installed. 3. Check the control software and upgrade to the latest, if necessary. 4. If not corrected, Replace the control PWB and check for correct operation.