
IF YOU ARE BUILDING FROM SCRATCH, GO THROUGH THIS
You get No module named cv2.cv.
Son, you did all step right, since your sudo make install gave no errors.
However look at this step
$ cd ~/.virtualenvs/cv/lib/python2.7/site-packages/
$ ln -s /usr/local/lib/python2.7/site-packages/cv2.so cv2.so
THE VERY IMPORTANT STEP OF ALL THESE IS TO LINK IT.
ln -s /usr/local/lib/python2.7/site-packages/cv2.so cv2.so
or
ln -s /usr/local/lib/python2.7/dist-packages/cv2.so cv2.so
The moment you choose wise linking, or by brute force just find the cv2.so file if that exist or not
Here I am throwing my output.
    Successfully installed numpy-1.15.3
(cv) demonLover-desktop:~$ cd ~/.virtualenvs/cv/lib/python2.7/site-packages/
(cv) demonLover-desktop:~/.virtualenvs/cv/lib/python2.7/site-packages$ ln -s /usr/local/lib/python2.7/site-packages/cv2.so cv2.so
(cv) demonLover-desktop:~/.virtualenvs/cv/lib/python2.7/site-packages$ pip list
Package    Version
---------- -------
numpy      1.15.3
pip        18.1
setuptools 40.5.0
wheel      0.32.2
(cv) demonLover-desktop:~/.virtualenvs/cv/lib/python2.7/site-packages$ python
Python 2.7.12 (default, Dec  4 2017, 14:50:18)
[GCC 5.4.0 20160609] on linux2
Type "help", "copyright", "credits" or "license" for more information.
>>> import cv2
Traceback (most recent call last):
  File "<stdin>", line 1, in <module>
ImportError: No module named cv2
>>>
[2]+  Stopped                 python
(cv) demonLover-desktop:~/.virtualenvs/cv/lib/python2.7/site-packages$ ls /usr/local/lib/python2.7/site-packages/c
ls: cannot access '/usr/local/lib/python2.7/site-packages/c': No such file or directory
(cv) demonLover-desktop:~/.virtualenvs/cv/lib/python2.7/site-packages$ ls /usr/local/lib/python2.7/site-packages/
(cv) demonLover-desktop:~/.virtualenvs/cv/lib/python2.7/site-packages$ deactivate
demonLover-desktop:~/.virtualenvs/cv/lib/python2.7/site-packages$ ls /usr/local/lib/python2.7/site-packages/
demonLover-desktop:~/.virtualenvs/cv/lib/python2.7/site-packages$ ls
cv2.so  easy_install.py  easy_install.pyc  numpy  numpy-1.15.3.dist-info  pip  pip-18.1.dist-info  pkg_resources  setuptools  setuptools-40.5.0.dist-info  wheel  wheel-0.32.2.dist-info
demonLover-desktop:~/.virtualenvs/cv/lib/python2.7/site-packages$ ls /usr/local/lib/python2.7/site-packages/
demonLover-desktop:~/.virtualenvs/cv/lib/python2.7/site-packages$ ls -l  /usr/local/lib/python2.7/site-packages/
total 0
demonLover-desktop:~/.virtualenvs/cv/lib/python2.7/site-packages$ ls
cv2.so  easy_install.py  easy_install.pyc  numpy  numpy-1.15.3.dist-info  pip  pip-18.1.dist-info  pkg_resources  setuptools  setuptools-40.5.0.dist-info  wheel  wheel-0.32.2.dist-info
demonLover-desktop:~/.virtualenvs/cv/lib/python2.7/site-packages$ workon cv
(cv) demonLover-desktop:~/.virtualenvs/cv/lib/python2.7/site-packages$ python
Python 2.7.12 (default, Dec  4 2017, 14:50:18)
[GCC 5.4.0 20160609] on linux2
Type "help", "copyright", "credits" or "license" for more information.
>>> import cv2
Traceback (most recent call last):
  File "<stdin>", line 1, in <module>
ImportError: No module named cv2
>>>
[3]+  Stopped                 python
(cv) demonLover-desktop:~/.virtualenvs/cv/lib/python2.7/site-packages$ find / -name "cv2.so"
find: ‘/lost+found’: Permission denied
find: ‘/run/udisks2’: Permission denied
find: ‘/run/docker’: Permission denied
find: ‘/run/exim4’: Permission denied
find: ‘/run/lightdm’: Permission denied
find: ‘/run/cups/certs’: Permission denied
find: ‘/run/sudo’: Permission denied
find: ‘/run/samba/ncalrpc/np’: Permission denied
find: ‘/run/postgresql/9.5-main.pg_stat_tmp’: Permission denied
find: ‘/run/postgresql/10-main.pg_stat_tmp’: Permission denied
find: ‘/run/lvm’: Permission denied
find: ‘/run/systemd/inaccessible’: Permission denied
find: ‘/run/lock/lvm’: Permission denied
find: ‘/root’: Permission denied
^C
(cv) demonLover-desktop:~/.virtualenvs/cv/lib/python2.7/site-packages$ sudofind / -name "cv2.so"
sudofind: command not found
(cv) demonLover-desktop:~/.virtualenvs/cv/lib/python2.7/site-packages$ ^C
(cv) demonLover-desktop:~/.virtualenvs/cv/lib/python2.7/site-packages$ sudo find / -name "cv2.so"
[sudo] password for app:
find: ‘/run/user/1000/gvfs’: Permission denied
^C
(cv) demonLover-desktop:~/.virtualenvs/cv/lib/python2.7/site-packages$ sudo find /usr/ -name "cv2.so"
/usr/local/lib/python2.7/dist-packages/cv2.so
^C
(cv) demonLover-desktop:~/.virtualenvs/cv/lib/python2.7/site-packages$ ln -s /usr/local/lib/python2.7/dist-packages/ccv2.so cv2.so
click/                        clonevirtualenv.pyc           configparser-3.5.0.dist-info/ configparser.py               cv2.so                        cycler.py
clonevirtualenv.py            concurrent/                   configparser-3.5.0-nspkg.pth  configparser.pyc              cycler-0.10.0.dist-info/      cycler.pyc
(cv) demonLover-desktop:~/.virtualenvs/cv/lib/python2.7/site-packages$ ln -s /usr/local/lib/python2.7/dist-packages/cv2.so cv2.so
ln: failed to create symbolic link 'cv2.so': File exists
(cv) demonLover-desktop:~/.virtualenvs/cv/lib/python2.7/site-packages$ rm cv2.so
(cv) demonLover-desktop:~/.virtualenvs/cv/lib/python2.7/site-packages$ ln -s /usr/local/lib/python2.7/dist-packages/cv2.so cv2.so
(cv) demonLover-desktop:~/.virtualenvs/cv/lib/python2.7/site-packages$ ls
cv2.so  easy_install.py  easy_install.pyc  numpy  numpy-1.15.3.dist-info  pip  pip-18.1.dist-info  pkg_resources  setuptools  setuptools-40.5.0.dist-info  wheel  wheel-0.32.2.dist-info
(cv) demonLover-desktop:~/.virtualenvs/cv/lib/python2.7/site-packages$ python
Python 2.7.12 (default, Dec  4 2017, 14:50:18)
[GCC 5.4.0 20160609] on linux2
Type "help", "copyright", "credits" or "license" for more information.
>>> import cv2
>>>
My step will only help, if your built is done right.
Время на прочтение
2 мин
Количество просмотров 7.2K

В заголовке известная ошибка python3.
Интерпретатор python2 импортирует opencv без ошибок при установке совместно с python3 в единой среде исполнения.
Краткая инструкция по локализации ошибки далее.
Среда исполнения
Дистрибутив линукс с длинным циклом поддержки.
Установлены все стабильные обновления.
Все пакеты развёрнуты системным менеджером ( apt ) или сборкой в среде исполнения из исходных текстов штатными средствами.
Установлены штатным способом два интерпретатора: python-2.7 и python-3.5.
Пакетов со стороны, пакетов собранных вне среды исполнения, нарушенных зависимостей, конфликтов версий нет.
Признаки ошибки
Ошибка возникает на этапе загрузки библиотеки opencv в интерпретаторе python‑3.5.

Причина ошибки
Причина ошибки — разные файловые структуры у python‑2.7 и python‑3.5; отличие системы индексов версий в именовании каталогов и файлов.
В одном случае, python‑2.7, один индекс версии — 2.7.
В другом случае, python‑3.5, три индекса версии — 3, 3.5 и 3.5m.
Конфигуратор сборки opencv устанавливает файловые пути python3 подобно python2.
Сборка и установка модулей opencv для python3 производится с ошибками файловой структуры.
Локализация ошибки
Ошибка исправляется через уточнение связанных параметров cmake с последующей установкой opencv из исходных текстов.
CMAKE_BUILD_TYPE:STRING=Release

OPENCV_FORCE_PYTHON_LIBS:BOOL=ON
OPENCV_PYTHON3_VERSION:BOOL=ON

PYTHON2_EXECUTABLE:FILEPATH=/usr/bin/python2.7
PYTHON2_INCLUDE_DIR:PATH=/usr/include/python2.7
PYTHON2_INCLUDE_DIR2:PATH=/usr/include/x86_64-linux-gnu/python2.7
PYTHON2_LIBRARY:FILEPATH=/usr/lib/x86_64-linux-gnu/libpython2.7.so
PYTHON2_LIBRARY_DEBUG:FILEPATH=
PYTHON2_NUMPY_INCLUDE_DIRS:PATH=/usr/lib/python2.7/dist-packages/numpy/core/include
PYTHON2_PACKAGES_PATH:PATH=/usr/lib/python2.7/dist-packages

PYTHON3_EXECUTABLE:FILEPATH=/usr/bin/python3
PYTHON3_INCLUDE_DIR:PATH=/usr/include/python3.5m
PYTHON3_INCLUDE_DIR2:PATH=/usr/include/x86_64-linux-gnu/python3.5m
PYTHON3_LIBRARY:FILEPATH=/usr/lib/x86_64-linux-gnu/libpython3.5m.so
PYTHON3_LIBRARY_DEBUG:FILEPATH=
PYTHON3_NUMPY_INCLUDE_DIRS:PATH=/usr/lib/python3/dist-packages/numpy/core/include
PYTHON3_PACKAGES_PATH:PATH=/usr/lib/python3/dist-packages
Заключение
Ошибка локализована параметрами cmake.

Для других сред исполнения и версий python3 уточнять параметры cmake по‑обстоятельствам.
Opencv is a library that is very helpful in image pre or post-processing. If you are a python programmer and you are unable to install OpenCV, then this post is for you. importerror no module named cv2 error occurs when cv2 module is not properly installed or its path is not properly set or configured. The straight-way fix for this error (no module named cv2) is to reinstall this module (OpenCV-python).
In some scenario reinstalling this module automatically remove the older version. But in some scenarios, We need to manually delete the older or incompatible version of cv2 module (OpenCV-python). In this article, We will encounter these ways one by one.
There are so many ways to install this packager. Let’s see them one by one.
Method 1: Using pip package Manager-
1.1 Use the below command to fix this issue.

pip install opencv-python
1.2 In the case of the Python 3. x version, You may use the below command.
pip3 install opencv-pythonIf the above command is not working. There may be a strong possibility that the pip package manager is not updated. So install it.
python -m pip install --upgrade pipMethod 2: Using conda package Manager-
In the above section, we have used the pip package manager. The conda manager is the same as pip. So we can also use conda to install the OpenCV or cv2 module. Here is the way to do so.
conda install opencv 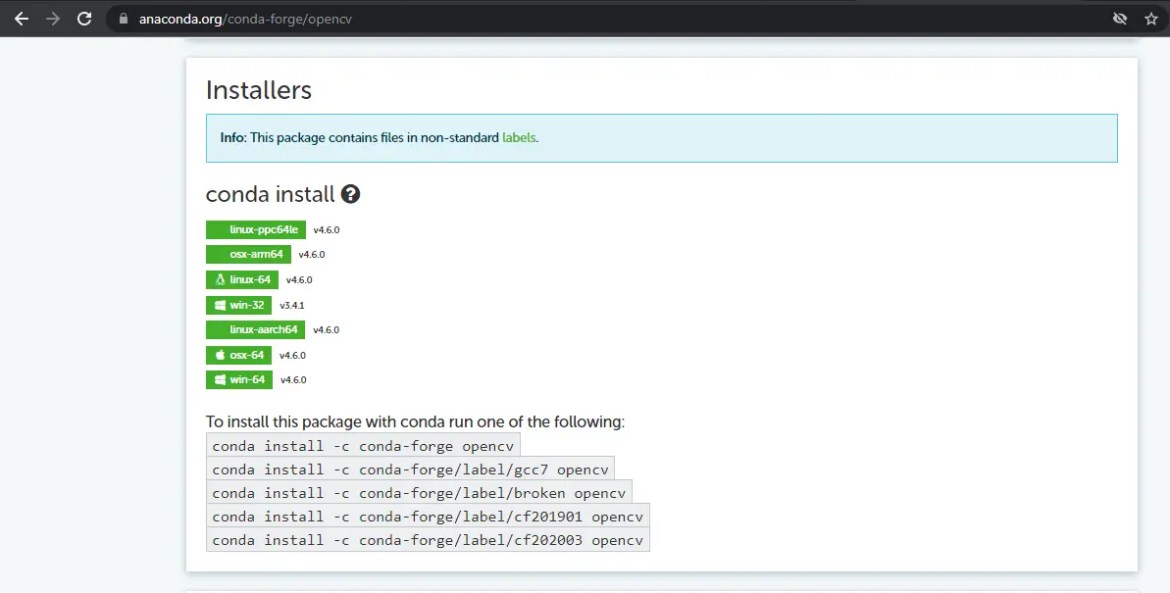
Note –
Well, At the beginning of the article, I have mentioned that reinstalling any module will first uninstall the older version. But you manually do it with the below command also.
pip uninstall opencv-pythonIt will manually uninstall the module.
Conclusion –
“importerror no module named cv2” is a very common error. Also, the import errors whether for cv2 or any other module have the same solution. Sometimes you get this error when you wrongly type the import statement. For example, instead of writing import cv2 , you write import cv . This leads to an import error when you run the code. I hope once you read this article, You may easily fix this error. Still, If you think, You are stuck. Please contact us or comment below in the comment box. We will surely assist with this. We have this very informative article on Generic ways to fix importerrors –
Easiest way to Fix importerror in python ( All in One )
It will clear the complete concept of solutioning Importerror in-depth like an expert. So Please go throw it.
No Module Named cv2 ( Other Specifications ) –
We have already provided the generic solution for the No Module Named cv2 error. Since this error can be produced in a different environment like Linux, Mac, Windows, etc. On the other hand, the same error No Module Named cv2 can be produced in any of the IDE like jupyter, Pycharm, Spyder, or with any package bundle like Anaconda. But the solution in most cases will be common irrespective of OS, Platform, IDE, etc.
Similar Errors :
1. Importerror attempted relative import with no known parent package
2. Importerror: no module named requests – Lets Fix step by step
3. ImportError: numpy.core.multiarray failed to import [cv2, matplotlib, PyTorch, pyinstaller ]
4.importerror: cannot import name registermattype from cv2.cv2 (Fix It)
Thanks
Data Science Learner Team

Join our list
Subscribe to our mailing list and get interesting stuff and updates to your email inbox.
We respect your privacy and take protecting it seriously
Thank you for signup. A Confirmation Email has been sent to your Email Address.
Something went wrong.
Although you’ll find a lot of tutorials that help you install opencv and ffmpeg (both go hand in hand almost always) out there, I will post what worked for me here.
Steps for installing ffmpeg correctly
- Download the latest static version of ffmpeg from the download page depending on your os.
- Extract the installed zip file using 7-zip. The folder will be named something like «ffmpeg-20130731-git-69fe25c-win32-static».
- Create a new folder named
ffmpegin yourC:and copy the contents of the extracted folder into this new one. - Now click the start button, right-click on computer. Select Properties from the right-click menu. In the System window, click on the “Advanced system settings” link.
- Click the Environmental Variables button in the System Properties window. It will be located at the bottom of the window.
- Select the PATH entry in the «User variables» section. Click the Edit button.
In the “Variable value” field, enter;c:ffmpegbinafter anything that’s already written there. If you copied it to a different drive, change the drive letter.
Click OK to save your changes.
If there is no PATH entry in the «User variables» setting, click the New button and create one. Enter PATH for the variable name.
This method will enable FFmpeg for the current user. Other Windows users will not be able to run it from the command line. To enable it for everyone, enter;c:ffmpegbinin the PATH entry in «System variables». Be very careful not to delete anything that is already in this variable. - Open the command prompt. Enter the command
ffmpeg –version. If the command prompt returns the version information for FFmpeg, then the installation was successful, and FFmpeg can be accessed from any folder in the command prompt.
If you receive alibstdc++ -6 is missingerror, you may need to install the Microsoft Visual C++ Redistributable Package, which is available for free from Microsoft.
I followed these steps from a site I don’t remember but this worked just as fine.
Now to install opencv and get it working, I followed the following steps:
- Download the self-extracting executable from the OpenCV website.
- Run the Executable which will in turn extract the executable.
- Create a folder in
C:calledopencv - Copy the contents of the extracted files into
opencv - Edit your PATH environment variable. This will be dependent on the version you want installed (i.e. 32 or 64 bit) and also the version of visual studio you have installed (express editions are fine).
—-Installing OpenCV Python
I use Anaconda. So, I copied the cv2.pyd file from this OpenCV directory (the beginning part might be slightly different on your machine):
Python 2.7 and 32-bit machine:
C:opencvbuildpython2.7x84
Python 2.7 and 64-bit machine:
C:opencvbuildpython2.7x64
To this Anaconda directory (the beginning part might be slightly different on your machine):
C:UsersxxxAnacondaLibsite-packages
OpenCV also requires that numpy be installed as well. matplolib is also recommended to be installed.
You’ll also have to locate the two .dll files in the bin folder of your opencv folder. And copy and paste them into the ffmpeg/bin folder as well as into the site-packages folder in your Anaconda folder. When I installed opencv, I didn’t have the bin folder installed (weird, I know). So, I copied my friend’s .dll files and renamed them to the version of opencv that I was using and it worked!
After installing both OpenCV and ffmpeg you’ll need to restart your computer to add the paths to the system path.
Hope this helps! For a lot of people, most of the steps above were not necessary. But for me, this worked! I use Windows 10, Opencv 3.0, Python 2.7!
Hello stackoverflow community 
I need some help. I’ve written a simple program from the python website and when I run the program, it says :
ImportError: No module named cv2
import cv2
import numpy as np

#read image into matrix.
m =  cv2.imread("python.png")

#get image properties.
w,h,bpp = np.shape(m)

#print image properties.
print "width: " + str(w)
print "height: " + str(h)
print "bpp: " + str(bpp)
I already tried to install openCV but it seems that I didn’t install properly, this is the tutorial I followed to install it. When I tried to installed the dependencies it said:
E:Package 'libtbb-dev' has no installation candidate
E: unable to locate package libfaac-dev
I ignored that package and procced to the next step (download the openCV 2.4.9).
When I tried to generated the Makefile using cmake I got the next warnings
Could not find a package configuration file provided by  "Qt5Core" with any of the following names:
    Qt5CoreConfig.cmake
    qt5core-config.cmake

    Add the installation prefix of "Qt5Core" to CMAKE_PREFIX_PATH or set "Qt5Core_DIR" to a directory containing one of the above files. If "Qt5Core" provides a separate development package or SDK, be sure it has been installed.
    Call Stack (most recent call first)
    CMakeLists.txt:466 (include)
The same happens with the next packages:
- Qt5GuiConfig.cmake
- qt5gui-config.cmake
- Qt5WidgetsConfig.cmake
- qt5widgets-config.cmake
- Qt5TestConfig.cmake
- qt5test-config.cmake
- Qt5ConcurrentConfig.cmake
- qt5concurrent-config.cmake
and at the end this Error shows up:
CMake Error at /usr/share/cmake-2.8/Modules/FindPackageHandleStandardArgs.cmake:97 (MESSAGE):
  Could NOT find Qt4 (missing: QT_QMAKE_EXECUTABLE QT_MOC_EXECUTABLE
  QT_RCC_EXECUTABLE QT_INCLUDE_DIR QT_LIBRARY_DIR QT_QTCORE_INCLUDE_DIR
  QT_QTCORE_LIBRARY QT_QTGUI_INCLUDE_DIR QT_QTGUI_LIBRARY
  QT_QTTEST_INCLUDE_DIR QT_QTTEST_LIBRARY QT_UIC_EXECUTABLE)
Call Stack (most recent call first):
  /usr/share/cmake-2.8/Modules/FindPackageHandleStandardArgs.cmake:288 (_FPHSA_FAILURE_MESSAGE)
  /usr/share/cmake-2.8/Modules/FindQt4.cmake:1200 (FIND_PACKAGE_HANDLE_STANDARD_ARGS)
  cmake/OpenCVFindLibsGUI.cmake:34 (find_package)
  CMakeLists.txt:466 (include)
I’ve searched all the file system but couldn’t find the above files. I also read that If anything goes wrong, I have to go back, correct the errors by maybe installing extra packages and then run cmake again. BUT, how do I install those extra packages?
I ran the next commands and all the libraries are installed and updated to the newest version.
sudo apt-get update
sudo apt-get updgrade
sudo apt-get install libopencv-dev
sudo apt-get install python-opencv
Can someone please help me get a usable install of OpenCV as simply as possible. I would really appreciate it. I’m stuck in this project.
PS. I also couldn’t find a cv2.so file I searched everywhere… I used the next command:
sudo find/name "cv2*"
Thank you.