

Description
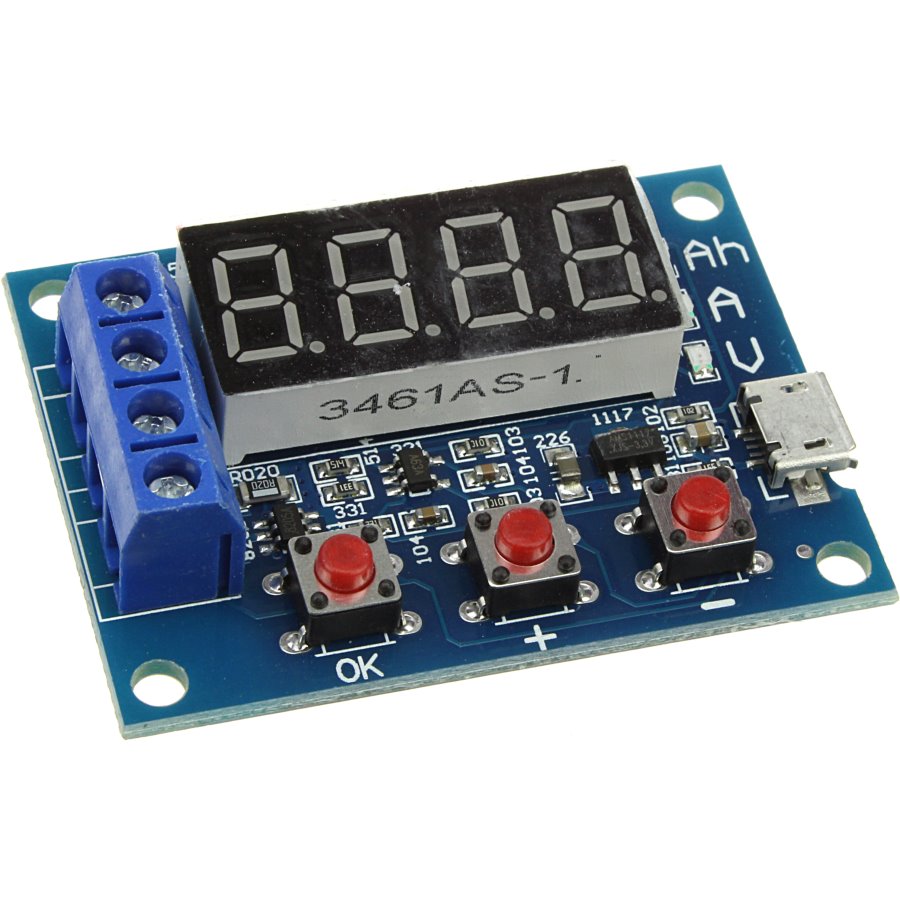
This is a simple, cheap, standalone battery capacity tester from Ebay (around $5). It connects to the battery and a load resistor, and draws power from a microUSB connector (no communications to the computer, just power). It draws power from the battery until a predetermined discharge termination voltage is reached, whence it displays the integrated Ampere-hours (Ah) of battery capacity (it’s a pity that Ah is the accepted unit rather than Volt-Ampere-seconds, a.k.a Joules). The Ebay description is hard to understand, so I edited it into more conventional English. All errors therefore are mine—I am uncertain about the details in the calibration section, for instance.
- External load resistor (7.5 Ω)
- Power supply voltage: DC4.5-6V (micro USB interface)
- Working current: less than 70mA
- Measured battery voltage: 1.00V-15.00V, resolution 0.01V
- Automatically selected termination voltage, depending on the initial charged cell voltage (range: 0.5-11.0V)
- Maximum current 3A, resolution 0.001A
- The maximum measurement error voltage: 1% +- 0.03V
- The maximum measurement error of current: 2% +- 0.010A
- The maximum battery capacity range: 0.001Ah..9999Ah (values lower than 10Ah are displayed as X.XXX; values between 10Ah and 99.99Ah are displayed as XX.XX, and so on).
- Board size: 50mm long by 36mm wide, by 17mm high, including standoffs
Note: in order to improve the voltage measurement accuracy, the circuit applies a DC bias. The display may show a small residual value, which does not affect the actual measurement.
Usage instructions
-
Measured battery should be fully charged.
-
Connect to the tested battery observing the polarity (+ terminal on the PCB to positive battery terminal). Reversing The Polarity May Damage The Circuit! Connect the operating power to the tester via the micro USB cable. The display should indicate the battery voltage.
-
Start test by pressing the «OK» button. The tester will automatically set suitable termination voltage, according to the battery full charge voltage, and flash it 3 times upon starting the test.
- The termination voltage chan be changed in 0.1V increments after starting the test, by pressing the «+» or «-» keys. The termination voltage is displayed with a leading P character.
-
During testing, the electronic switch connects the load resistor, and the testing data are displayed in sequence, as shown by the LED indicator:
- the integrated capacity (Ah),
- instantaneous discharge current (A)
- current battery voltage (V)
-
When the battery voltage reaches the termination voltage, the tester cuts off the load control switch, and displays the capacity (Ah) and rapidly blinks the corresponding LED indicator. Press «OK» to terminate flashing. Pressing the «OK» button again returns to power on state, so that another battery can be connected and tested.
The error codes
Err1:
the battery voltage higher than 15V
Err2:
the battery voltage is lower than the setting voltage termination
Err3:
the battery is unable to withstand the load discharge current (either the internal battery resistance or connector/cable resistance is too large)
Err4:
the current is too large (current is more than 3.1A)
Calibration
Apply USB power and simultaneously press all three buttons to enter the calibration mode and perform the following steps
- The first calibration step after entering the calibration displays the 0u0A; short connect both positive and negative input terminal and press the «OK» button
- Next, the display will show J10u; apply 10.00V DC between the input positive and negative terminal and press the «OK» button again.
- The display will show J2.0A; apply 2.0 A DC current between the input terminals and press the «OK» button to complete the calibration.
If the tester determines that the calibration data is reliable, it will in turn show 4 calibration numbers after completing the procedure; otherwise it will ignore the calibration attempt, discard the data and exit the procedure.
Shipped contents:
- 2x 5W 7.5ohm Resistance
- 1x Battery Capacity Tester Board ( USB cable is NOT provided )
ZB2L3 модуль определения емкости аккумуляторов. Позволяет проверить емкость аккумуляторов с напряжением от 1.1 до 12 вольт.
Коды ошибок и их значения:
- Err1: напряжение аккумулятора выше 15 В
- Err2: напряжение батареи ниже, чем напряжение завершения (отсечки)
- Err3: аккумулятор нельзя нагрузить или разрядить из-за слишком большого сопротивления
- Err4: перегрузка по току (ток превышает 3,1 А)
Характеристики:
- Напряжение питания: 4.5-6В (разъем microUSB)
- Ток потребления: не более 70 мА, в «холостом» режиме 20 мА
- Измеряемое напряжение: 1.00-15.00 В с шагом 0.01 В
- Напряжение отсечки: 0.5-11.0 В
- Измерение тока: Максимум 3.000 A, шаг 0.001 A
- Погрешность измерения напряжения: 1% ± 0.02 В
- Погрешность измерения тока: 1.2% ± 0.002A
- Максимальное измерение емкости: 9999 Aч (1 Aч = 1000 мАч). По мере роста значение смещается запятая.
- Размер платы: 50 X 37 X17 мм
- Вес: плата 28 грамма, два 5 Вт керамических резистора 9 грамм, 50 Вт резистор около 27 грамм.
клеммы IN+ IN- используются для подключения тестируемого аккумулятора
клеммы R R используются для подключения нагрузки
Кнопки «+» «-» задают напряжение отсечки аккумулятора
Номер товара: 43844
Доставка по РФ от 3 дней и от 150 ₽
Хочу, чтобы менеджер оформил мой заказ:
Нажимая на кнопку «Позвоните мне!», я даю согласие на обработку персональных данных.
- Описание товара
- Характеристики
- Отзывы
- Наличие в магазинах г.Омска
Описание товара
В комплекте поставляются два нагрузочных резистора, имеющих сопротивление 7,5 Ом (5 Вт). Для питания схемы и индикаторов используется отдельный вход 5 В (Micro USB). Энергия аккумулятора рассеивается только на нагрузочном резисторе. Энергопотребление схемы на точность показаний не влияет. Работой тестера управляет микроконтроллер, установленный под 4-значным 7-сегментным светодиодным дисплеем.
Для подключения тестируемого аккумулятора используются клеммы IN+ IN-.
Для подключения нагрузки (резисторов) используются клеммы R R.
Кнопками плюс и минус задаётся напряжение отсечки аккумулятора.
Коды ошибок тестера ZB2L3:
Err1: Напряжение аккумулятора выше 15 В
Err2: Напряжение батареи ниже напряжения отсечки
Err3: Большое сопротивление соединительных проводов
Err4: Перегрузка по току (ток превышает 3,1 А)
Характеристики тестера аккумуляторных батарей ZB2L3:
Напряжение питания: DC 5V (Micro USB)
Рабочий ток: менее 70 мА
Напряжение разряда: 1.00V-15.00V (разрешение 0.01V)
Напряжение отсечки: 0,5-11,0 В
Погрешность измерения напряжения не более: 1% + 0,02 В
Погрешность измерения тока не более: 1,5% ± 0,008A
Максимально измеряемая ёмкость батареи: 9999Ah
Размер печатной платы: 50 * 36 мм
Размер изделия: 50 * 36 * 17 мм
Вес: 18 г
Характеристики
| Артикул | 43844 |
| Производитель | Shengzhu |
| Тип элемента | Радиоконструкторы и модули |
| Вес без упаковки | 18 гр |
| Вес с упаковкой до | 100 гр |
| Габарит высота | 17 мм |
| Габарит длина | 50 мм |
| Габарит ширина | 36 мм |
Отзывы
Наличие в магазинах г.Омска
С этим товаром покупают
Описание
Тестер питания ZB2L3
ZB2L3 Тестер емкости аккумуляторов 1.2-12В
В процессе тестирования аккумуляторов нагрузочное сопротивление сильно нагревается
Спецификация:
Напряжение питания: DC4.5-6В (микро разъем USB)
рабочий ток: менее 70мА
разрядное напряжение: 1.00v-15.00v, разрешение 0.01v
поддерживается ток: максимальный 3.000 А, разрешение 0.001 А
Максимальная погрешность измерения напряжения: 1% + 0.02
Максимальный погрешность измерения тока: 1.5% ± 0.008a
Максимальный диапазон емкости батареи: 9999 АН (1AН = 1000mAh).
БОльшее значение включается путем сдвига десятичной точки. Когда оно меньше чем 10Ah — будет отображать x.xxx до 10Ah, если больше 10Ah — будет отображать xx.xx, и так далее.
размер платы: 50 х 37мм
Как использовать:
1. Перед тестированием аккумулятор должен быть полностью заряжен.
2. Подключить аккумулятор плюсовой выход к положительному входу, минусовой выход к отрицательному входу, при переполюсовке подключения плата выходит из строя.
3. Для запуска тестирования нужно нажать на кнопку «OK», индикатор тестера начнет мигать. Теперь можно задать конечное напряжение разряда аккумулятора кнопками «+» или «-» с шагом 0,01В, после настройки нажимаем еще раз на кнопку «OK», чтобы начать тестирование.
4. После начала теста, тестер включит нагрузку управления электронного коммутатора, тестовые данные будут попеременно показывать емкость(ах), текущий ток разряда (а) и напряжение аккумулятора (v). Когда напряжение аккумулятора достигает напряжения завершения установки, управление нагрузкой выключает тестер, индикатор быстро мигает, и на дисплее отображается фактическая емкость аккумулятора.
Коды ошибок и их значения:
Err1: Напряжение аккумулятора выше 15В
ERR2: Напряжение аккумулятора ниже, чем установленное пороговое напряжение разряда
ERR3: Большое сопротивление нагрузки, слишком маленький ток
Err4: Перегрузка по току (ток превышает 3.1A)
Description
This is a simple, cheap, standalone battery capacity tester from Ebay (around $5). It connects to the battery and a load resistor, and draws power from a microUSB connector (no communications to the computer, just power). It draws power from the battery until a predetermined discharge termination voltage is reached, whence it displays the integrated Ampere-hours (Ah) of battery capacity (it’s a pity that Ah is the accepted unit rather than Volt-Ampere-seconds, a.k.a Joules). The Ebay description is hard to understand, so I edited it into more conventional English. All errors therefore are mine—I am uncertain about the details in the calibration section, for instance.
- External load resistor (7.5 Ω)
- Power supply voltage: DC4.5-6V (micro USB interface)
- Working current: less than 70mA
- Measured battery voltage: 1.00V-15.00V, resolution 0.01V
- Automatically selected termination voltage, depending on the initial charged cell voltage (range: 0.5-11.0V)
- Maximum current 3A, resolution 0.001A
- The maximum measurement error voltage: 1% +- 0.03V
- The maximum measurement error of current: 2% +- 0.010A
- The maximum battery capacity range: 0.001Ah..9999Ah (values lower than 10Ah are displayed as X.XXX; values between 10Ah and 99.99Ah are displayed as XX.XX, and so on).
- Board size: 50mm long by 36mm wide, by 17mm high, including standoffs
Note: in order to improve the voltage measurement accuracy, the circuit applies a DC bias. The display may show a small residual value, which does not affect the actual measurement.
Usage instructions
-
Measured battery should be fully charged.
-
Connect to the tested battery observing the polarity (+ terminal on the PCB to positive battery terminal). Reversing The Polarity May Damage The Circuit! Connect the operating power to the tester via the micro USB cable. The display should indicate the battery voltage.
-
Start test by pressing the «OK» button. The tester will automatically set suitable termination voltage, according to the battery full charge voltage, and flash it 3 times upon starting the test.
- The termination voltage chan be changed in 0.1V increments after starting the test, by pressing the «+» or «-» keys. The termination voltage is displayed with a leading P character.
-
During testing, the electronic switch connects the load resistor, and the testing data are displayed in sequence, as shown by the LED indicator:
- the integrated capacity (Ah),
- instantaneous discharge current (A)
- current battery voltage (V)
-
When the battery voltage reaches the termination voltage, the tester cuts off the load control switch, and displays the capacity (Ah) and rapidly blinks the corresponding LED indicator. Press «OK» to terminate flashing. Pressing the «OK» button again returns to power on state, so that another battery can be connected and tested.
The error codes
Err1:
the battery voltage higher than 15V
Err2:
the battery voltage is lower than the setting voltage termination
Err3:
the battery is unable to withstand the load discharge current (either the internal battery resistance or connector/cable resistance is too large)
Err4:
the current is too large (current is more than 3.1A)
Calibration
Apply USB power and simultaneously press all three buttons to enter the calibration mode and perform the following steps
- The first calibration step after entering the calibration displays the 0u0A; short connect both positive and negative input terminal and press the «OK» button
- Next, the display will show J10u; apply 10.00V DC between the input positive and negative terminal and press the «OK» button again.
- The display will show J2.0A; apply 2.0 A DC current between the input terminals and press the «OK» button to complete the calibration.
If the tester determines that the calibration data is reliable, it will in turn show 4 calibration numbers after completing the procedure; otherwise it will ignore the calibration attempt, discard the data and exit the procedure.
Shipped contents:
- 2x 5W 7.5ohm Resistance
- 1x Battery Capacity Tester Board ( USB cable is NOT provided )